

1
Install PrestaShop
Download PrestaShop from the developer versions page and install it on your server following the instructions in the package.
2
Download the PitchPrint module
Get the latest release from github.com/pitchprint/prestashop/releases.
3
Upload the module
Unzip it and upload to your PrestaShop
modules directory. Upload the pitchprint folder itself, not just its contents, so the result looks like this:modules
pitchprint
uploads
pitchprint.php
4
Set upload folder permissions
Set
site/modules/pitchprint/uploads/files to permission 777.777 grants write access to everyone on the server. Work through our security measures before going live.5
Install and configure the module
In your PrestaShop admin click Modules, search for “pitchprint”, click Install, then click Configure.
6
Generate your PitchPrint keys
In a new tab, create an account or log in, then add a domain on the domains page.Enter your intended live domain, not a localhost address. You can still use the keys for local testing. PitchPrint returns an API Key and Secret Key.
7
Enter the keys in PrestaShop
Paste both keys into the PitchPrint configuration boxes and save. Leave the JavaScript and CSS fields empty for now.
8
Assign a design to a product
Go to Catalog → Products and click edit on any product. PitchPrint sits at the bottom of the left menu. Click it, assign one of your designs and save.To create more designs, go to the PitchPrint Designs page.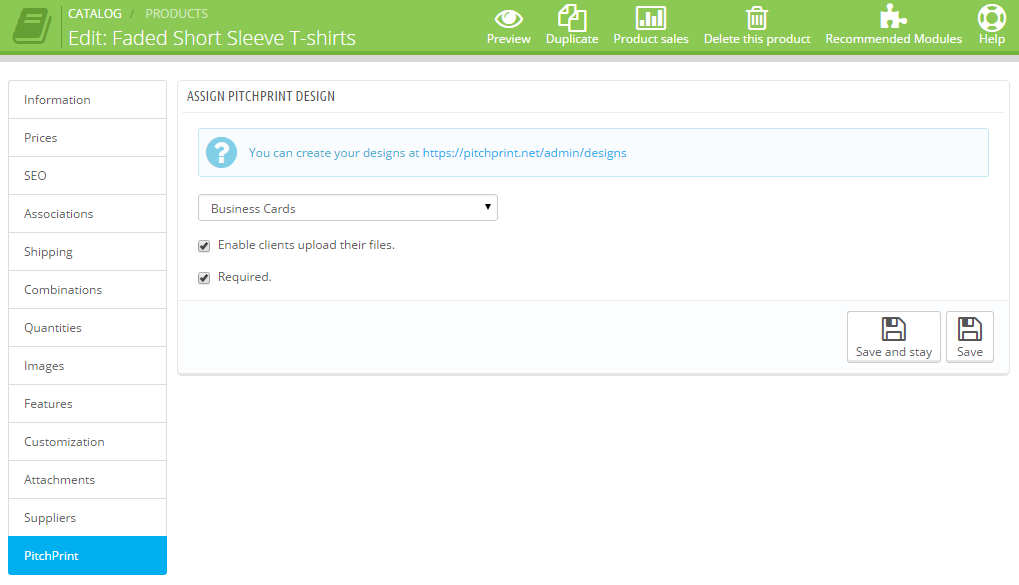
9
Test it on your storefront
Open the product on your store and check for the Customize button.
10
Collect your print files
When an order comes in, the design download links appear against each product in that order.
Related articles
Which shopping cart framework should I pick?
Suggestions to help you choose the right shopping cart platform for your store.
Browser Compatibility
See which browsers PitchPrint supports and the requirements for the app to run.
Getting started with PitchPrint
An overview of PitchPrint’s features, workflows and best practices for new users.