

- OpenCart 3.x
- OpenCart 2.x (legacy)
1
Install OpenCart
Download the latest release from the OpenCart download page and install it following the instructions in the package.
2
Download the PitchPrint ocmod module
Grab the V10 ocmod build from github.com/pitchprint/opencart/releases.
3
Upload the module
In your OpenCart admin go to Extensions → Installer and upload 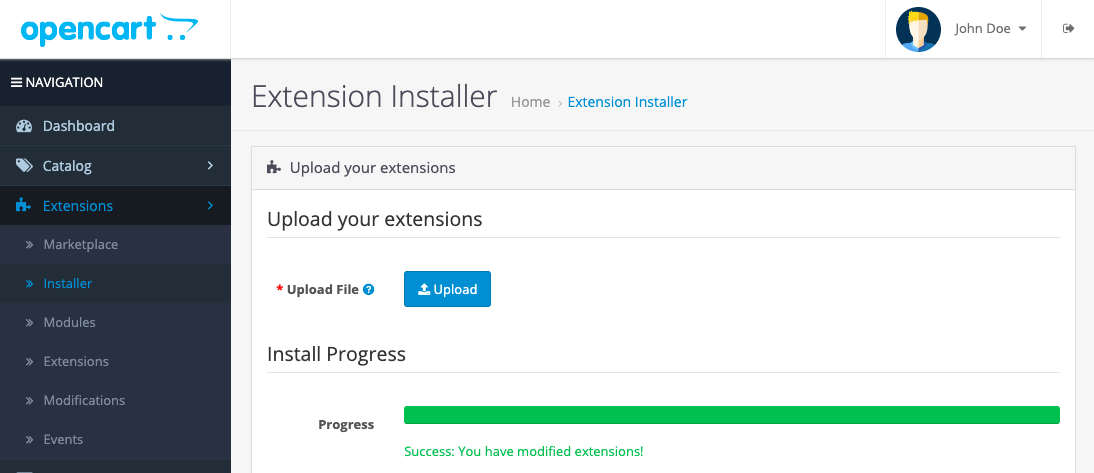
pitchprint.ocmod.zip.4
Refresh modifications
Go to Extensions → Modifications and click the refresh button.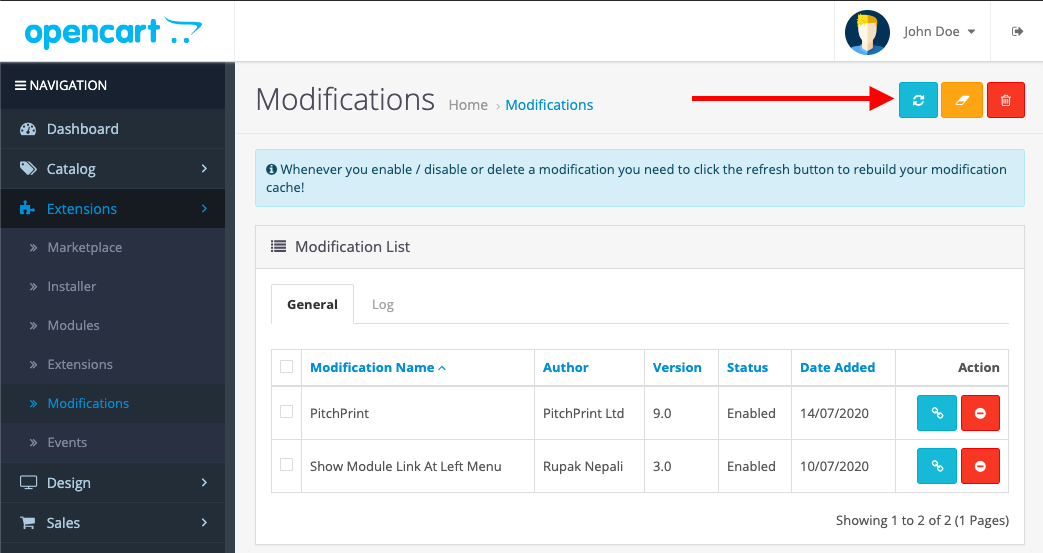
5
Find the module
PitchPrint now appears under Extensions → Modules. Continue with the setup steps below.
Setting up PitchPrint on OpenCart
1
Install and edit the module
Click to install the PitchPrint module, then click to edit it.
2
Generate your PitchPrint keys
Create an account or log in, then add your domain on the domains page.Enter your intended live domain, not a localhost address. You can still use the keys for local testing. PitchPrint returns an API Key and Secret Key.
3
Enter the keys in OpenCart
Paste both keys into the module configuration and save.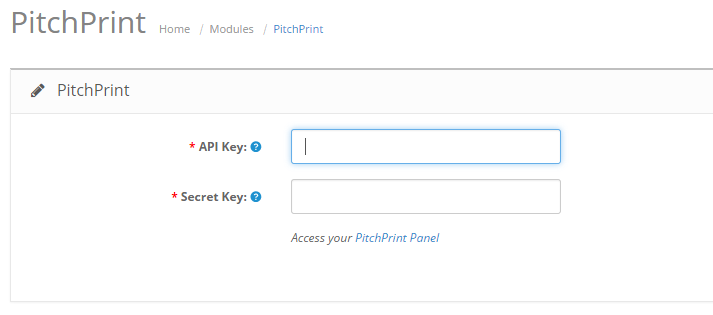
4
Assign a design to a product
Go to Catalog → Products, edit or create a product, and open the Options tab. Type “Web2Print” in the left box, click the Web2Print option to insert it, set Required to Yes and assign a design template.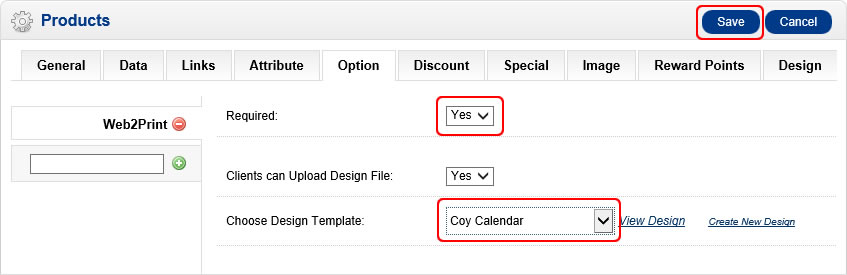
5
Test it on your storefront
Open the product on your store and look for the Customize Now button.
Related articles
Which shopping cart framework should I pick?
Suggestions to help you choose the right shopping cart platform for your store.
Browser Compatibility
See which browsers PitchPrint supports and the requirements for the app to run.
Getting started with PitchPrint
An overview of PitchPrint’s features, workflows and best practices for new users.