

ProjectId in PitchPrint Admin
In an effort to continue with the Ease of Use initiative that our plugin is known for, we’ve added another useful column to the projects tab which displays the ProjectId making it easier for admins to manoeuvre our platform and find ProjectId with ease. Please refer to the image below: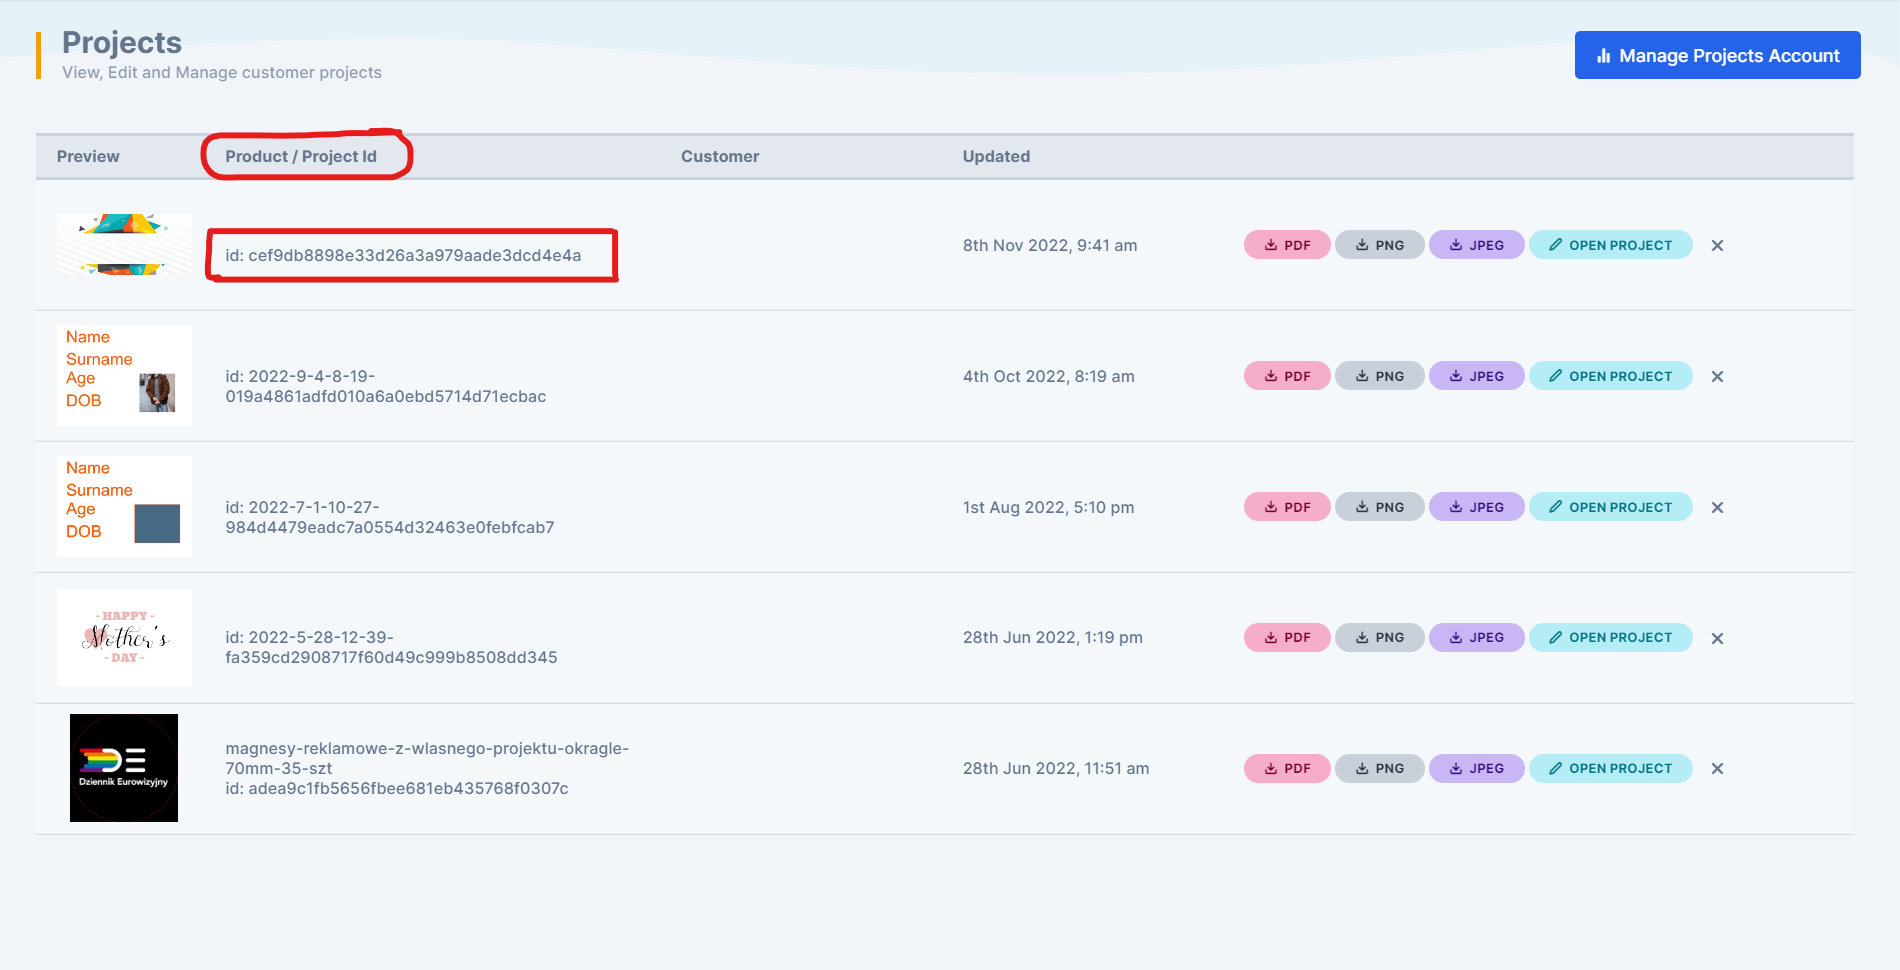
Automatically Zoom Canvas
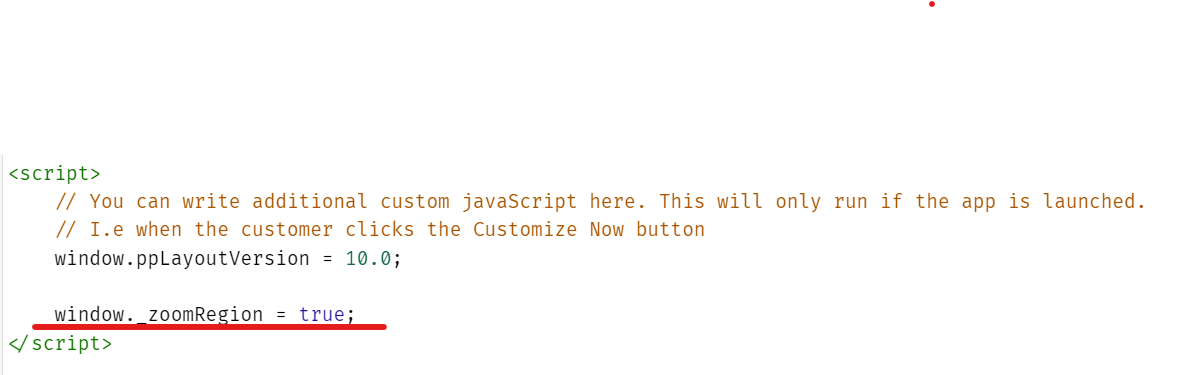
We’ve also added this great new feature which empowers the admins to be able to zoom the canvas automatically with just a few tweaks in the layout section. This feature will aid customers with design templates specifically with small mask areas such as pens, pencils, or any other design with a small canvas area so that the end user can focus on what is key when customizing a product, the design area. Please refer to the instructions below on how to enable this feature:Go to layouts. Add a new layout give the layout a title and then click submit.
Click on the add new layout button
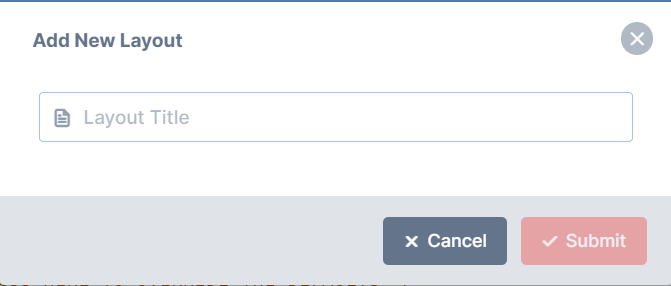
Add your title and submit
Tons of 3D models
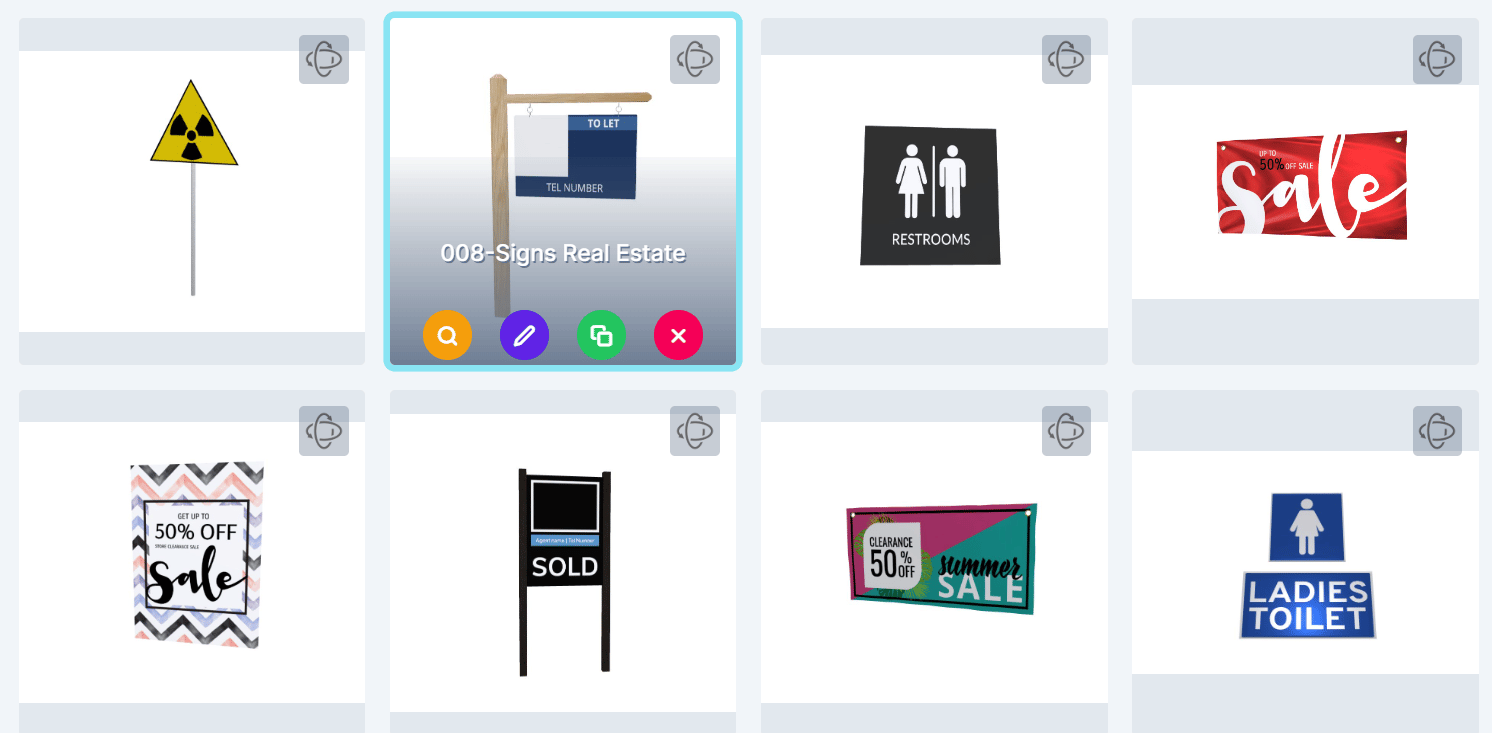
We are still in the process of updating our FREE 3D model studio and we are pleased to inform our PitchPrint Community that we’ve recently added numerous models in all our product categories for our Premium users to make use of at no additional cost.Here are some of the categories we currently offer:Stationary, Beverage, Apparel, Photo Frames, Furniture, Signs, Kitchen Utensils, Packaging, Signs, Banners, Flags, Decor, Canvas, Gazebos & Promotional Items.Please have a look at some of our amazing new 3D models below: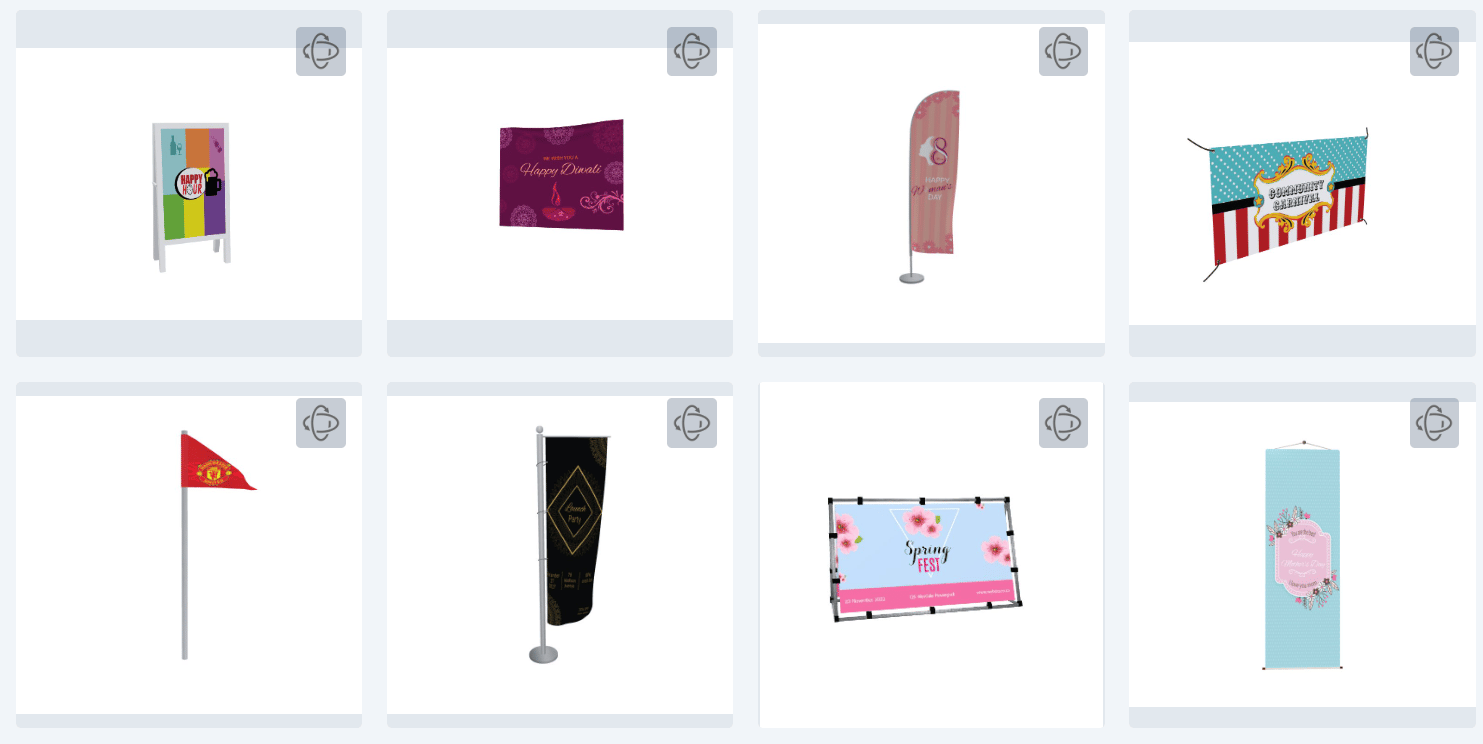
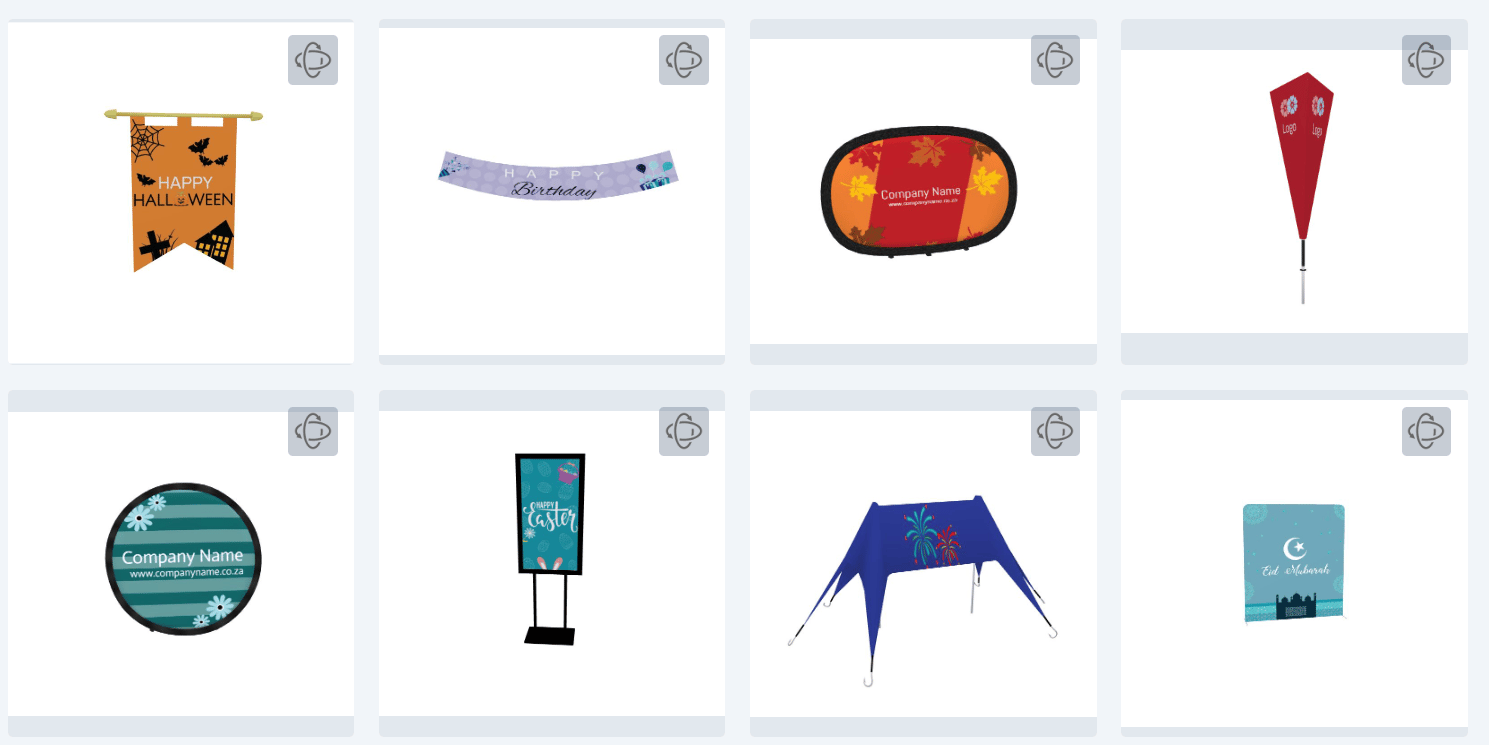
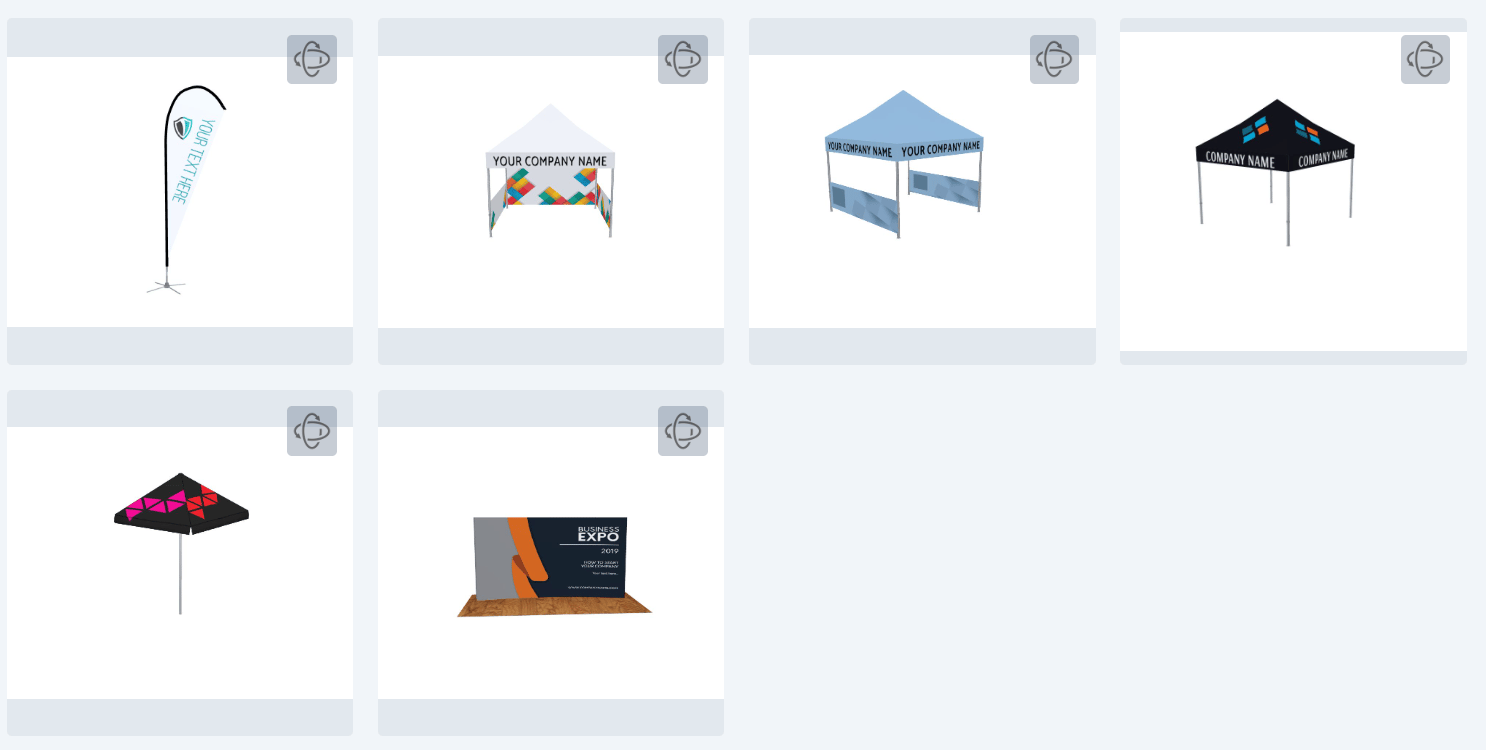
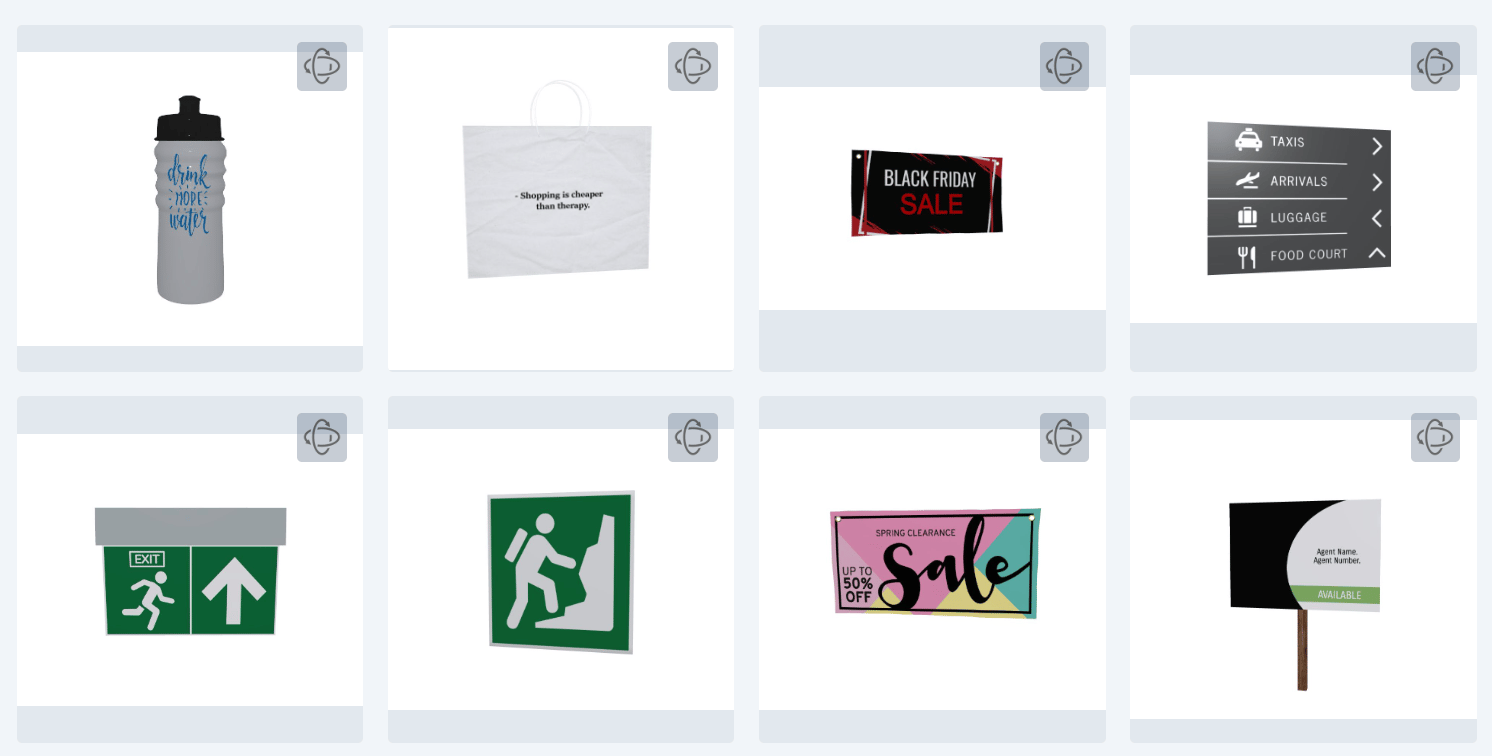
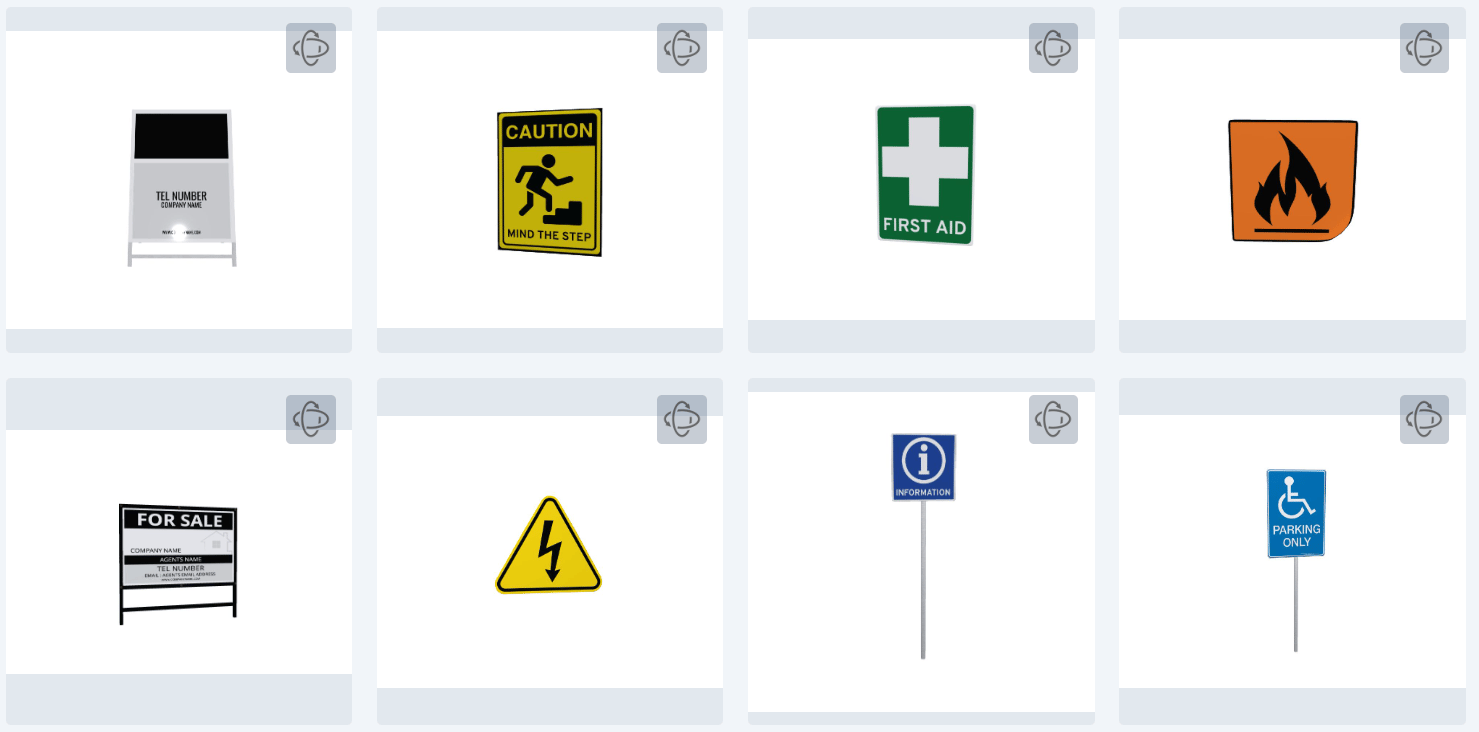
Wordpress cart image update
A few weeks ago we made an update to Wordpress that would allow an admin to hide the preview in the cart if Retain Page Images was enabled on PitchPrint Admin please refer to the image below for reference:
This setting will keep product page images and not use the customers design.
Superscript and Subscript
We’ve added this amazing feature that allows you to convert a text or number element into a superscript or a subscript.Please have a look at the screenshots below for reference: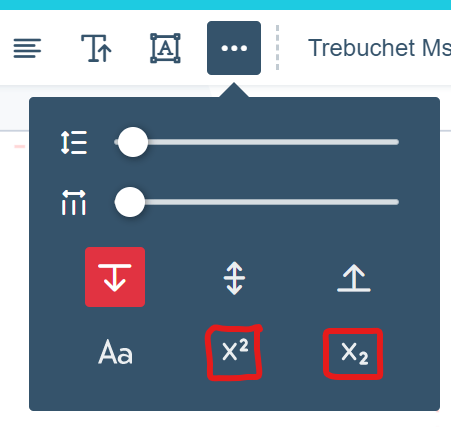


When superscript is applied.

When subscript is applied.
Please be advised that this action cannot be reversed once the change has been applied. If you would like to undo this effect, then you need to remove the item altogether where the change was applied.
Trim as Bleed
This great feature that was only available on one of our earlier versions, version 9. This feature grants the admin the option of using a bleed line as a Trimbox on the PDF file. We have now rolled it out on our latest version 10 and you can activate this feature via the use of tags. Now if a design contains a bleed line, the admin user simply needs to add a tag on the Page section to apply this feature. Please have a look at the steps below to enable this feature:Simply head over to the page section and add the trim_as_bleed tag as shown below: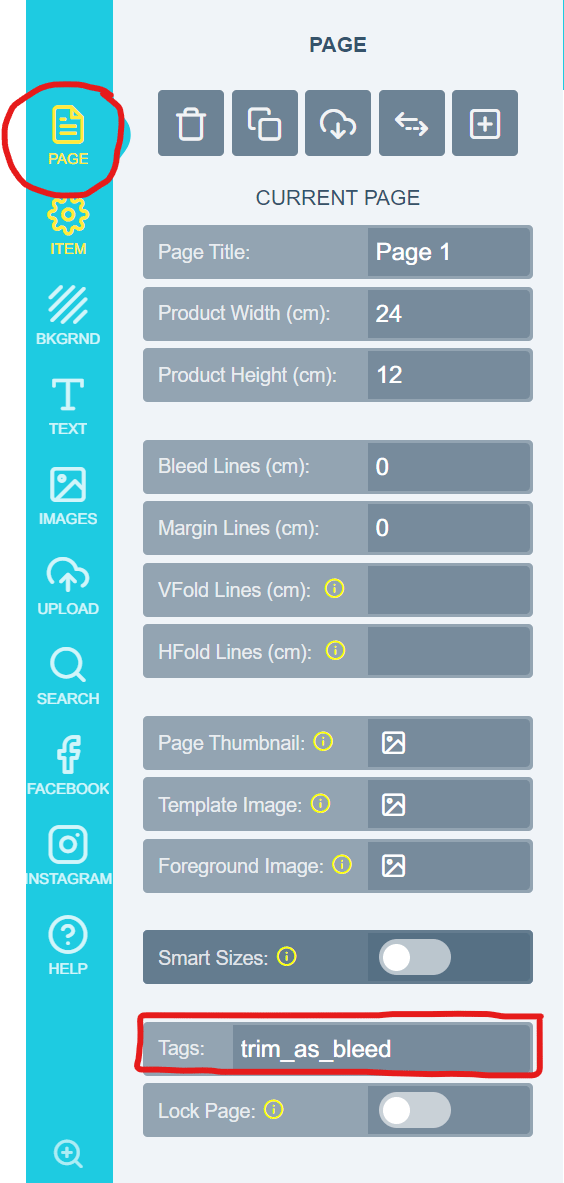
Then add the trim_as_bleed tag as shown in the screenshot.
Bug fixes
Bug fixes
BigCommerce Orders API
The way the Orders API worked was that only 50 orders would be displayed at a time inside the orders section on the PitchPrint admin. If the order did not contain a PitchPrint customized design file, unfortunately it wouldn’t display at all. We have now added pagination so that Admins could see all their orders and scroll through them with ease. We have also fixed the API so that all orders display irrespective whether a customised file is present or not.Product Page PDF download on Wordpress
The product page PDF download on Wordpress was using our old PDF distiller engine. We have updated the system and will now use the link of our new PDF distiller.That’s it for this week, be sure to check out our tutorial videos which covers the entire admin panel, installation guides, modules and tags. You can access all our detailed tutorial videos using this quick link here.ProjectId on BigCommerce Orders
We’ve added the PitchPrint projectId to all BigCommerce orders on PitchPrint admin. This awesome feature will assist the admin user in determining exactly which project belongs to which order. It also comes in handy in circumstances where an order contains more than one project, the admin user will know exactly how to differentiate between the different projects within an order.Retain Cart Image on WordPress
Previously, the cart image on WordPress would automatically update to the customers design. We have now added this amazing feature which allows the admin user the option of choosing not to update the cart image but instead keep the original product page image. Simply delete and reinstall the plugin, clear your cache and the change will be applied accordingly to your site.BigCommerce Cart Preview and Save for Later
And finally, we have added the customized image on BigCommerce. The admin users now have the option of either choosing to utilise the customized design as the product page image or the keep the original product page image. Additionally, we added the Save for Later functionality on BigCommerce which will allow the end users to Save their designs to their respective accounts and be able to edit them at a later stage with ease.Bug fixes
Bug fixes
WIX cart preview
Some of our customers had an issue whereby their cart preview image did not update automatically to the customized design but instead the original product page image would display. We have fixed this issue and the customized image will now be shown if this is the option enabled by the admin user.Design Re-edit on WIX, EKM and Shopify
Lastly, when re-editing a design on Wix, all the resources on that particular account would display instead of only presenting the resources specifically assigned to that particular design. We have also fixed this issue and only resources assigned to a design will be displayed instead of everything.Well that’s it for this week. Please don’t forget to check out our tutorial videos which covers the entire admin panel, integrations on all our supported platforms, editor elements and all the hidden gems our plugin has to offer.What is a tag?
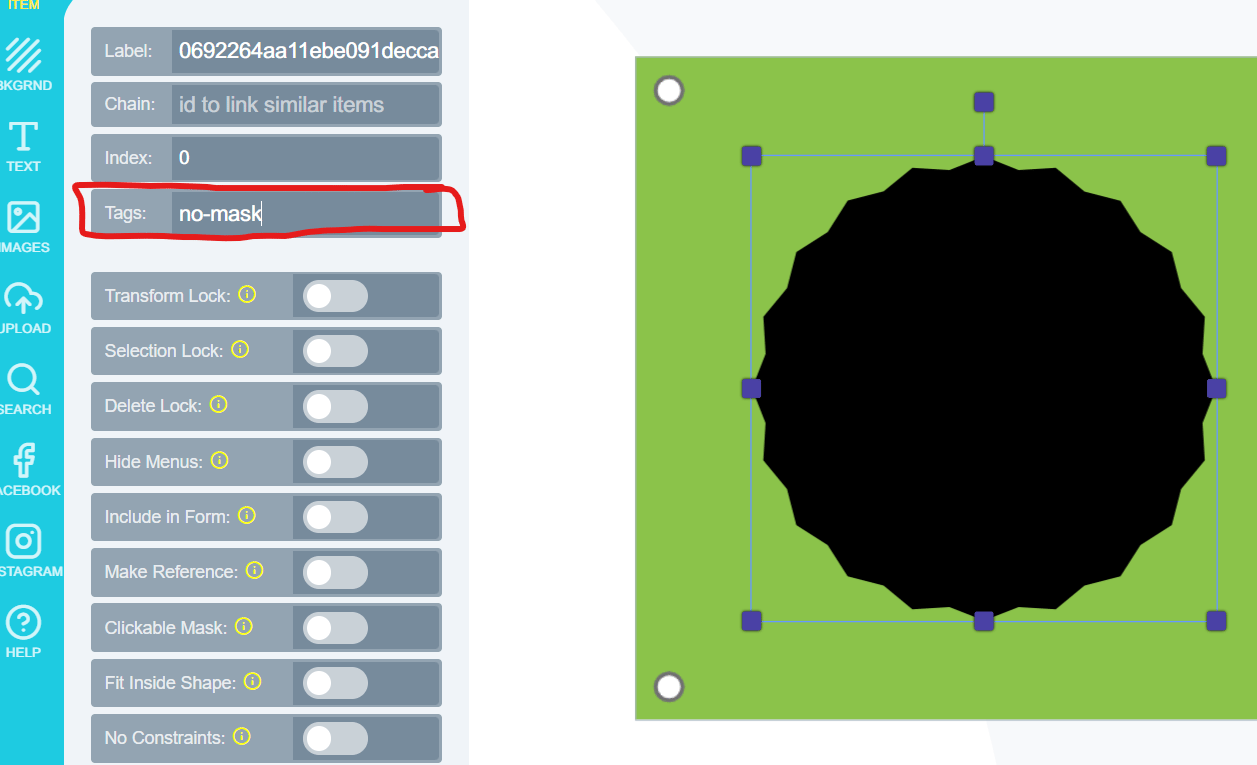
Tags are keywords that are recognized by our system and subsequently implements the feature associated with that tag, on your design. To add a tag, simply provide the tag name and hit enter, then save your design settings. It’s that simple.Let’s quickly go through a list of tags available on PitchPrint and compare the outcome of applying each tag thereafter.Page Clip: A feature that allows you to add any shape to the canvas and set it as a clip to cut area around the shape in the final PDF.To enable page-clip, click on the shape and go to the ITEM menu tab. Add page-clip to the tag section as shown below and enable make reference.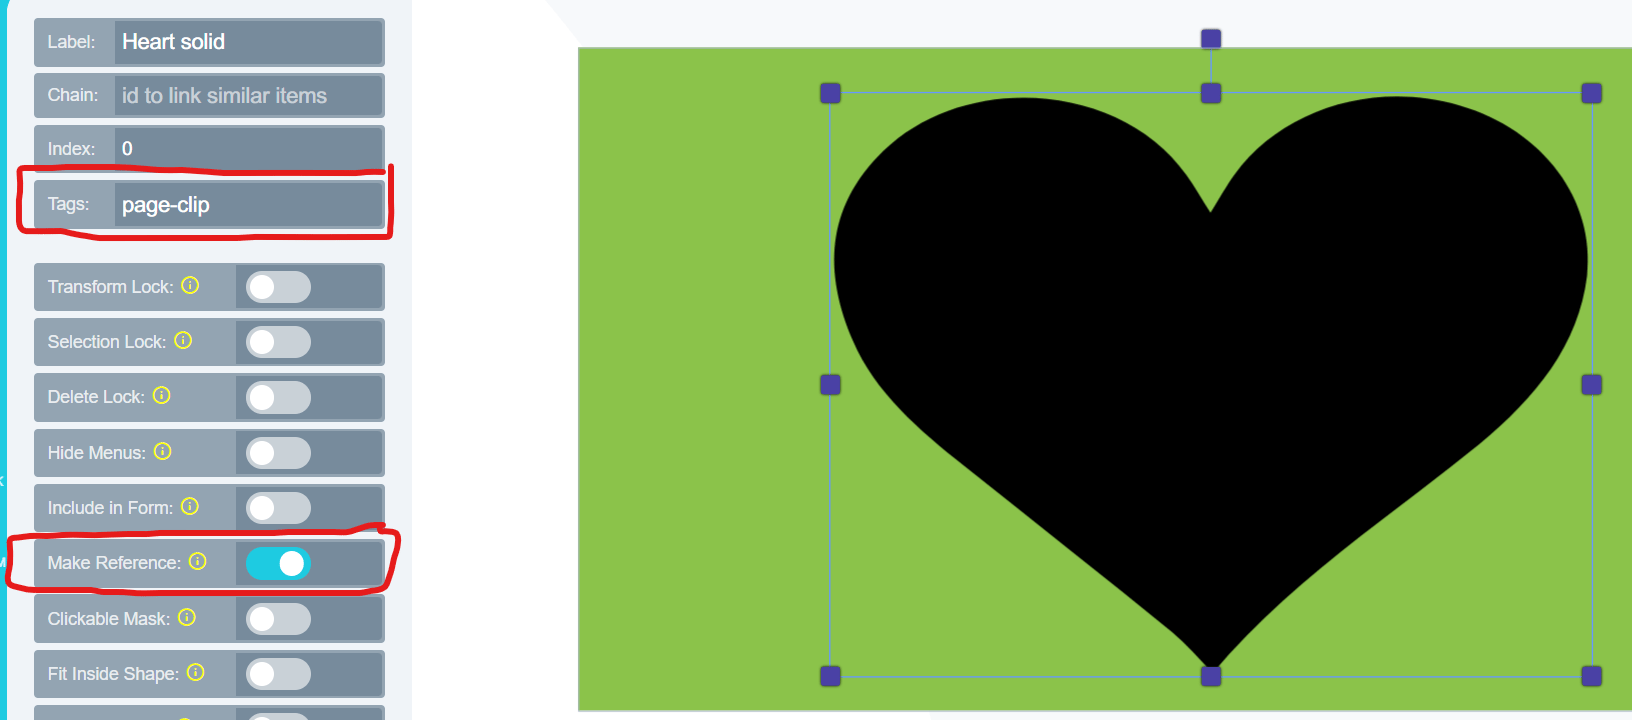

Disable Text anchors
This tag will disable the text anchors when applied to a text field. To enable disable text anchors please add the following tag shown below: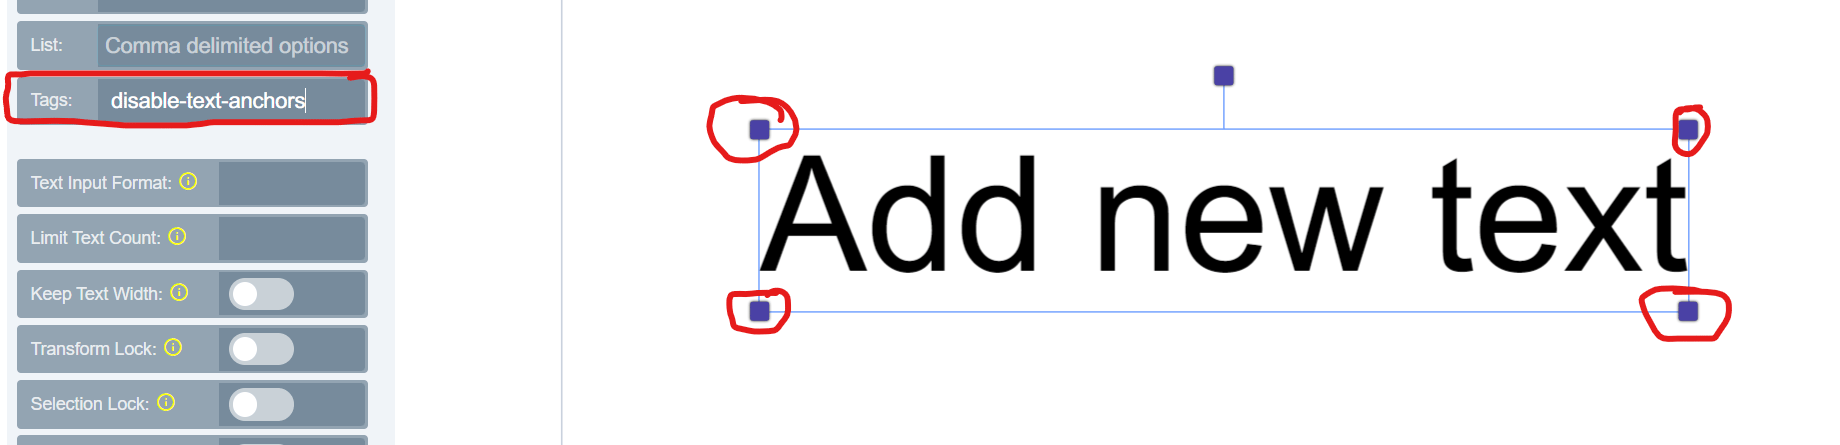
The anchors circled in red will be disabled and the customer won’t be able to resize the text
Bug fixes
Bug fixes
Cart Image on WIX
We had an issue with the customized cart image on WIX if and when a customer had multiple products with different PitchPrint designs. The WIX cart image would not display the image associated with each product, it would instead display the last customized design on all cart design images. We’ve gone ahead and fixed this issue and you will now see the correct cart image associated with each product when purchasing more than one customized product.We’ve concluded our tutorial videos and you can watch the 2min clips of each section of our plugin by going to https://admin.pitchprint.com/videos. The videos cover the entire admin panel, editor as well as the installation guides to the frameworks we support.More 3D Models
We’ve added quite a few new models to our 3D studio that you and your customers can use freely at no additional costs at all. These are some of the categories that we cover:Stationary, Beverage, Apparel, Photo Frames, Furniture, Signs, Kitchen Utensils, Packaging, Signs, Banners, Decor, Canvas & Promotional Items.Most of the categories are completely new and for some of them we’ve just updated the 3D models inside the category to make them even more realistic.Please have a quick look at some of the exciting models we’ve added below: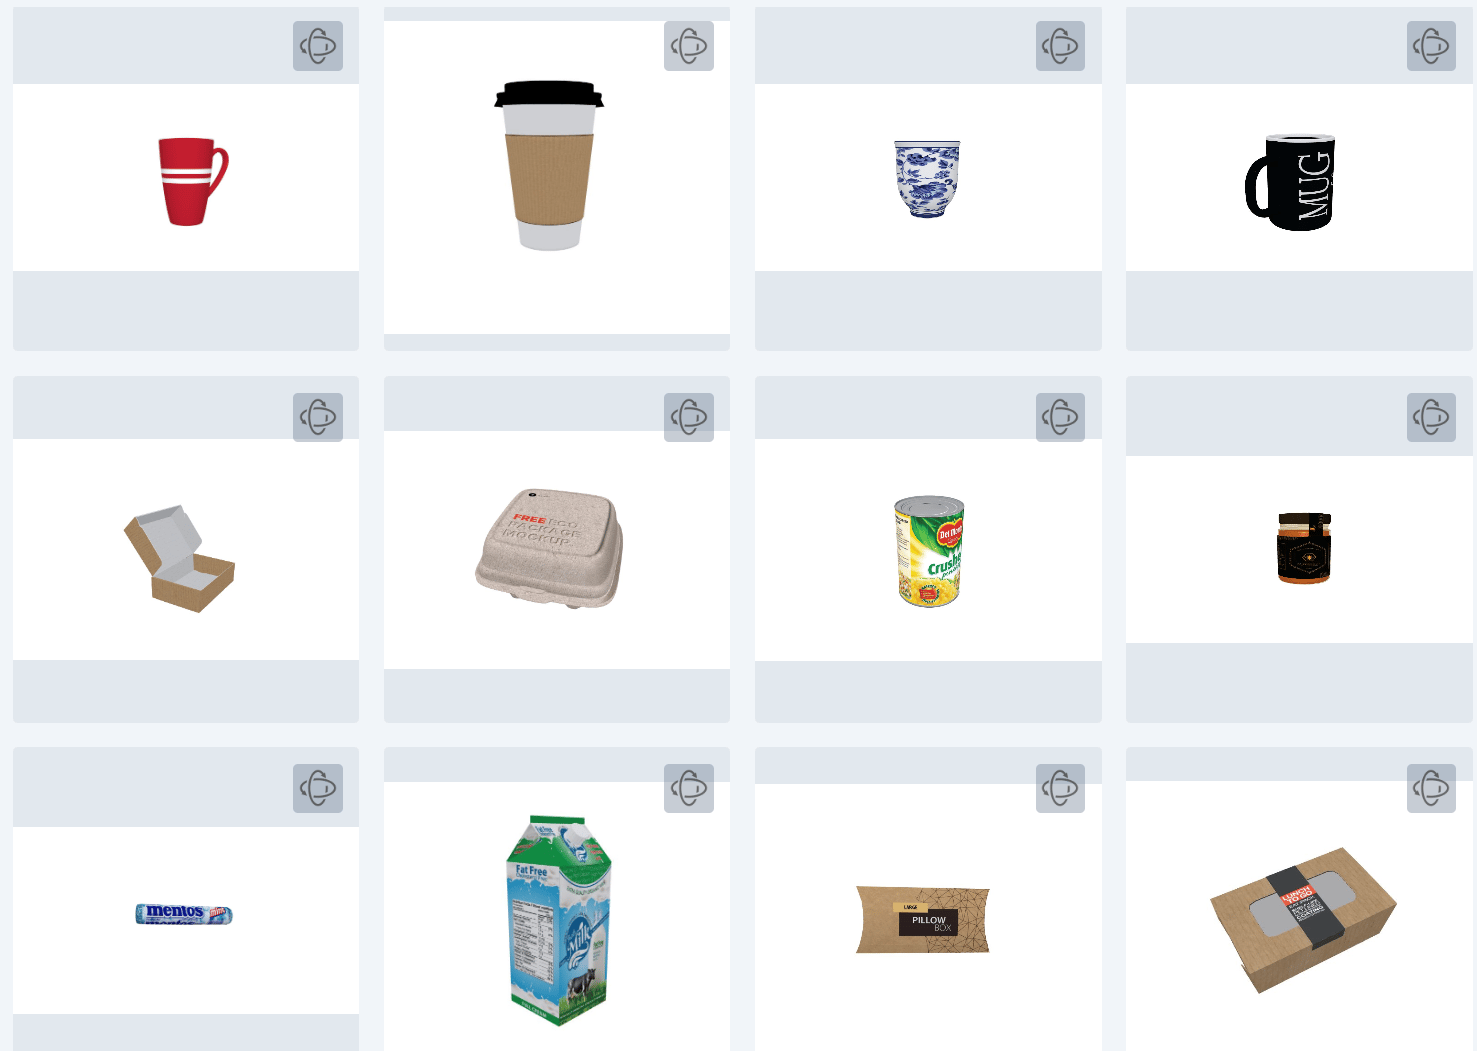
Beverage Containers
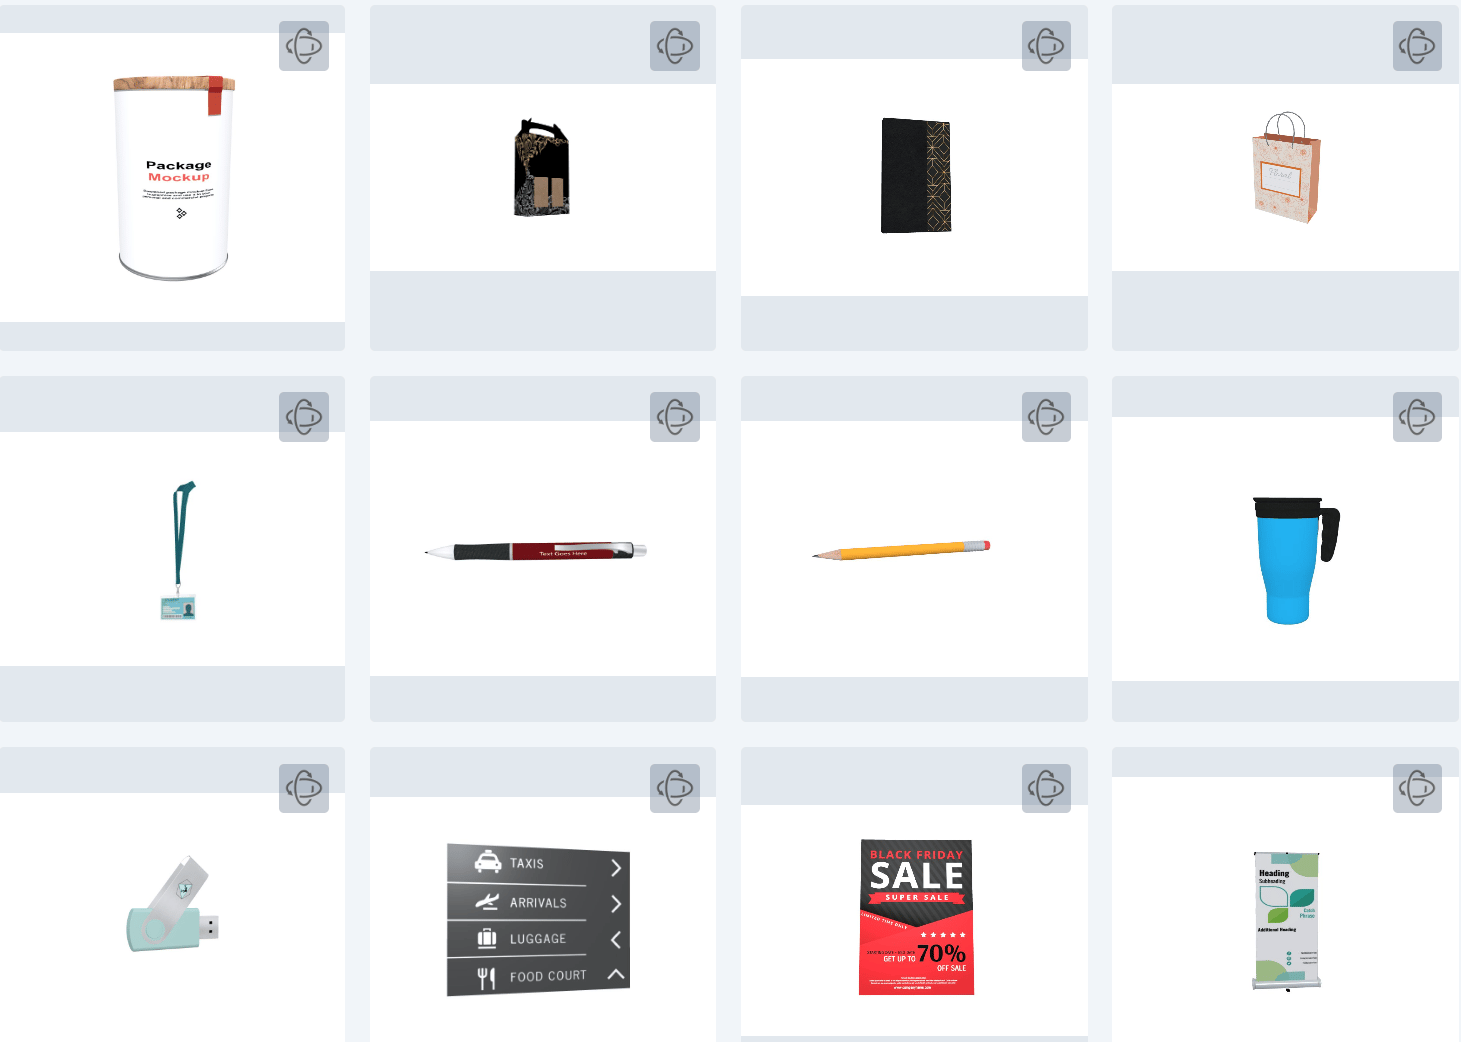
Signs, Promotional Items and Stationary
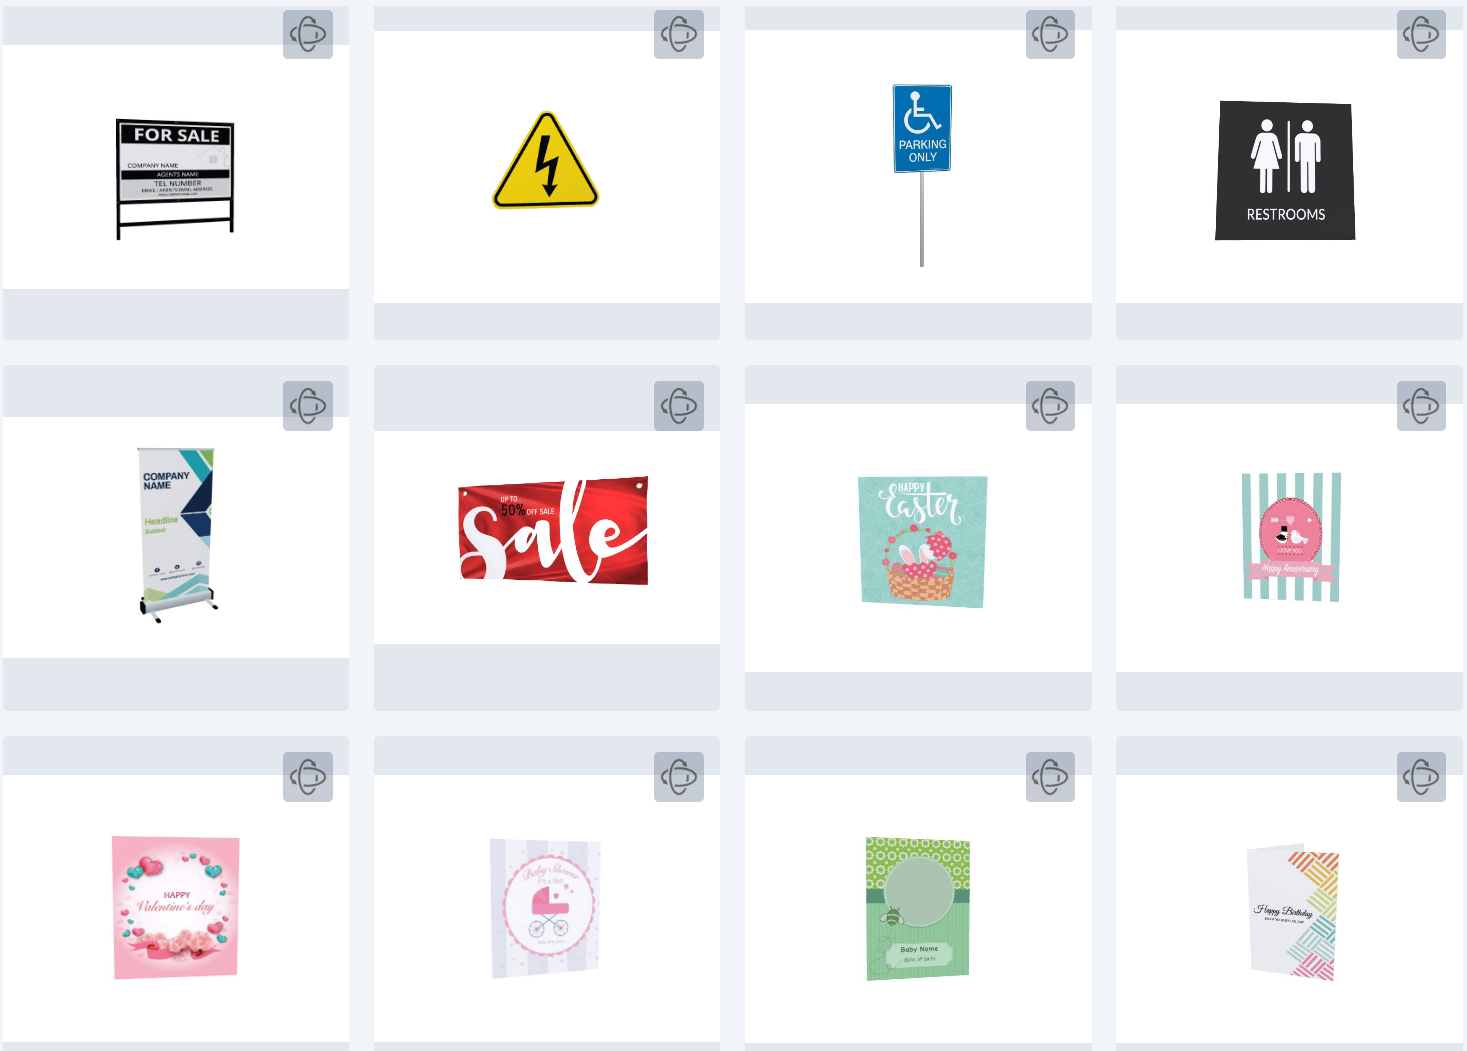
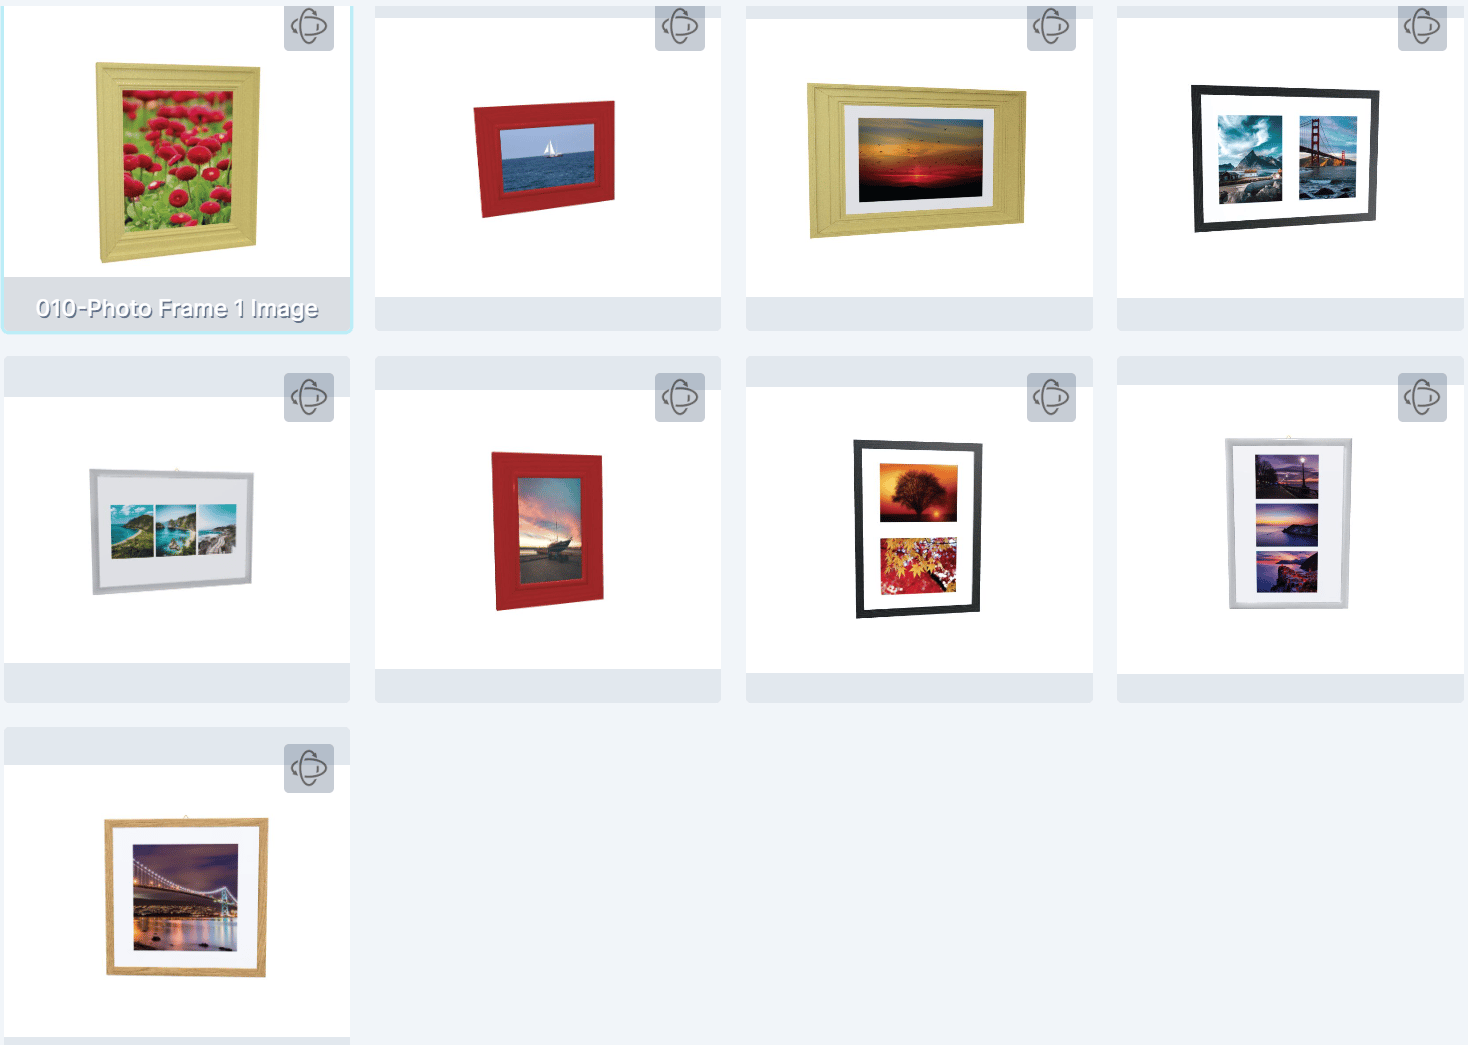
Photo Frames
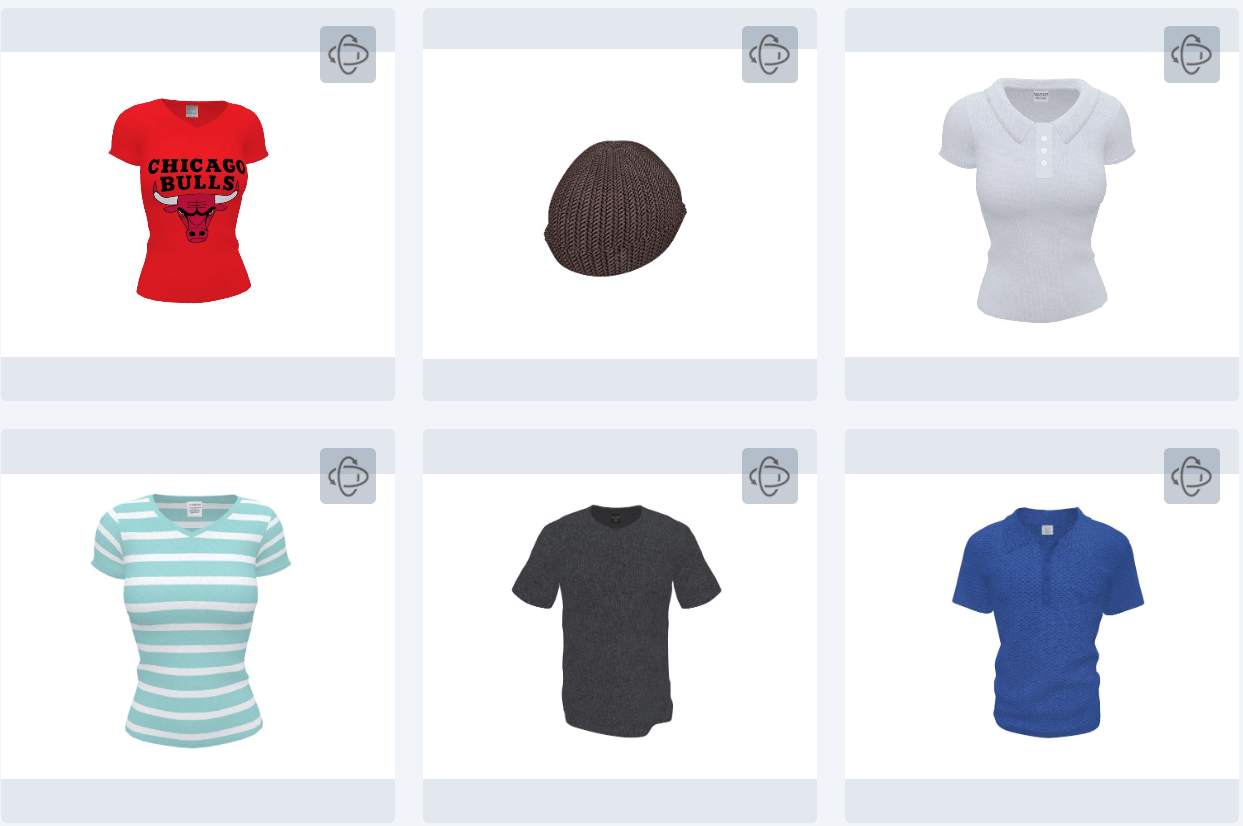
Apparel
EKM orders with customize file
The order tab for EKM in PitchPrint admin initially showed all orders placed on the website. We have now added this amazing new feature on the platform which assist in displaying orders where the customer used PitchPrint. This makes it so much easier for admin users because they only get the orders with a PitchPrint design attached to them.Bug fixes
Bug fixes
EKM order file download and preview issue
We had an issue where the correct file was not showing when the file was being downloaded from the orders section on the PitchPrint admin. And we also had an issue where the incorrect preview for the PDF file was being shown in the orders section. We have now fixed both issues and the correct file will now be downloaded directly from the orders section, and the correct preview will be displayed correctly as well.We’ve officially concluded all our tutorial videos covering the entire admin panel from designs, to resources to admin settings as well as installation guides and modules! We are excited and we know that this will be an awesome learning experience not only for our new customers but for all admins to unearth some hidden gems within our plugin and enhance their experience whilst also assisting them to be able to manoeuvre around the admin with ease.EKM product preview
We’ve added this amazing feature for our EKM customers which allows their end users to preview their PitchPrint customized image instead of the default product page image. We’re still fairly new on the EKM platform so please keep your eyes peeled to our blog for our bi-weekly releases in respective of additional functionalities that will be gradually added on EKM.QR code chain elements with tags
We’ve also added this amazing feature which allows you to chain text elements on the canvas to the QR code using tags. The text elements need to have the exact same tag as the QR code which you wish to add. To set the tag click on the element >> Go to item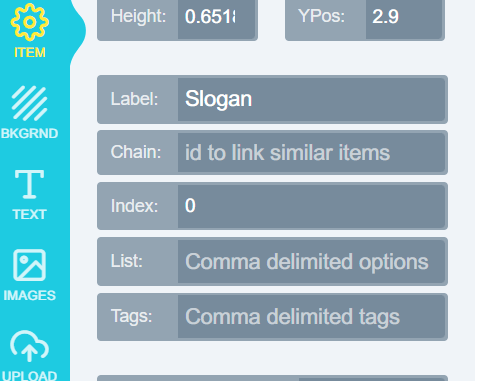
Add the tag in the tag section

You can add any tag this is just an example
Bug fixes
Bug fixes
Navigation thumbnail update
We had a minor issue whereby the design navigation thumbnails did not update when editing a design. The issue would crop up when a customer submits a design and then re-edits it again to make any additional changes to it, the thumbnails would not update to reflect the new changes made by the customer. We have fixed this issue and the thumbnails will now update accordingly. Please refer to the image below for the navigation thumbnails: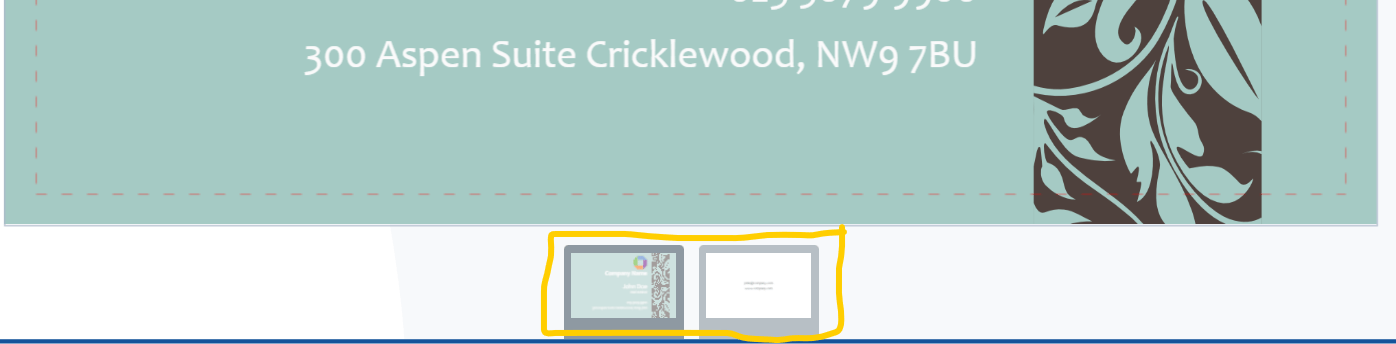
Single or Double Sided Module
We’ve added an amazing new #Module called Single/Double Sided to our expansive list of modules. This amazing feature will give your customers the ability to choose whether they would like to have either a single design or double sided design inside the editor. Now if a customer chooses a single design option, the editor will open up with only one page and if they choose double then the editor will open up with two pages respectively. This feature uses a variation element selector which will assist us to determine the number of pages the customer opted for whilst designing. To view a demo of this amazing new feature then quickly go to https://wp.demo.pitchprint.io/product/palette-business-card/.To enable this feature go to designs >>> click on the gear icon: kindly refer to the image below:
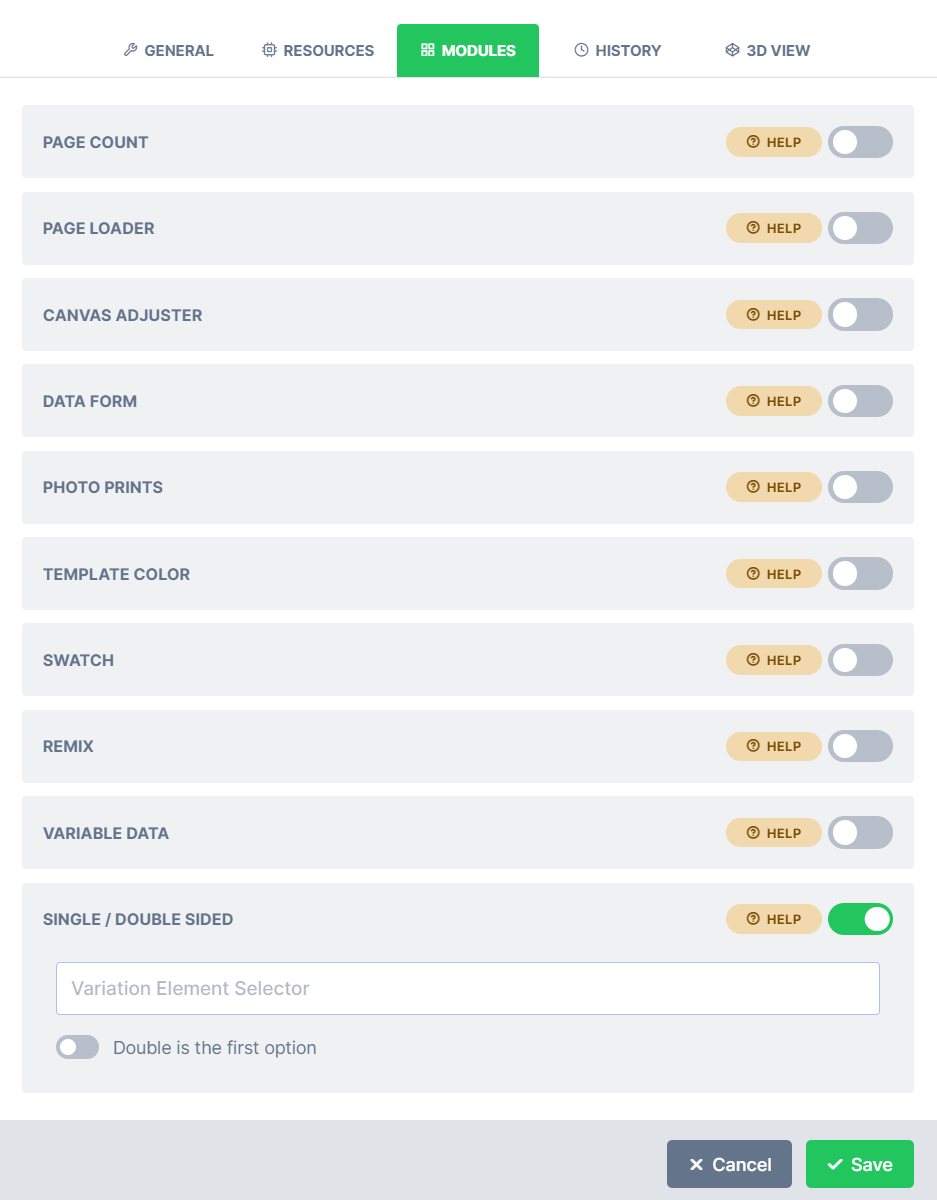
Enable Single/ Double Sided it can be found at the bottom
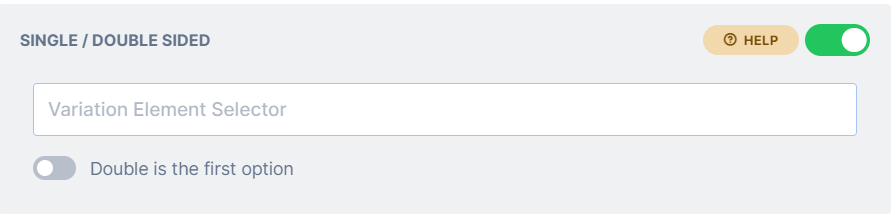
Please contact support for any assistance re the variation element selector
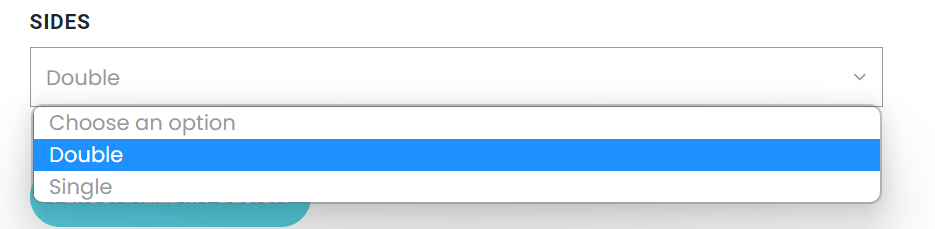
Please note you need the above variations on your website in order for this to work.
DesignId in URL on Wordpress
We have also added this awesome new feature which will assist the admin user in setting the designId of a product directly in the URL. You can achieve this result by adding a filter in your functions.php file of your theme. Please see image below for reference: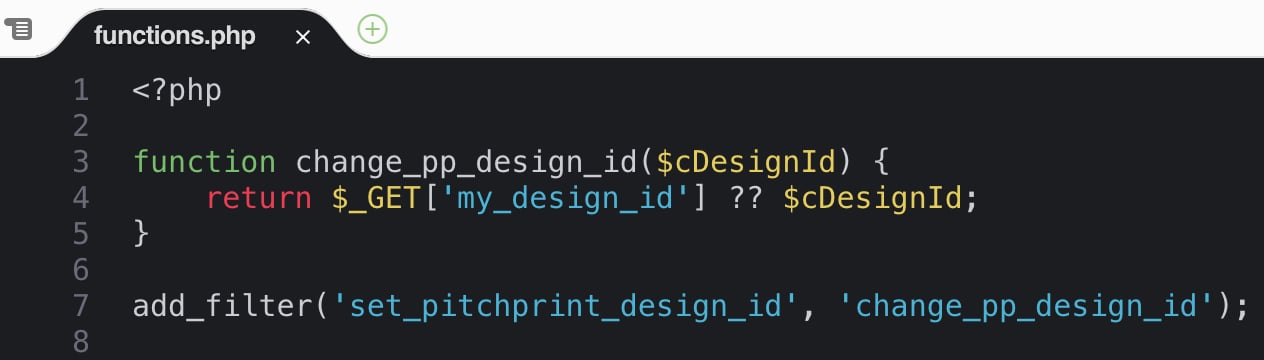
Maximum File Upload Message
Another amazing feature that we have recently added is a pop up message which will display when your customer uploads either a file that is too large or if it’s an unsupported file type.
Cart Preview and Save for Later on BigCommerce and WIX
The cart preview feature is now available on BigCommerce and WIX. Now our customers on these frameworks will able to preview their customized design as a thumbnail in the cart. Additionally, we’ve added the amazing save for later feature which will enable the end user to save their designs to their respective accounts and be able to edit them at a later stage. To enable save for later please follow these simple steps below:Go to settings >>> scroll down to Enable Save for Later - use the toggle switch to enable the feature and save your changes. Refresh your product page on your website to see the changes.

Save for later button on your website inside PitchPrint
N.B If the saved orders are not showing on WIX please add the following code snippet window.PPCLIENT.customAccountDivSel to the custom Javascript section shown below this can be found in settings, paste the code and save. Alternatively, contact us on support@pitchprint.com and we will gladly assist.

Paste the code snippet in the text field on the left and save your changes.
Products search on EKM
Previously, PitchPrint only allowed up to 20 products per tab to be displayed at a time and the admin user would have to move between tabs to display more designs. This initial approach however, was proving not to be the best user experience especially for some of our customers with multiple products. We’ve now added this amazing feature on the EKM platform which allows the admin user to search for their products and display them with ease. A more efficient approach for our valued customers.Multi shopId in Webhooks
We’ve also recently added another great feature which adds the shopId to the project data that gets dispatched via webhooks. If you have webhooks enabled and you receive data from it, now the shopId will be one of the parameters inside the data you will receive from PitchPrint.Well that’s it for this week but do check our new Tutorial Videos on the admin panel by opening the following tab https://admin.pitchprint.com/videos. We’ve added quite a few how to videos and we will also be uploading our Modules video in the upcoming week to assist all of our valuable customers on how to manoeuvre around our platform, content covered on the videos from settings to creating designs, editor elements etc. with practical examples, so please do keep an eye out!Have a lovely week from the PitchPrint team!😊Parallel file upload limit increase
In the past, our file upload limit per cycle was set to 12 and our customers could only upload the aforementioned number of files at a time and having to wait for the next cycle in order to upload more files. The initial restriction was put in place so as to avoid slowing down the system. However, we found a middle ground and increased the file upload limit to now 20 which allows for much more uploads at a time but without overwhelming the system.Archive orders on WIX
We have added this amazing feature on the #WIX platform which allows the admin to archive their orders using a toggle switch. It will assist with decluttering the orders page for admins especially when handling sizeable volume orders and best of all the orders can be accessed at anytime by simply using the toggle switch to view archived orders.Add shopId to project details
We’ve also added the shopId to projects feature on #Prestashop platform for our customers who were unable to identify easily which project belonged where especially for those with multiple stores. This great feature will now show the unique shopId of the store inside the project page next to each project to ensure the store owner will know exactly which shop the project belongs to.Wordpress Update
Lastly, we made an update to Wordpress where we’ve improved the display of metadata.Bug fixes
Bug fixes
Template Color Module inside edited project
We had an issue whereby when a customer edited a project using the template color module, the module would no longer be available inside the project once the project was opened. We have fixed this issue and the module will now be available when the customer edits a project.Well that’s it for this week folks but please do check our new Tutorial Videos on the admin panel by opening the following tab https://admin.pitchprint.com/videos. We’ve added quite a few how to videos to assist all of our valuable customers on how to manoeuvre around our platform, covering all the from settings to creating designs and easily watch at your convenience. We’ll add more videos in the weeks to come covering topics such as Modules etc. with practical examples, so please keep an eye out!Save for Later on Shopify
We’ve added this amazing save for later feature on the #Shopify Platform. All Shopify users can now make use of this amazing feature by simply enabling it inside the settings section.
Please use the toggle switch to enable this feature and save your changes.
Please clear your cache to see the save for later button inside the editor on the front end.
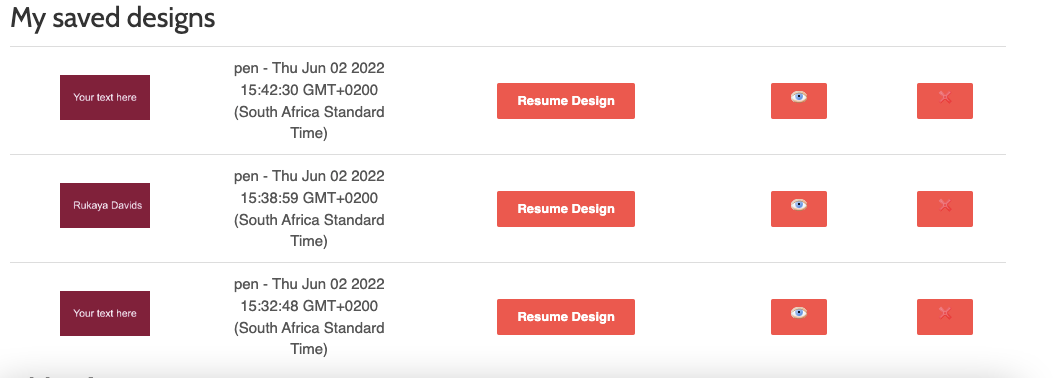
Please note that the div inside the customer account section will differ per theme so if you are unable to see the section shown below please contact support@pitchprint.com and we will gladly assist.
Remove Background
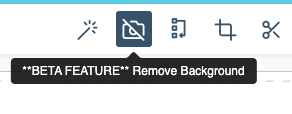
We’ve also added this amazing new feature which will allow your customers to remove the background from an image. Please be advised that this feature is in BETA Phase and we are in the process of training the AI but the feature will gradually improve over time when more sample images are uploaded. To enable this amazing feature please follow the steps below:Go to https://admin.pitchprint.com/layouts, reload layouts.

Click on this button to reload layouts.
Go to https://admin.pitchprint.com/styling, resave styling. You should then see the button shown below inside the editor:

Click on this button to re-save styling.
Tooltips in Module Configuration
Lastly, we’ve also added tooltips to the module configuration help button inside design configuration. This will assist Admins learn a bit more about all our Modules in detail. You can see the tool tip by hovering over the help icon. Please have a look at the screenshot below for reference: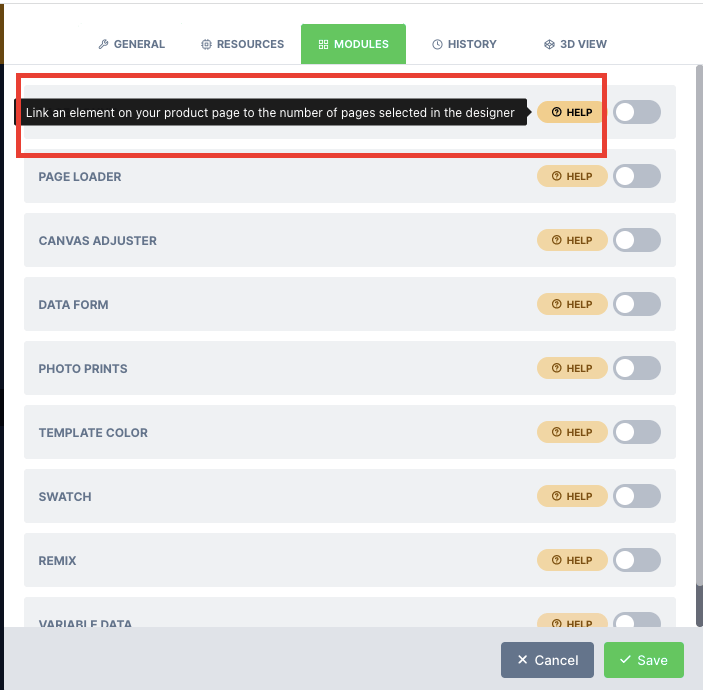
Please hover over each help button to see the explanation for each module
Bug fixes
Bug fixes
Text tab could not be selected as default tab
By default, we provide the option for an Admin to select a default tab that will be shown for each design when it loads in the designer.We had an issue with the text tab when a user selected it as the default tab. It would not load as the default but instead the background tab would be displayed. We have fixed this issue and the tab will now be displayed correctly as the default option. Please have a look at the image below for reference: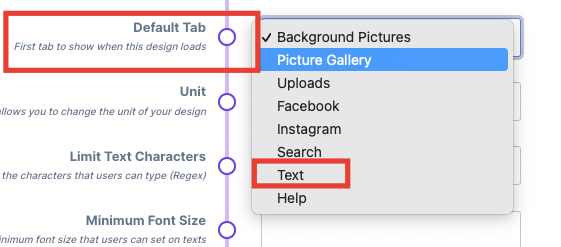
This can be found inside design configuration
Progress bar for image upload
Previously, when the end user uploaded their images, they wouldn’t know the progress of the image being uploaded on the product page particularly when a store uses a Mini Display Mode. We’ve now added this cool new feature which displays a progress bar on every product that uses this specific (mini) display mode when an image is uploaded. This way the customer will always be able to see the status of the images uploaded at any given moment.Endpoint to convert a Project into a Design
In the past, if an admin user wanted to convert a project to a design, they would have to recreate the project as a design from scratch which is counterintuitive to one of the things we are known for, being a Fast web2print plugin. We’ve corrected this wrong with this amazing new feature which uses an endpoint that allows the admin to convert a project into a design instantly. Please have a look at the endpoint below:https://api.pitchprint.com/runtime/project-to-designKindly use your Secret key as an Authorization in the header, your secret key can be found here, and subsequently parse the categoryId and the projectId as JSON data in the body.
Please do not hesitate to reach out to support should you need any assistance.
Keyboard Shortcuts
We’ve added a few new cool keyboard shortcuts as well as existing keyboard shortcuts that most users are not aware of, you can have a quick look at the list of keyboard shortcuts below:Hold down space key
This will allow you to pan and move the canvas around with your mouse or trackpad. Ctrl + C - Copy Ctrl + V - Paste Ctrl + A - Select All Items Ctrl + X - Cut Ctrl + W - Close Keyboard shortcuts for Undo and Redo (This will differ per Operating system) Left and Right arrows - Can be used to navigate between all pages of a design in the preview window. Ctrl + Arrows - To move in increments of 5 or more steps.We will be adding more keyboard shortcuts as we go along.That’s it for this week but please do check our PitchPrint Community Forum where we are running a teaching series on our amazing product features, unearthing some of our product hidden gems etc. so that our customers get the best value for their subscription.Have a lovely and productive week, from the PitchPrint Team!😊Design ID in design configuration
In the past, our customers had to use php code to fetch a unique design ID for each design within a design category. We’ve now added this amazing new feature that allows admin users to view each unique design ID inside the design configuration section. You can follow these easy steps below in order to view a design ID:
Click on design configuration
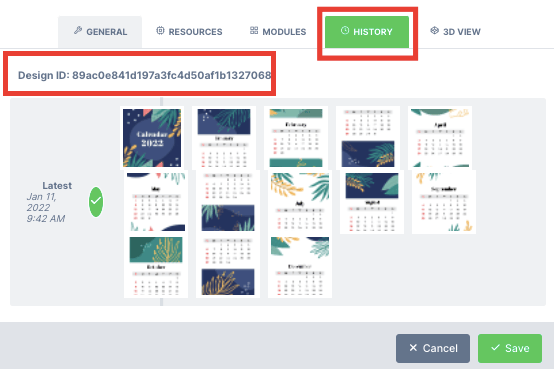
Go to the history tab >> the design ID can be found inside the history tab as shown in the image
Recenter artwork button
When a customer would zoom in on a design to an extent whereby the canvas becomes clipped, in order to recenter the canvas they would either have to refresh the design page or alternatively, try and zoom out manually which would still not aid in putting the canvas to its default position. We have found a quick solution with this incredible feature which now allows not only the customers but the admin users as well the ability to recenter the canvas with just a click of a button. Please see below image for reference:
The reload/recenter button will allow customers as well as admins to recenter the canvas.
Bug fixes
Bug fixes
Issue with Dawn Theme on Shopify
We had an issue whereby the project Id was not being attached to the order on the Shopify platform specifically on the dawn theme. Usually our PitchPrint methodologies would be to look for the form and injects the code for the product option into the form itself. In this case, there were two forms in this particular theme and the code was being inserted into the incorrect form thus the project ID was not being included in the order details. We have gone ahead and fixed this issue by removing the second field and the project ID now gets attached to the order correctly.That’s it for this week but please do check our PitchPrint Community Forum where we are running a teaching series on our amazing product features, unearthing some of our product hidden gems etc. so that our customers get the best value for their subscription.Delete button in Data Form Module
In the past our customers had to manually delete data from inside the data form. We added this wonderful feature which will now give you the ability to clear the field contents with the click of a button. To use the feature go to layouts and Reload Latest >> also go to styling and save changes. Once you’ve completed these steps go to your product page. Clear cache and reload then open the Pitchprint editor the button should then be visible.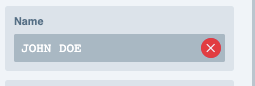
The red button will allow you to clear the form field
3D Models Matte or Glossy
In the past some of our customers had issues with the 3D models sometimes looking too dull and not realistic enough. We’ve added this amazing new feature which will allow you to set a model to be either glossy or matte. Glossy would assist in making models like cups, bowls, packaging jar, wine bottle, travel mug, ceramic vase, mentos etc appear to look a bit more realistic. Matte would apply to apparel, furniture, and boxes in the packaging category etc.We also provide you the option of using a combination of both on your models but this would be purely based on personal preference.We implemented up to 5 sliders which allows you to select which portion of the model should be Matte and which portion should be Glossy. The number of sliders you will see in the configuration will depend on the number of meshes that is applied to a model, each mesh will then have it’s own slider which you can use to apply the glossy/matte effect.
When sliding to the left it will give a gloss finish, when sliding to the right it will give a matte finish
Limit the number of Files that can be uploaded
We placed a limit on the number of files that can be uploaded in one go. The maximum number of files the customer can upload all at once is now 12. We added this limitation because when the end user uploaded more than 12 files the application and the browser would slow down tremendously and only resume back to normal after the upload completed.This will now ensure that there are no more lags in the application as well as the browser during file uploads. If the customer wishes to upload more they can wait until the upload has finished and then upload the next batch of files.That’s it for this week but please do check our PitchPrint Community Forum where we are running a teaching series on our amazing product features, unearthing some of our product hidden gems etc. so that our customers get the best value for their subscription.Enjoy the rest of your week from the PitchPrint team😊Grommets
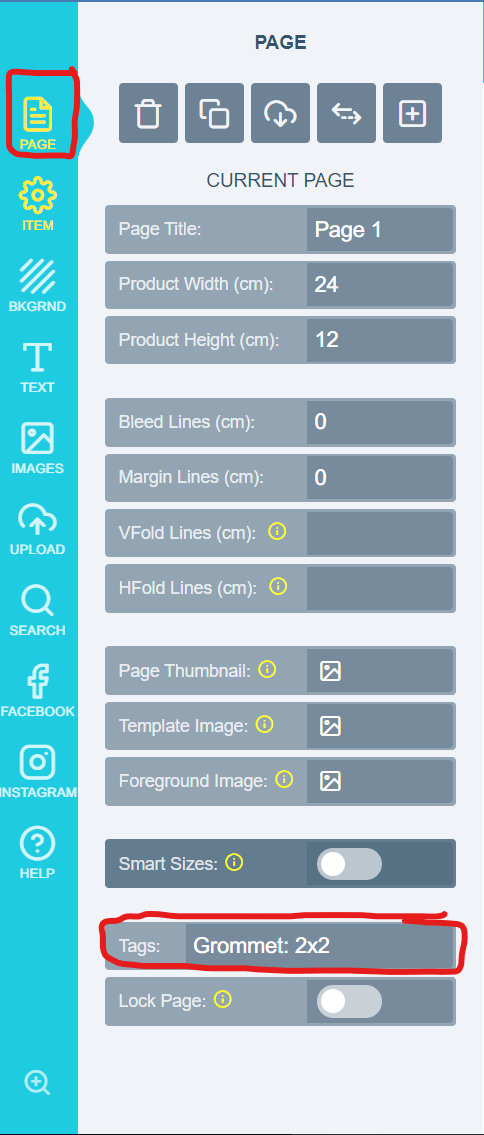
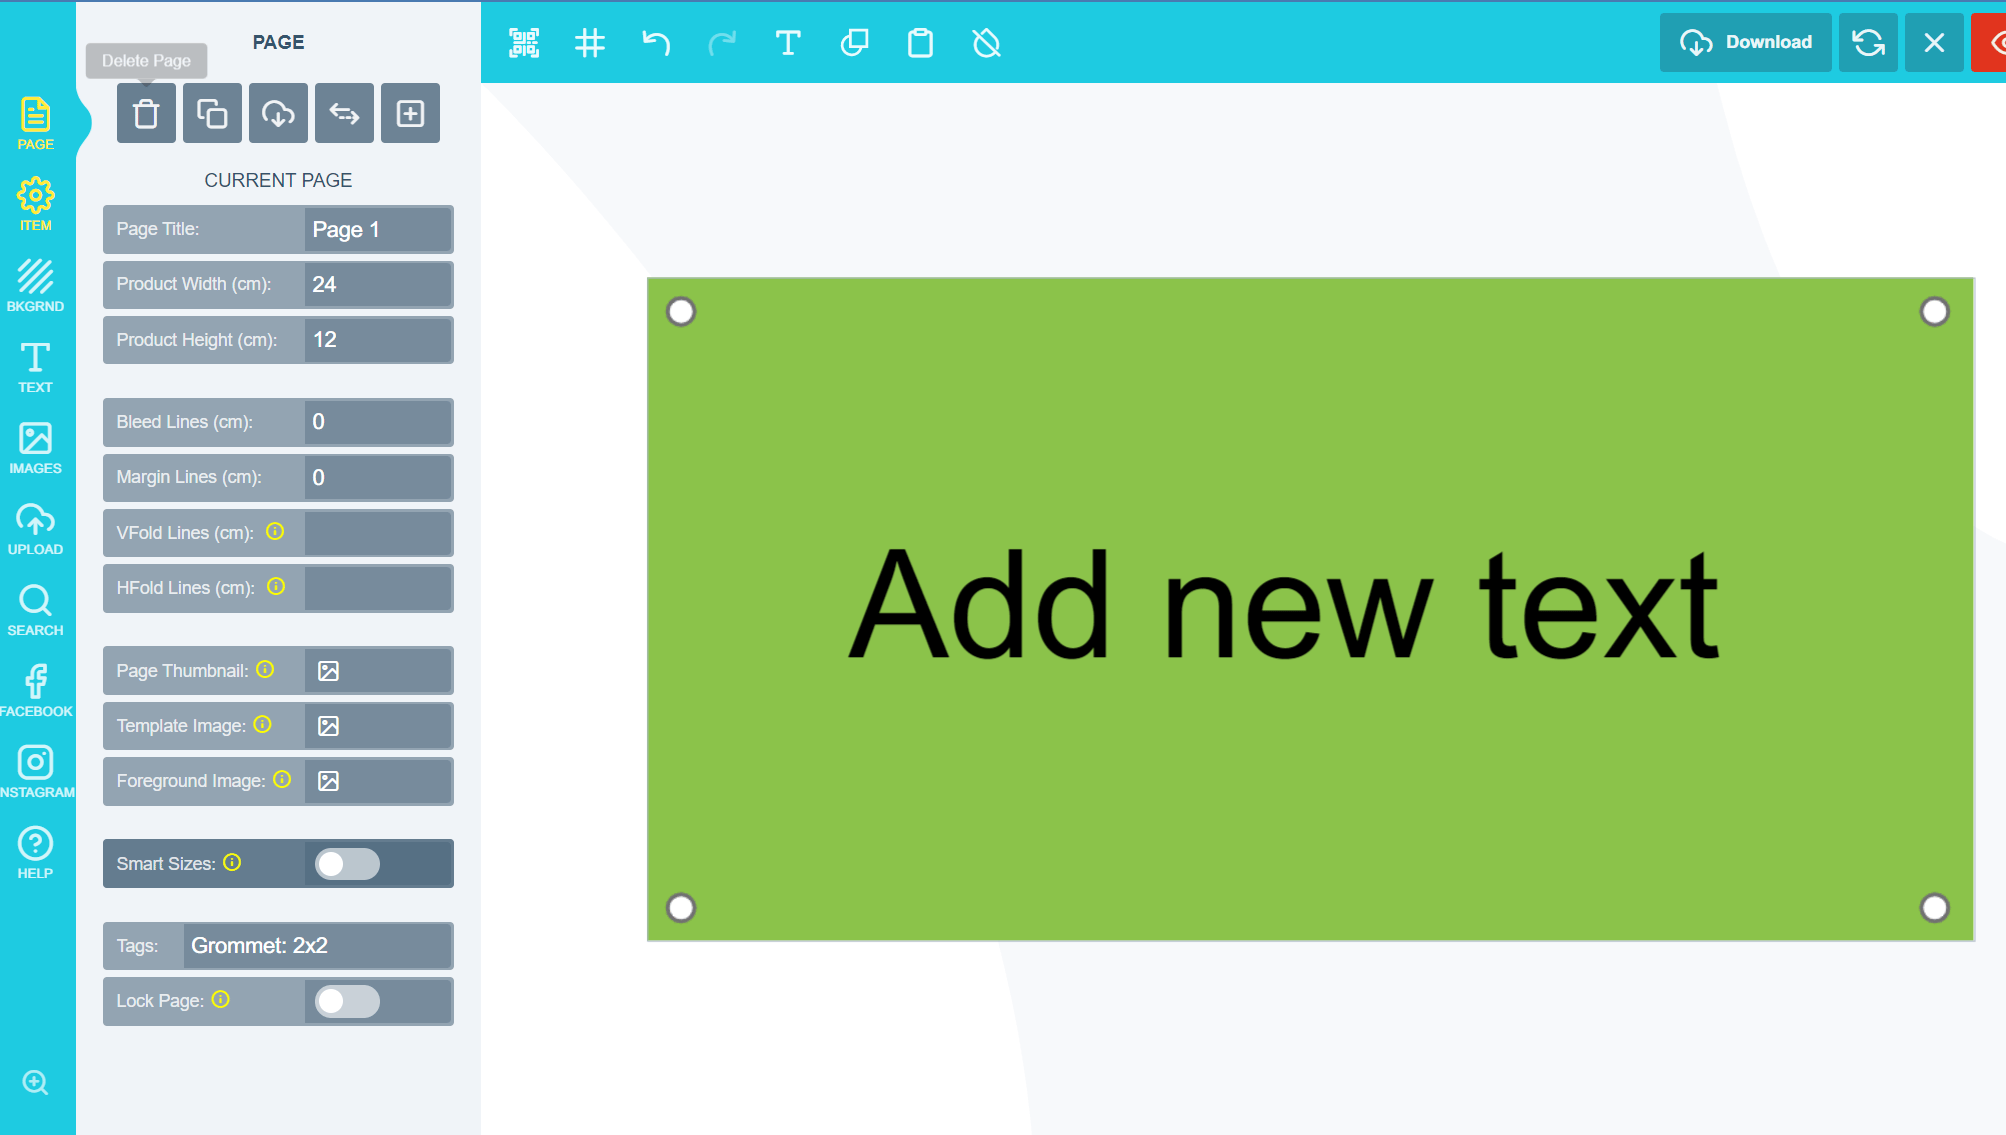
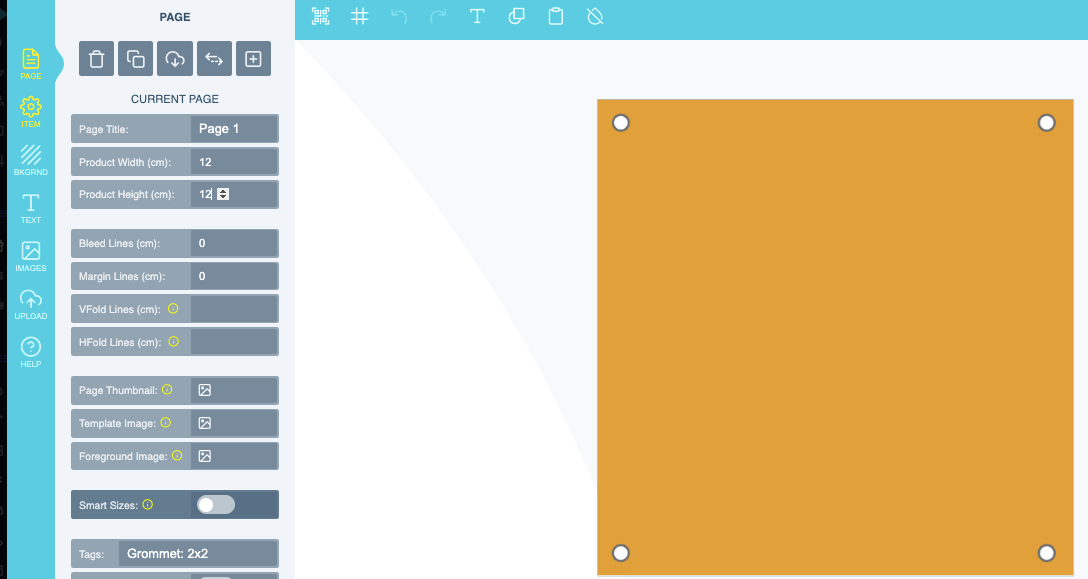
We added an amazing feature that will allow you to make use of Grommets, a reinforcement hole to protect or insulate a rope or cable passed through it. This awesome new feature will allow you to add holes to the canvas either horizontally or vertically, a perfect way of preventing the design material from tearing or abrasion. This will also provide a hassle-free installation for all your signage products i.e. vinyl banners, teardrop flags, posters, canvas banners, plastic signs and even apparel too.Grommets can be added to the canvas by adding a tag to the page with your dimensions. Your tag would be written as follows - Grommet: 2(The Horizontal Value) x 2(The Vertical Value). Please have a look below for reference: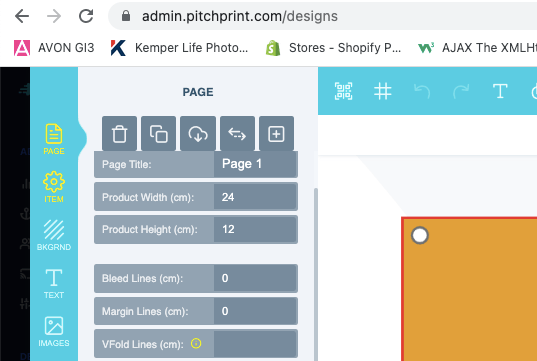
Go to Page
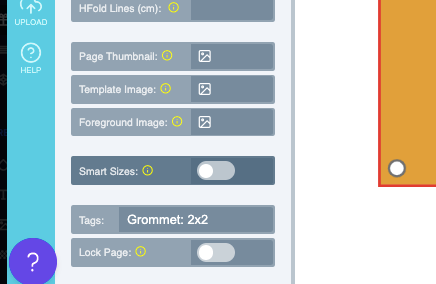
Scroll down and enter the tag as shown above
Please note for Horizontal values any value can be added as for Vertical only 1 OR 2 may be used. Please note that any changes made to the top of the page will be automatically added to the bottom as well.Please have a look at the changes below for reference:
Bug fixes
Bug fixes
Show/Hide Tabs in Admin
We had an issue with Show/Hide tabs in the Admin (please refer to the image below for reference). When these tabs were enabled in a single design configuration settings, the changes would be enabled on all designs across the domain. We have fixed this issue and it will now show and apply only on the design where the setting is enabled.
Issue with Bulk Configuration and 3D models
We had an issue with bulk configuration and 3D models. When the admin would edit the bulk configuration(please have a look below for reference) settings for a category. The 3D models assigned to each design would changed. We fixed this issue and the bulk configuration will no longer affect the 3D models assigned to each design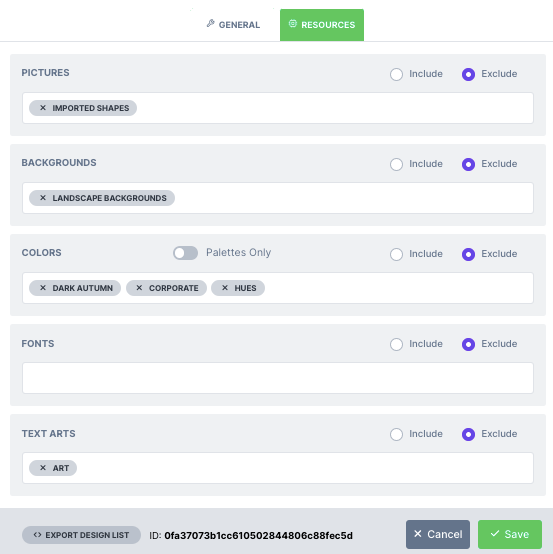
Block Key Commands
This amazing new feature will allow admin users to block any keyboard commands they want using tags. You can block any single key or any combination of keys to suit your needs. In the following example we will show you how to block ctrl+a OR cmd+a. Go to settings >> scroll down to global tags see below:
add the tag as shown above, your tag will always be preceded by an exclamation mark ! please save the changes you make.
Reject SVG’s if no font exists in font list
We’ve implemented a new feature whereby this functionality will check if an SVG file contains a font and if the font is not part of your font list on PitchPrint, it will reject the SVG and it will not be uploaded. Now if a font is part of your font list, it will be uploaded successfully.Bug fixes
Bug fixes
Copy Text styles maintains old font styles
Previously, we had an issue with copy text styles where a customer would copy the styles from one set of text to the next and change the font type thereafter on the new text but it would still maintain text styles e.g bold, italic, underline etc from the source text. We’ve gone ahead and fixed this issue and you can now copy styles and change them on the new set of text without the styles reverting to the old source text format.Bulk Photo Print Quantity Issue
We had an issue with Bulk Photo Print module where the quantity did not update correctly on the product page. This issue has also been fixed and the quantity should now update correctly based on the values selected inside the designer.Bulk Photo Print and Re-edit issue
This bug fix is also in relations to the Bulk Photo Print module re customers re-edited a design within the Bulk Photo Print module, the designer would display an incorrect total number of pages. In addition to the aforementioned issue, when re-editing a design, the designer would also display the wrong quantity per page in comparison to what the customer initially submitted. We’ve also fixed these issues and the designer will now not only display the correct total number of pages when a design is re-edited but will also display the correct quantity per page as per the customer’s initial submission.That’s a wrap for this week but please do check our PitchPrint Community Forum where we are running a teaching series on our amazing product features, unearthing some of our product hidden gems etc. so that our customers get the best value for their subscription.Single Image for Template Color Module
In the past, our admin users had to upload a template image for every colour they wanted to use inside the Template Module feature. We’ve now implemented an amazing yet efficient feature that allows admin users to only upload one image(the template image needs to be white- please refer below for reference) and in addition choose the colours that they would like to have for the rest of the templates and it will then change the color of the template automatically whenever a new color is selected. Please have a look below on how to enable this feature:Enable Tint Original Template >> then click add new color to add the colors which you would like to have available in the template color module >> select the color on the color picker or alternatively enter the hex value for the color and save.
Upload template image in this section inside the design
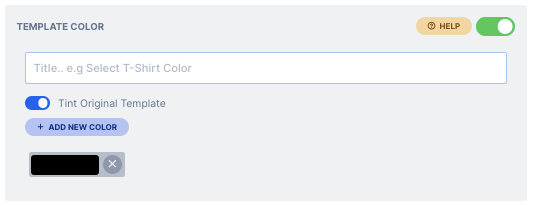
Enable Tint Original
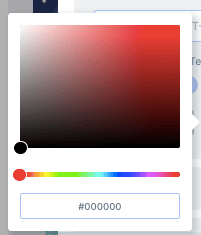
Choose the color on the color picker
Upload image via data form on Mobile
The upload indicator in data form on mobile would only show after the customer uploaded the file. We’ve now added a new feature whereby the upload indicator field will always show whether it contains an image or not which will improve the UX on mobile devices.Bug fixes
Bug fixes
Sort duplicate design in alphabetical order
Previously, when admin users would copy a design to a different domain or category, the copied designs would not be sorted in an orderly fashion. We’ve fixed this issue and all duplicated designs will now appear in alphabetical order for ease of access.Pagination on WIX
Recently we had an issue with WIX customers who were not able to access all of their products with ease in the admin especially those with a lot of product offerings on their e-commerce stores. We’ve added pagination at the bottom of the products page in PitchPrint to allow customers to manoeuvre between the sections of products they have on their website. Please have a look below for reference: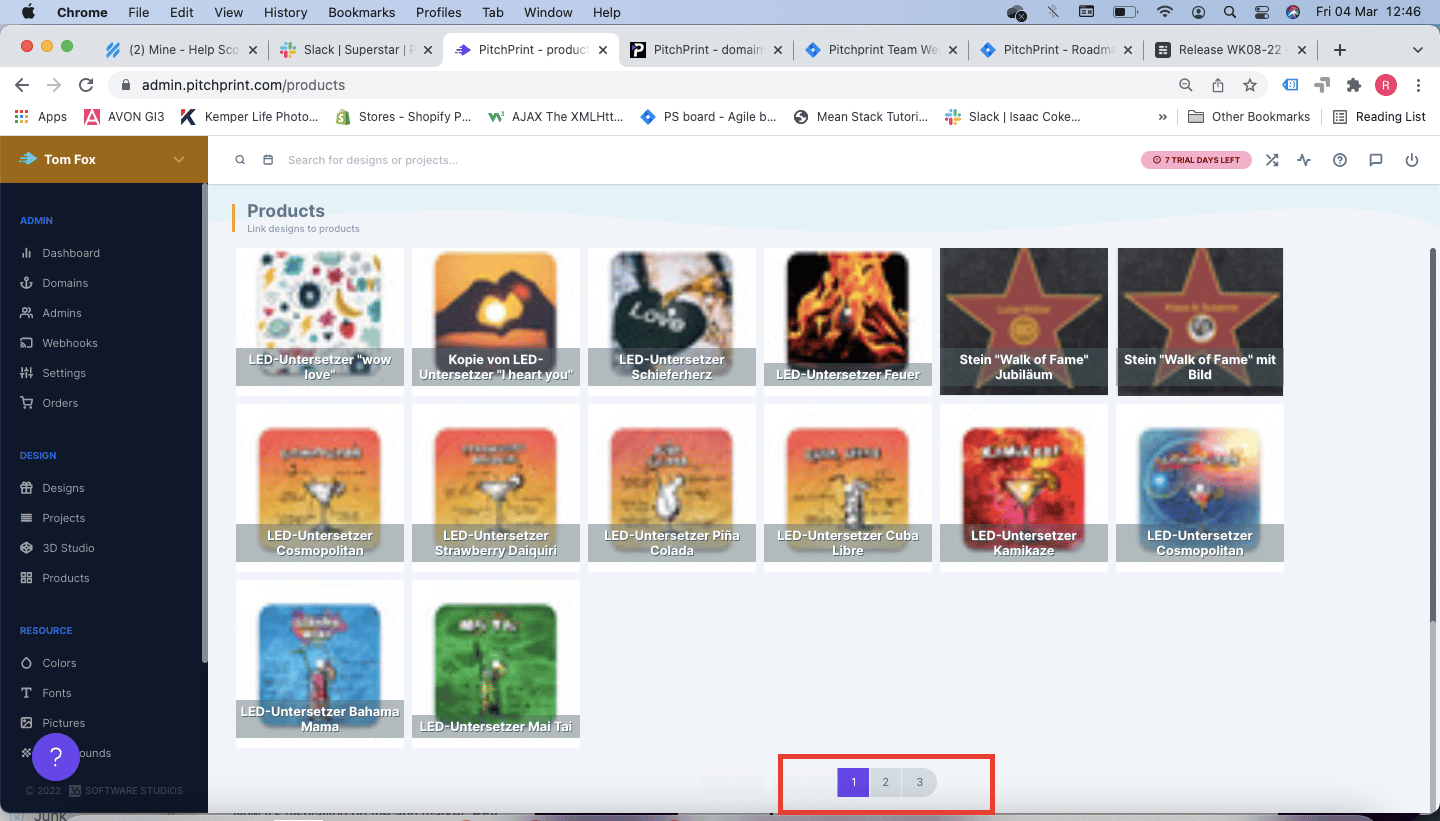
Disable group selection
We added a feature which will allow the admin to enable/disable item group selection per design. Prior to this new release, customers were able to select multiple items all at once but that resulted in items losing individual functionalities such as selection lock, delete lock or transform lock just to name a few.Now with this amazing feature the admin has more control and will be able to curb the issue of customers selecting multiple items at once and subsequently having an adverse effect on individual item functionalities.You can enable this feature by following these easy steps >> Going to designs >> Click on the gear icon >> Enable the toggle as shown below and Click save:
Category Customisation on OpenCart
We added the customisation button on all products within a category on OpenCart. Previously, customers had to visit the product page to be able to access the designer. This awesome feature will enhance user experience and making the whole process more efficient by allowing your customers to access the designer directly from the category page.Retain Uploaded image dimensions
Prior to the deployment of this feature, when customers uploaded images, the image would scale down immensely in the editor. This issue raised concerns as to whether the image still maintained its resolution and size within the editor. We’ve now put those concerns at bay with this amazing feature which if enabled, it will allow the editor to retain the size and resolution of the uploaded image irrespective of the file uploaded.To enable this amazing feature go to https://admin.pitchprint.com/settings >> Scroll down to File Uploads and enable the toggle switch below, please be sure to save any changes you make.
Category Customisation in Prestashop
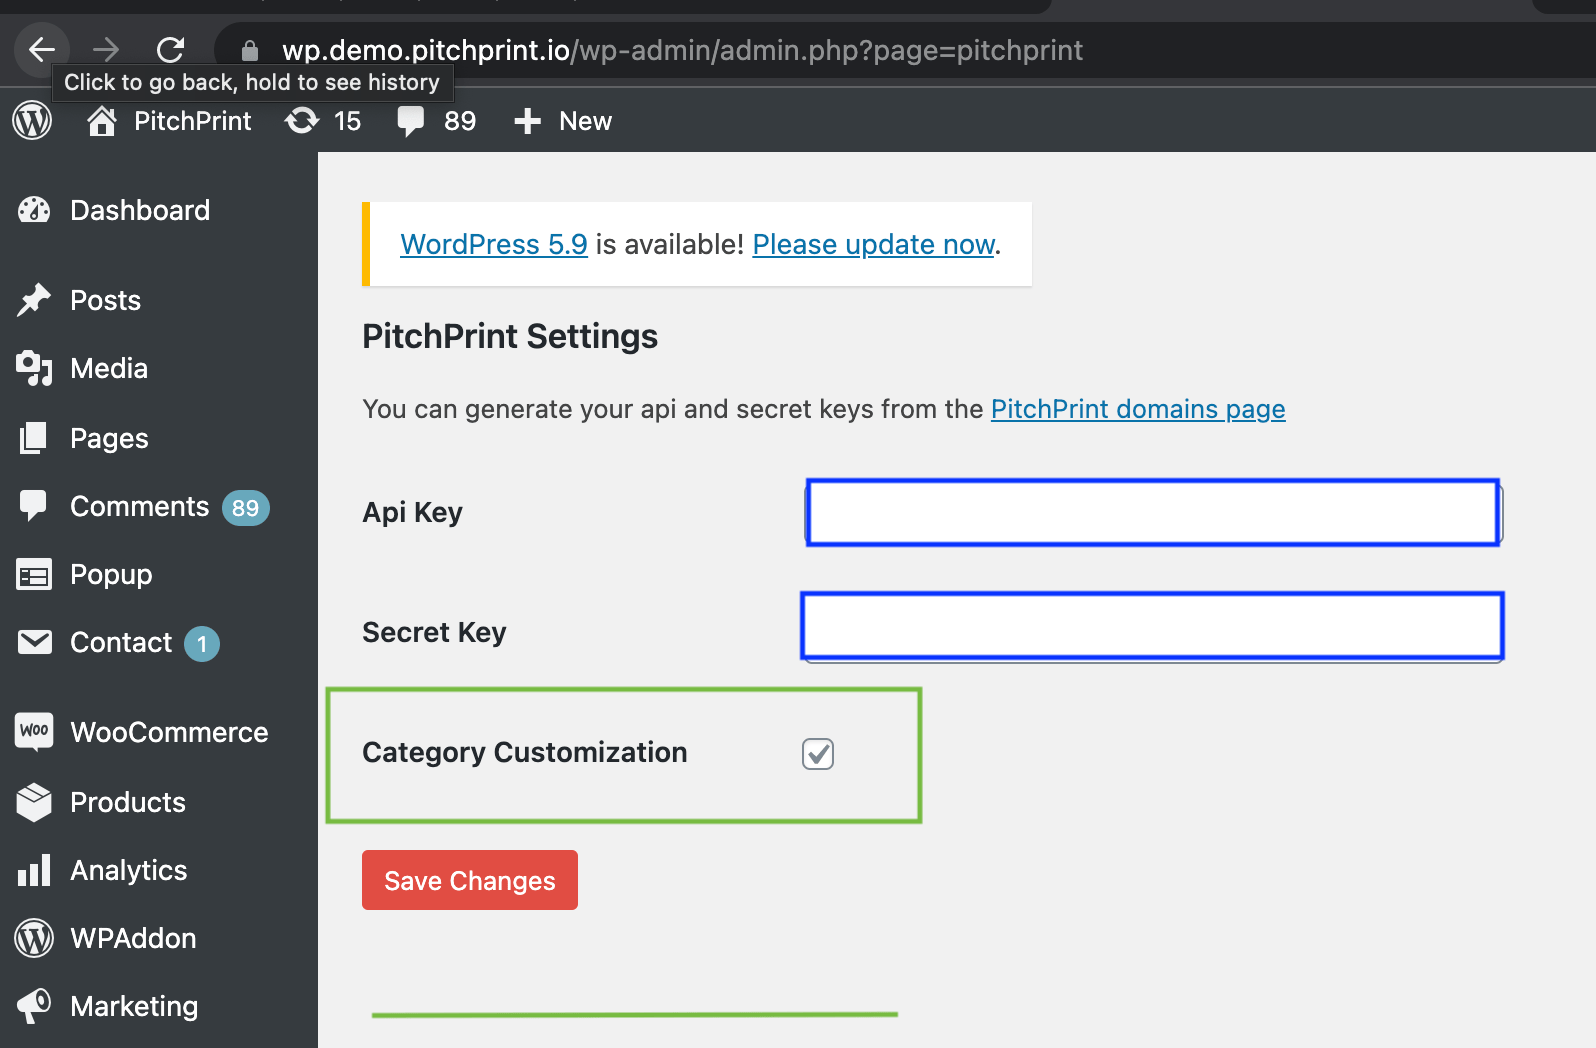
In the past, the customer had to open each product individually to be able to use the editor which was not the most efficient way of finalising a design/order for the end user. We’ve now added a button to this product section which will allow the customer to access the editor directly from the product category page. Please have a look at the images below for reference:To enable this feature please go to your Prestashop admin panel where you will be able to configure PitchPrint and click on the checkbox as indicated below: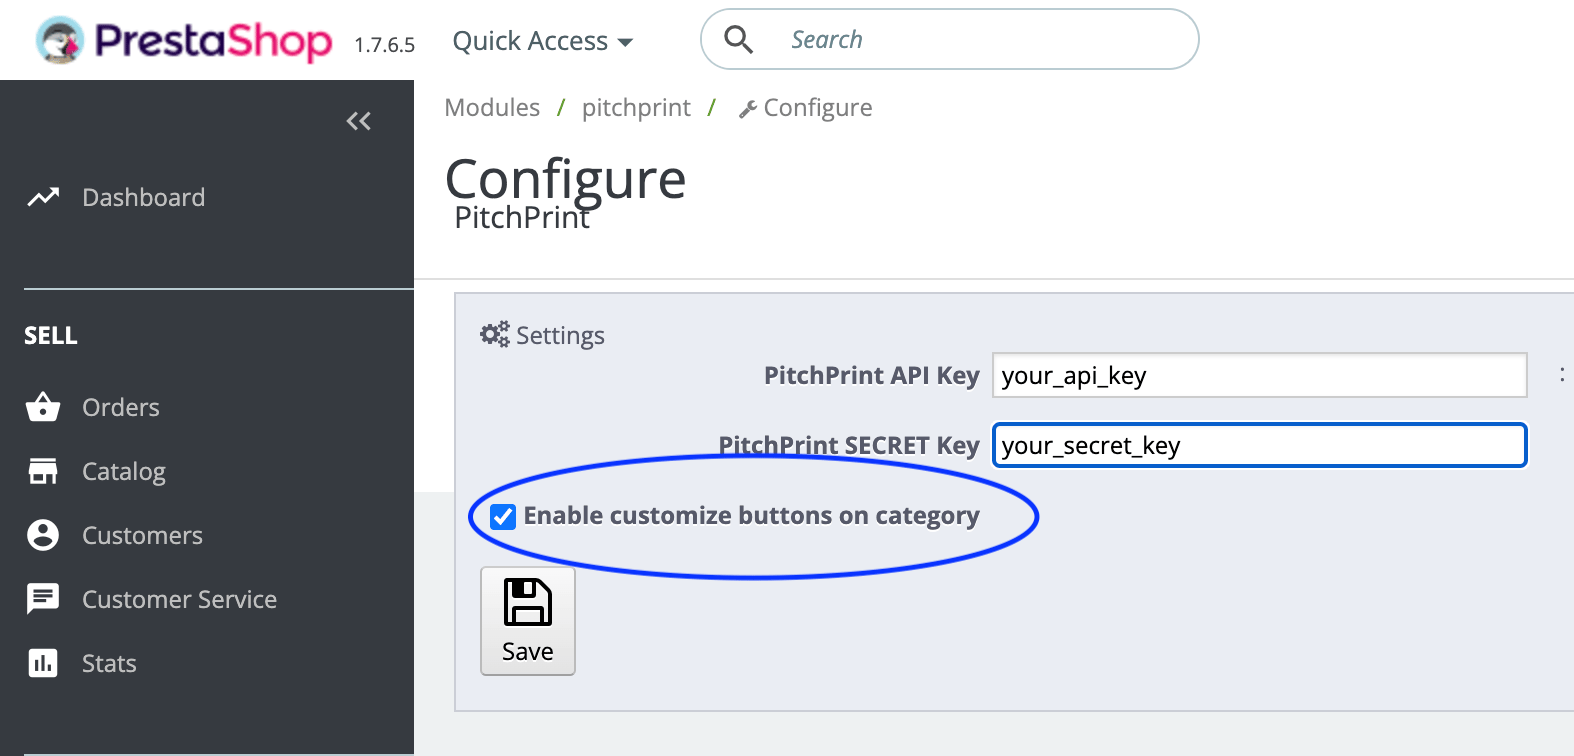
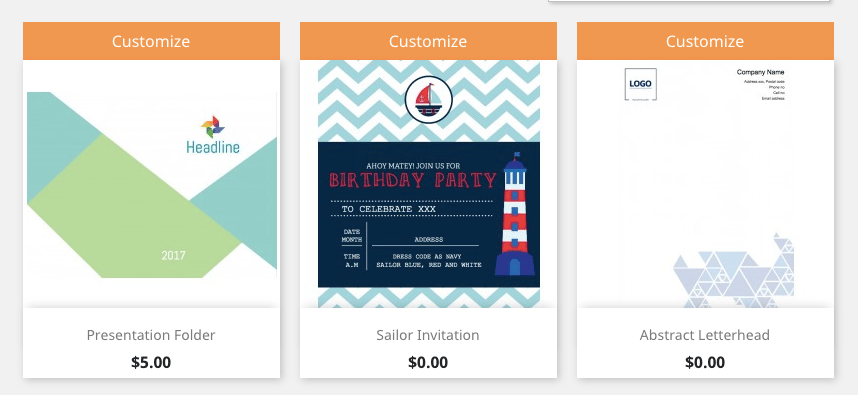
Non-reactive canvas on Mobile
We’ve also added a new feature that will make the canvas non-reactive in mini mode on mobile display. Previously, the screen used to be reactive and subsequently caused issues with customers zooming in or mistakenly selecting other elements on the canvas that would affect the customer using the editor and customising their designs. The canvas will now remain static while the customer uses the editor on mobile in mini mode display.Bug fixes
Bug fixes
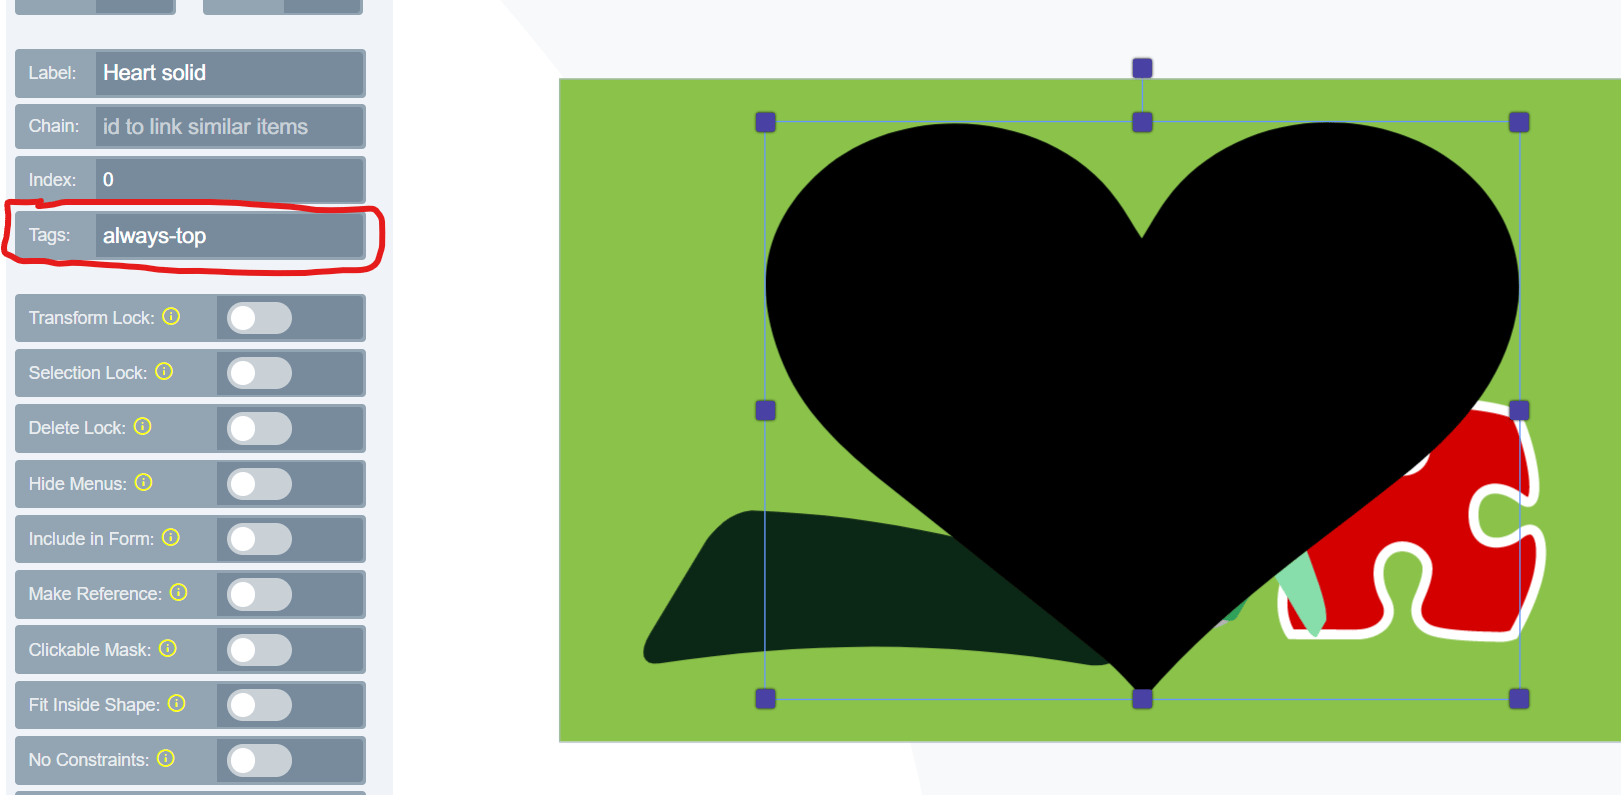
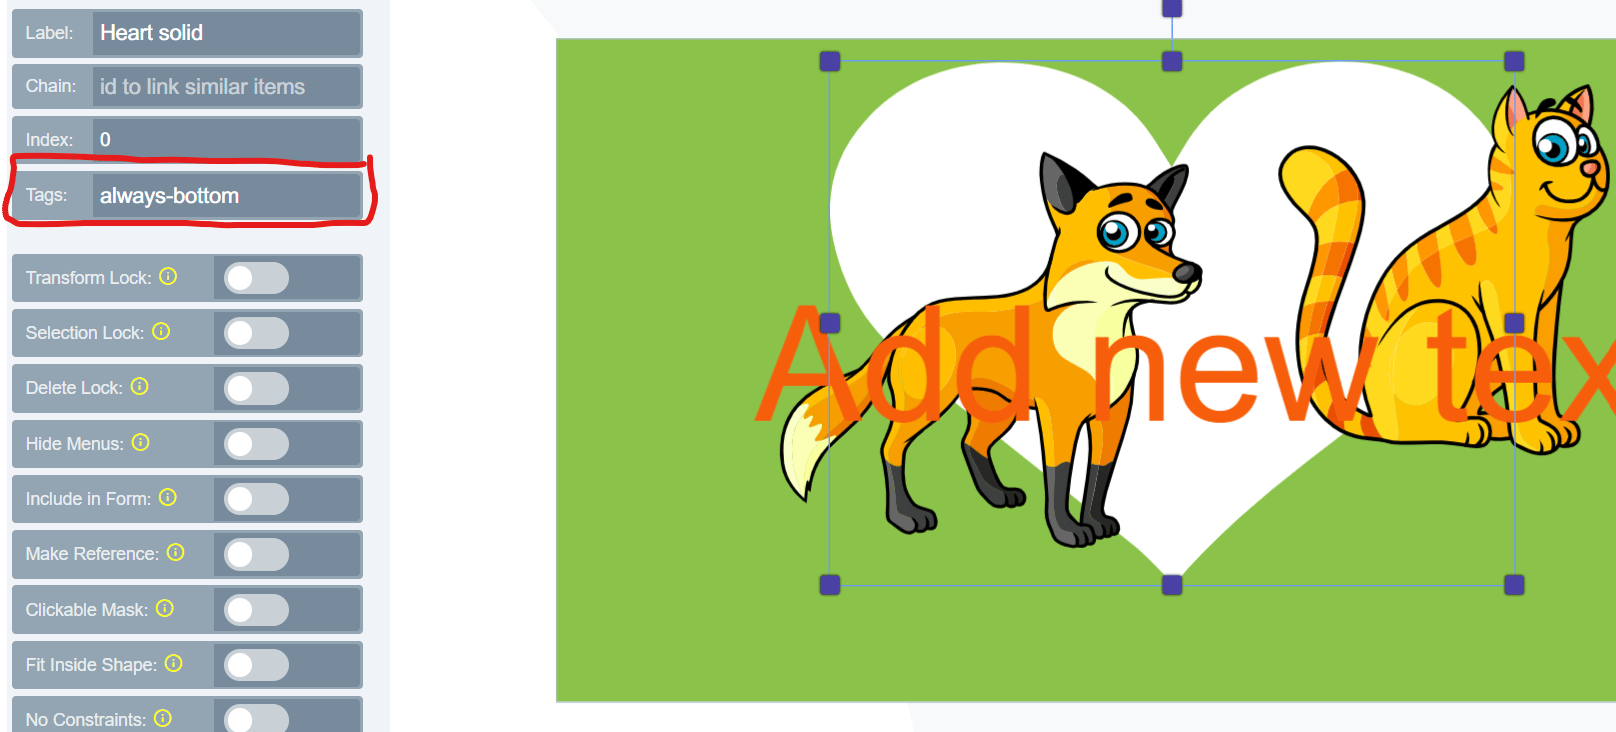
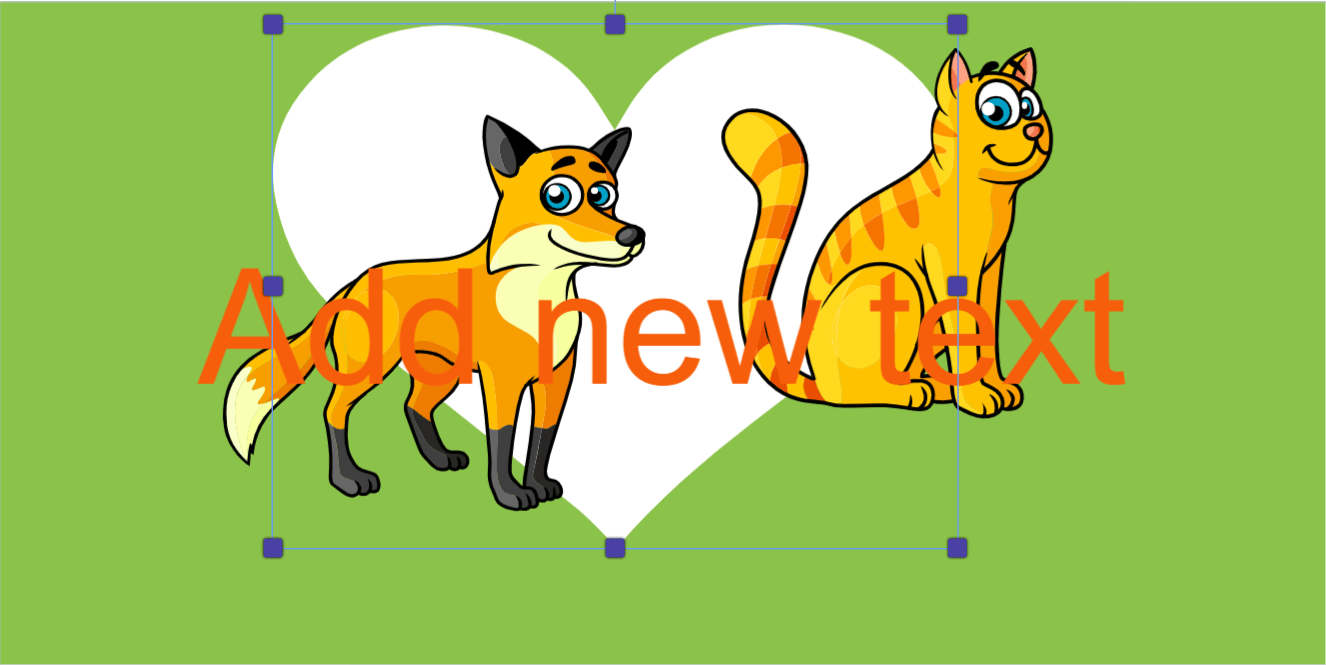
Show draw on canvas at the top
We had an issue with draw on canvas and elements that were set to always-top. The issue was that the shape drawn would not be displayed whilst in process yet the element on top would display throughout, so the user couldn’t actually see the shape that they were drawing until the drawing was completed. We’ve fixed this issue and the shape will now be displayed while the customer is drawing and will subsequently be moved to the back after the drawing is completed.That’s it for this week but please do check our PitchPrint Community Forum where we are running a teaching series on our amazing product features, unearthing some of our product hidden gems etc. so that our customers get the best value for their subscription.Customize button on Product Category
In the past the end user had to open a product page to be able to use PitchPrint to customise your products. We’ve now added this great feature on Wordpress that allows you to enable the customisation button to be displayed on the category page without having to navigate to the product page. Please have a look at the images below for reference: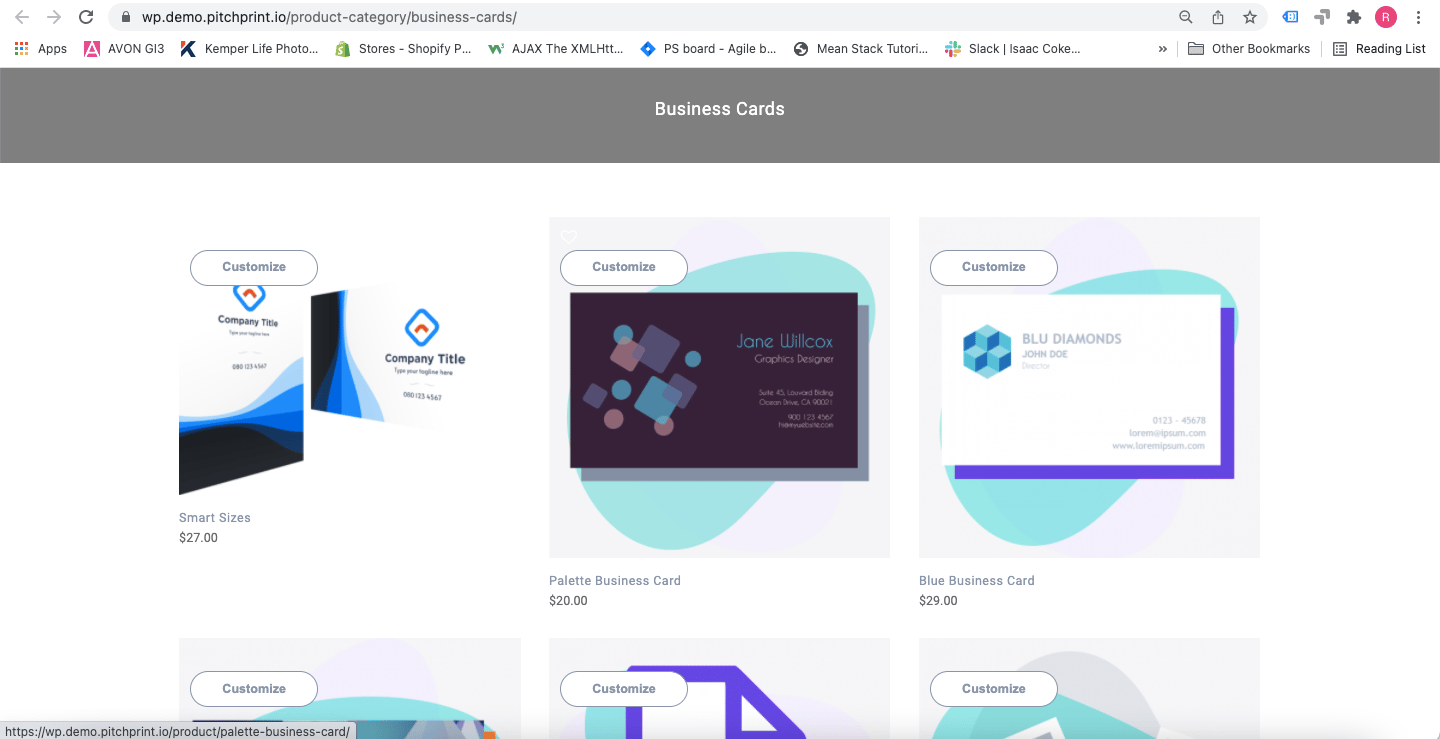
Bug fixes
Bug fixes
Drag and drop issue with text art
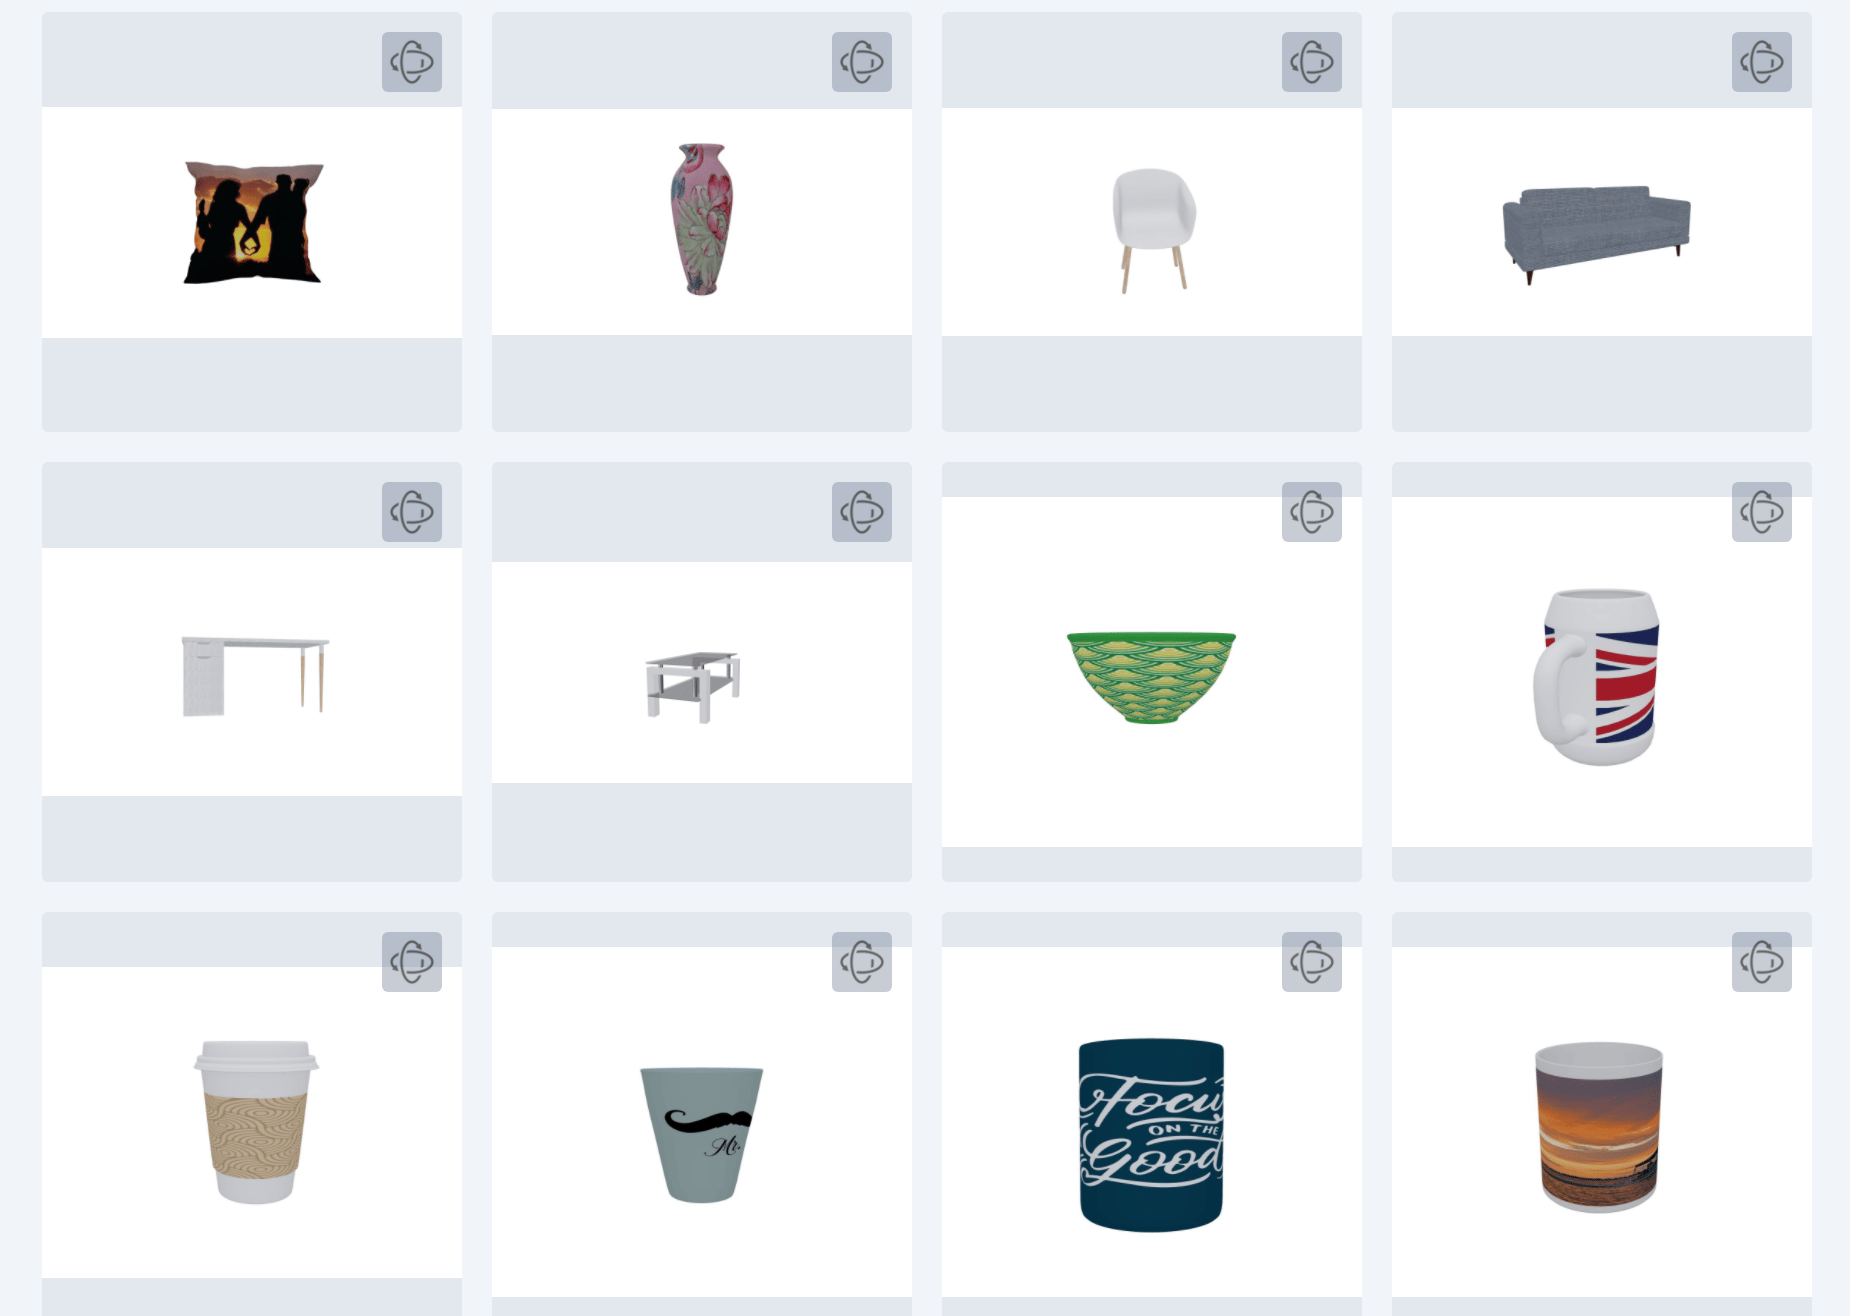
We had an issue where text arts could not be dragged and dropped onto the canvas, you could only click on a text art to add it to the canvas. We’ve fixed this issue and text arts can now be conveniently dragged and dropped as well as clicked to be added to the canvas.We’re in the process of updating our 3D Studio Library to make our models even more realistic refining them into something you can almost feel and touch. We’ve added quite a number of new models to offer more variety for you to choose from. Please go to https://admin.pitchprint.com/three and click add new model to see our collection of 3D models. Here are some of the models we recently added below: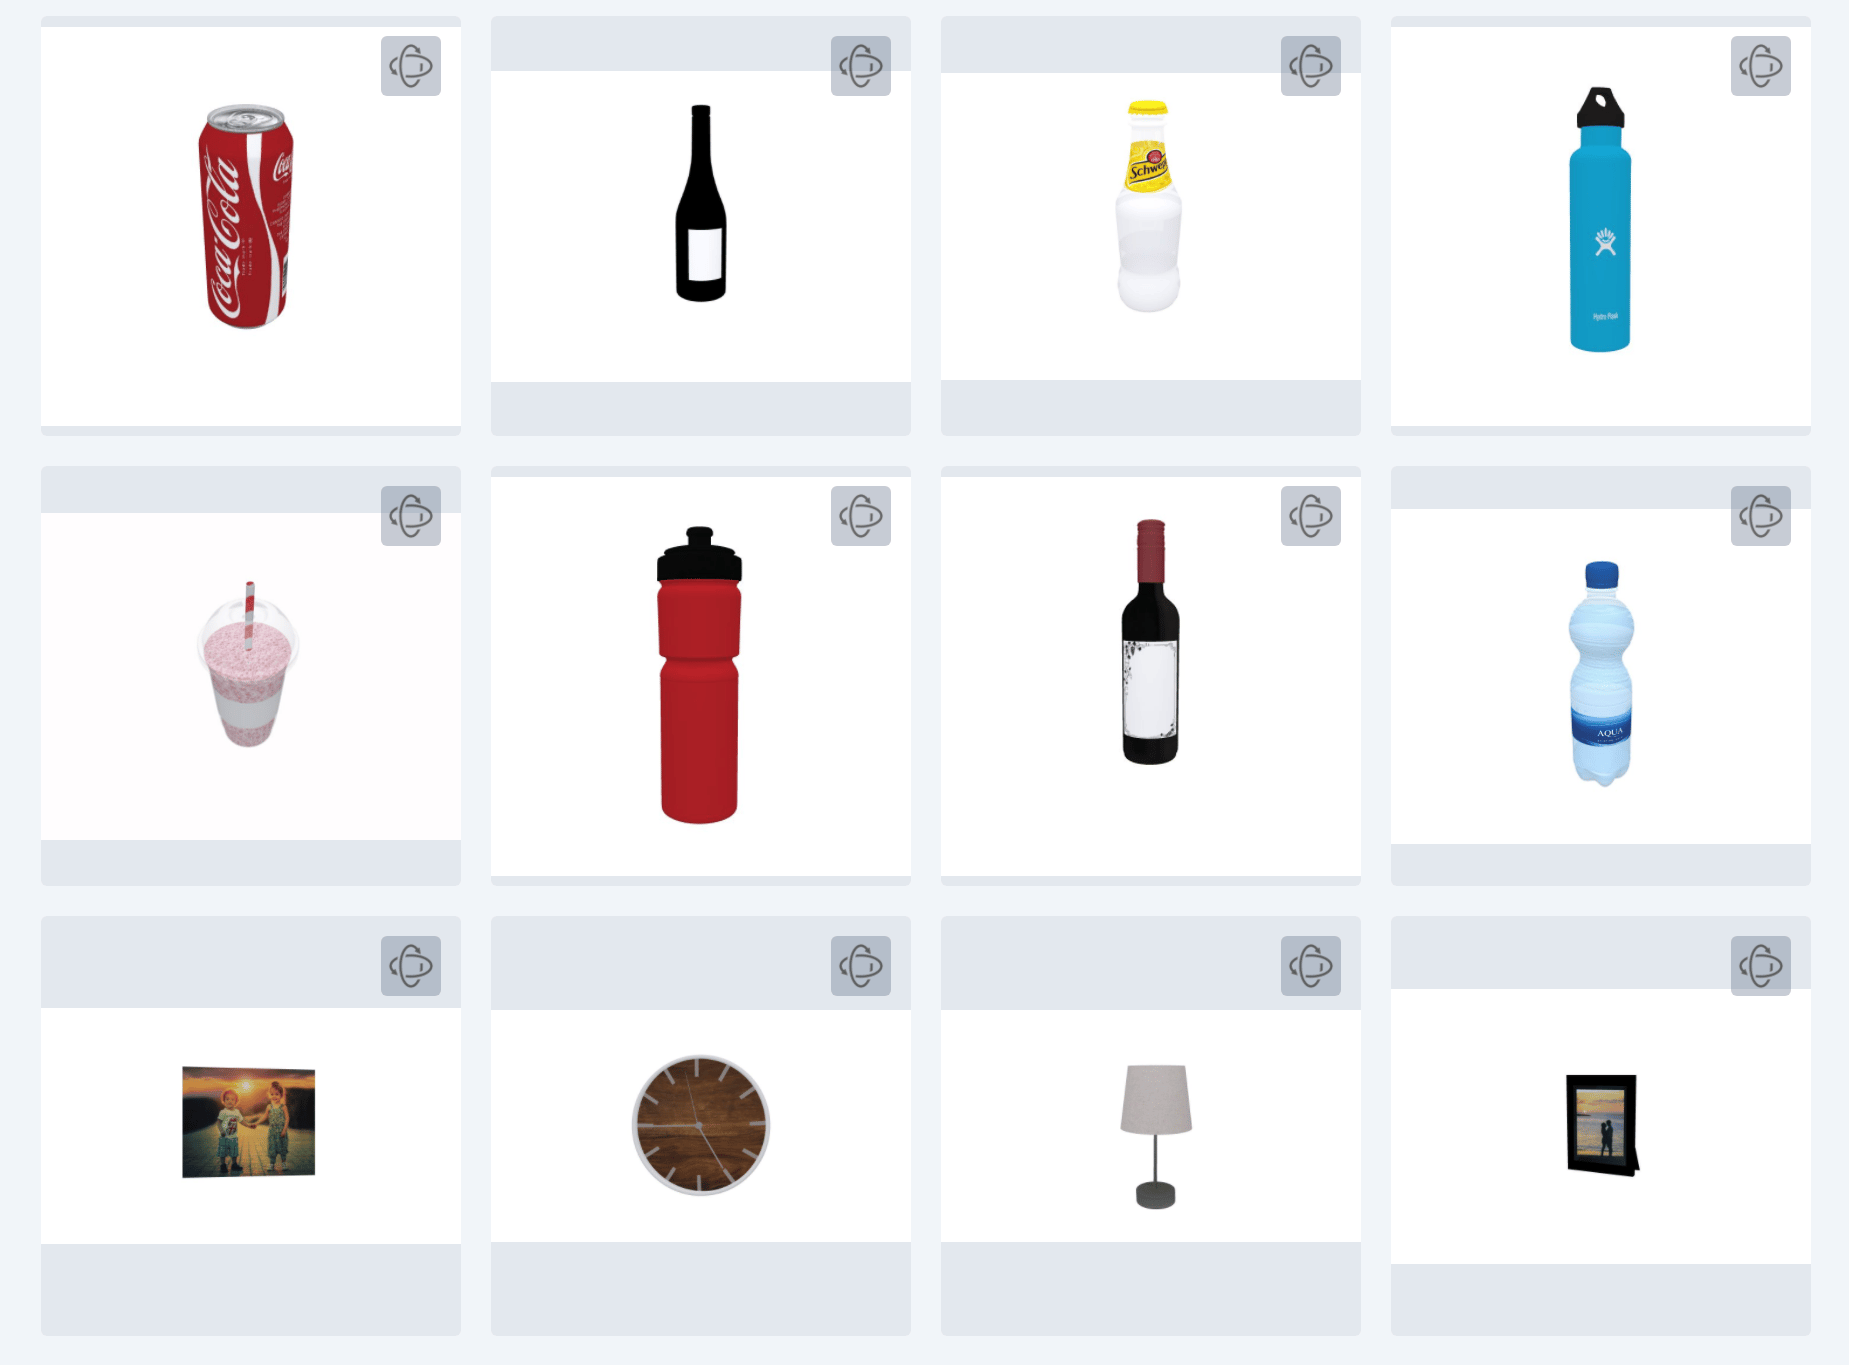
CategoryId in Bulk Configuration
In the past our customers had to use the PHP code fetch-design-categories from our documentation in order to get the CategoryId. We’ve now introduced another option of adding the CategoryId to the bulk configuration section in order to save you the time and effort of running PHP code whenever you need to get the categoryId also adding more variety for your convenience. Please have a quick look below: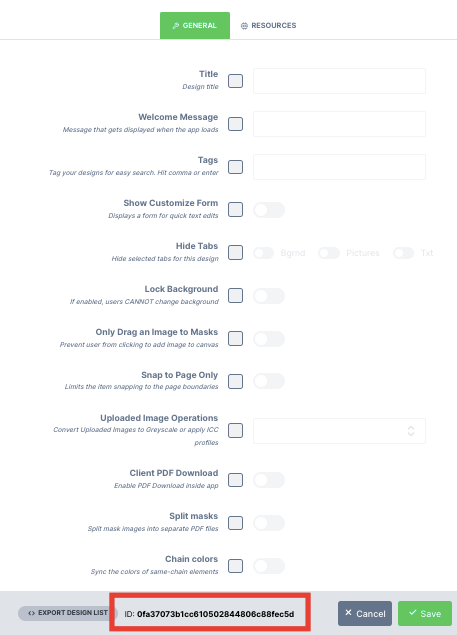
Minimum Font Size
We’ve also added a Minimum Font Size option in the design configuration settings. Now with this exciting new feature, you can set the minimum font for a design and the font will not be able to go below this value. Kindly refer to the screenshot below: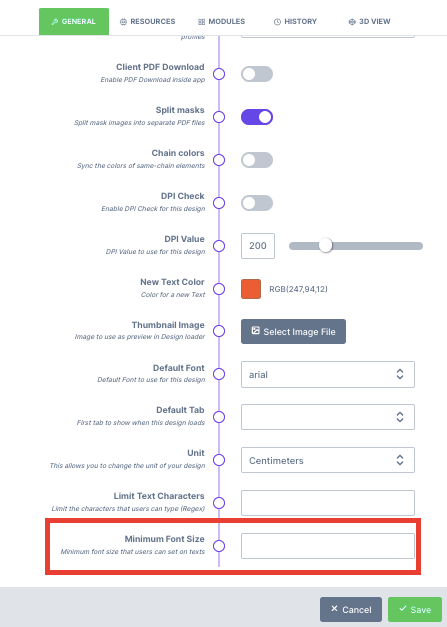
Bug fixes
Bug fixes
Roll up banner designs
We had an issue with importing designs from the roll up banner category. When these designs were imported and launched in the editor the background wouldn’t display. We have gone ahead and fixed this issue and the design will now display correctly as shown in the thumbnail.Preview button in import designs section
We had a minor glitch with the preview button in the import designs section. We’ve fixed this issue as well and you can now preview designs before importing them. Have a look at the below screenshot for reference: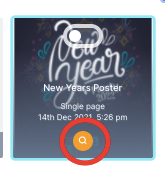
Disable Zoom on Mobile
We added a toggle switch for you to enable and disable zoom on mobile, you can find this switch in settings.Product Image API
We added some code on Wordpress to check if there’s a product image, if no product image is provided it will use the PitchPrint design as the default product image. You can enable this feature in Wordpress admin when assigning a design to a product. Please have a look below: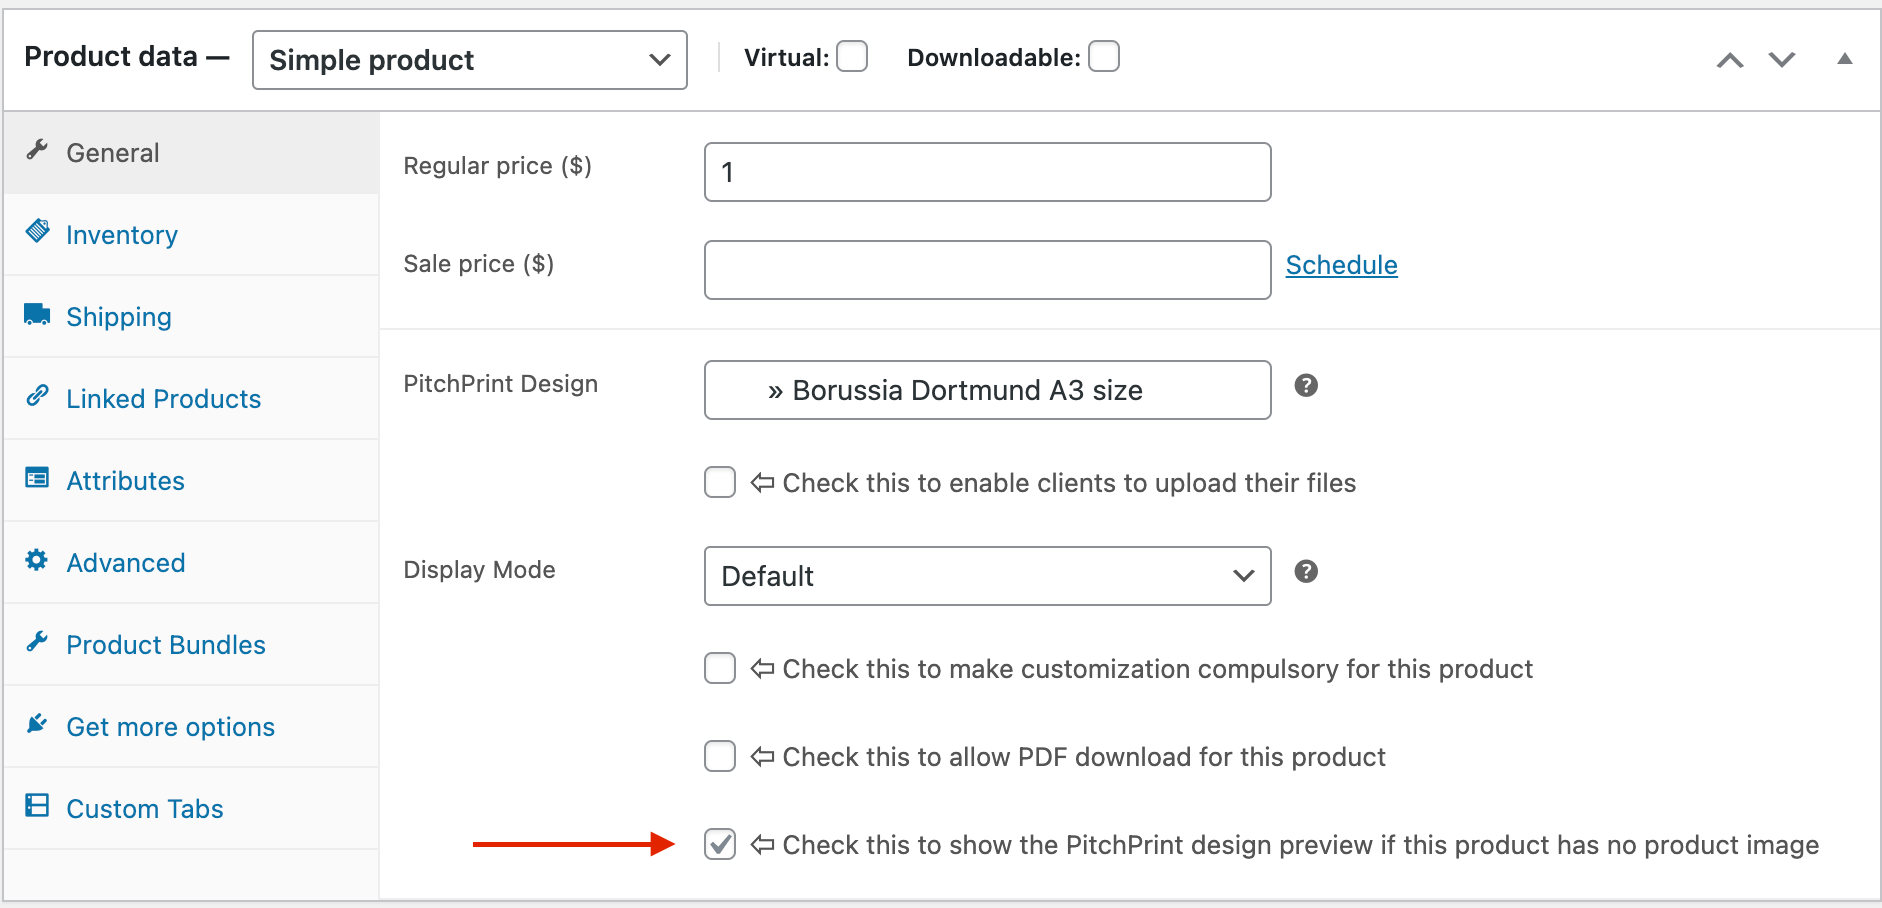
Bug fixes
Bug fixes