

1
Open the Options page
In your OpenCart Admin, navigate to Catalog -> Options
2
Add a new option
Click on the + sign to add a new Option to the store.
3
Name the option ppCanvasAdjustment
This will open the options configuration page as shown below. For the option name, provide “ppCanvasAdjustment” and for type, use “Select”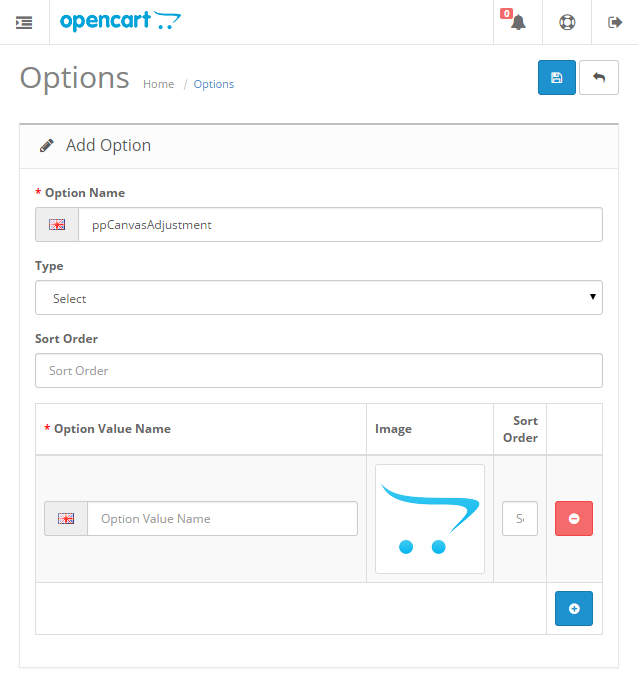
4
Add the preset option values
Click to add an Option Value. We will start with the preset values model. So enter in the exact preset options you have created in your Canvas Adjuster module, joining width and height with an “x”. So for width: 200, height:120, the Option Value name will be “200×120” without spacing. For this to work properly, make sure in your Canvas Adjuster module options, you have deselected “Clients can enter custom values” else if any value that is not exactly as specified in this option shows up, they will not be captured by the system. If you want to allow custom values as well as presets, then use the next model instead.
5
Or set up custom value ranges
For the custom values model, we will calculate pricing based on canvas area (width multiplied by height) in ranges. So for the above, 200 width by 120 height, we simply enter in a range that spans and covers certain values. 200 * 120 = 24000. So we will enter in “0-24000” of course there can’t be zero so you can make it “1-24000”. For the next range, that will be say “24001-36000”, then “36001-48000”. Simply use a hyphen to separate the ranges. Kindly note, these are simply examples and it all depends on the rate at which your product pricing changes with print or canvas area and all values are based on the design unit pre-defined in your design.
6
Save the new option
Ignore the sort order values. You can enter in more option values for other products as you wish as you will still need to assign option values to your products at a later stage. Save your new option
7
Add the option to your product
Next, we need to add this option to our product. Navigate to Catalog -> Products and edit the product you have previously assign the design with Canvas Adjuster. Click the Option tab and type in “ppCanvasAdjustment” in the option search box on the left. This should bring up the newly created option. Click to add it.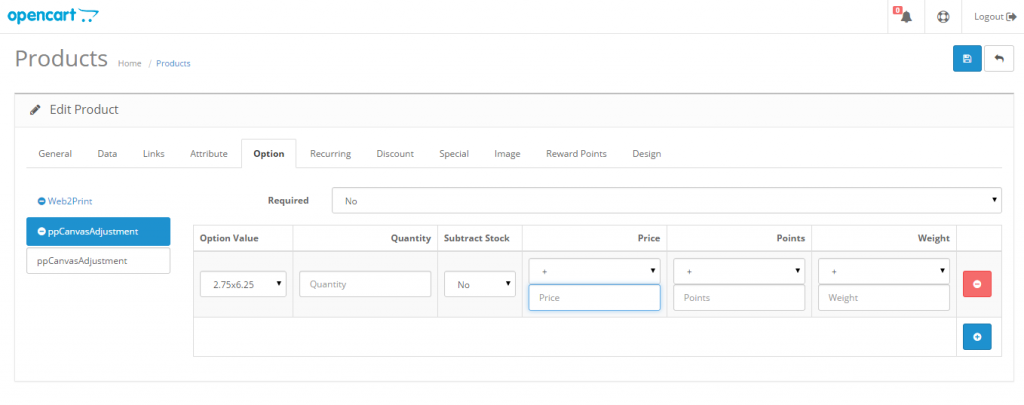
8
Set the option values and prices
Set Required to “No”. Click to add as many size option values as you want and adjust the Price, Weight and Points as desired for each. Make sure subtract stock is set to “No” as well as quantity greater than 0. Save the edited product.
9
Check the adjusted price
That is it! When an order is made, the price is adjusted based on your option values and the canvas setting your customer has selected.
Related articles
Canvas Adjuster Module
Enable and configure the Canvas Adjuster so customers can set canvas dimensions on a design.
Integrating Canvas Adjuster To A WordPress Store
Set up canvas-based pricing variations for the Canvas Adjuster in a WooCommerce store.