

1
Convert the shape into a path
To achieve this, select the shape you want to use for masking in Illustrator and convert it into a path. If you have non-touching parts, select them all and make sure they are flattened as one single element, not grouped.
2
Make a compound path
Select them and click Object > Compound Path > Make.
3
Save the file as SVG
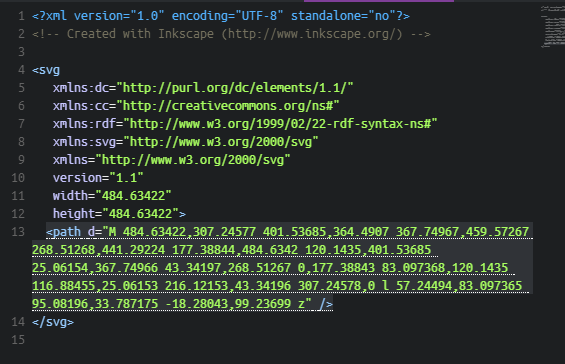
Then copy the new item and open your text editor. Paste into the text editor and save the file with a .svg extension. Check the code and ensure you see it as a single path node similar the image above.
4
Import the SVG into PitchPrint
Import same into PitchPrint and that should work as an Photo Mask.
Related articles
How to save your SVGs for use in PitchPrint
Export and save PitchPrint-optimized SVG files from Adobe Illustrator.
How to create a clickable mask
Turn a shape into an image placeholder customers can click to insert images.
Custom Mask
Use any shape as a clipping area to trim content in the final PDF.
How to Add a Placeholder image for Mask Shapes
Set a guide image that prompts clients to click a mask shape.