

1
Create a new Zap in Zapier
Register or login to Zapier and click the Make a Zap button on the top right hand corner. A Zap is simply a workflow link you create between apps on Zapier. You can read more here
2
Open the Zap creation dashboard
That should take you to the Zap creation dashboard.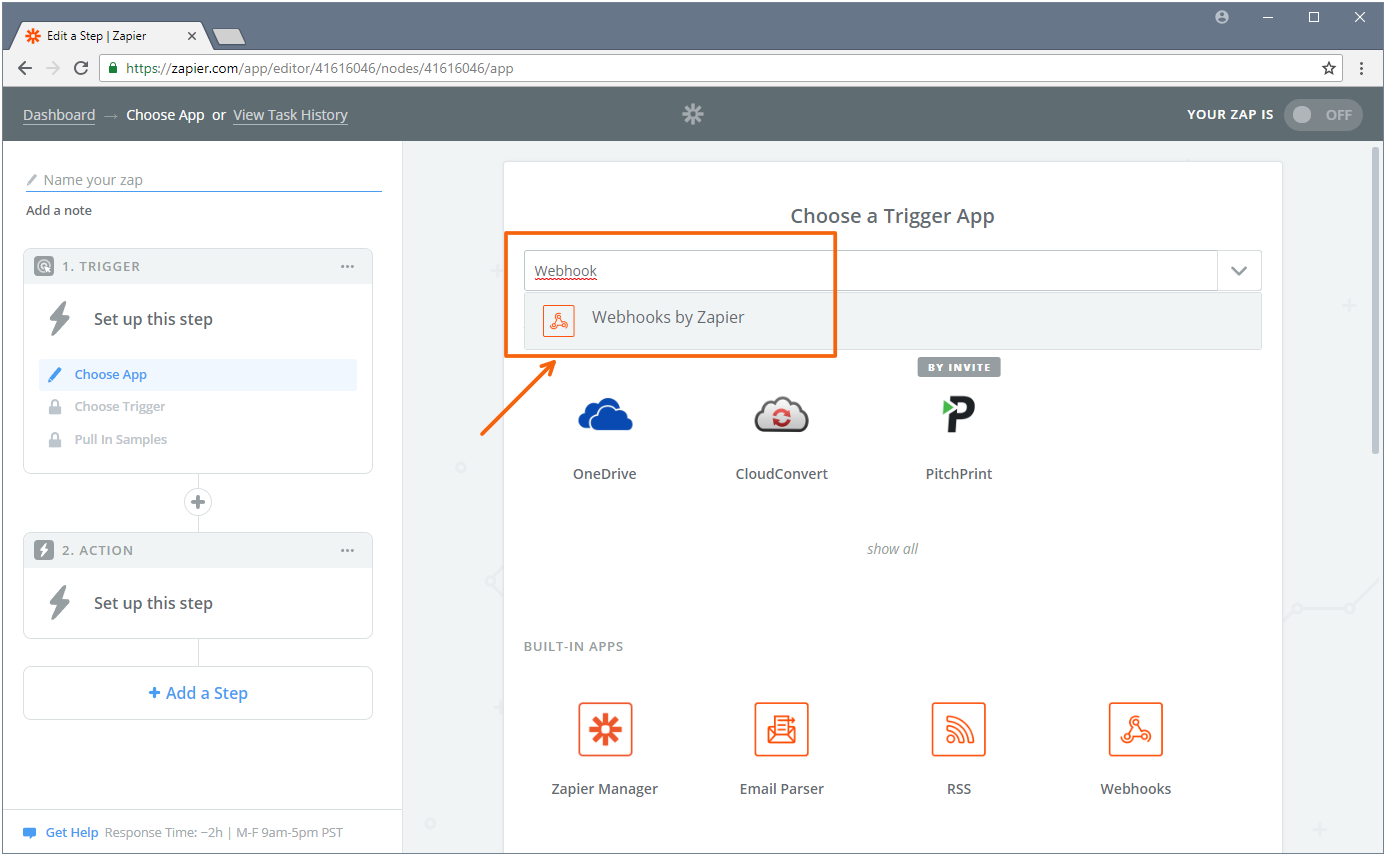
3
Search for the Webhooks by Zapier app
In the search box, type in “webhook” and select the Webhooks by Zapier app.
4
Select Catch Hook
Select Catch Hook in the next form that appears and click the Save + Continue button: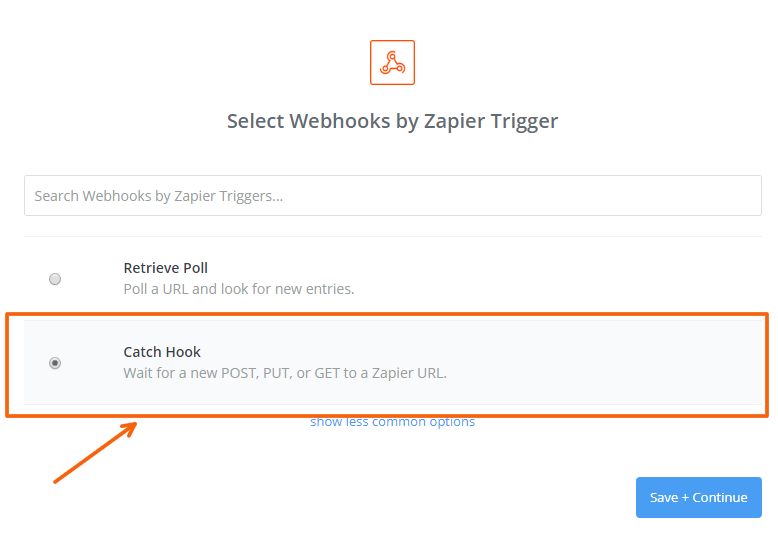
5
Set the Child key to products
For the Child key, type in products and continue: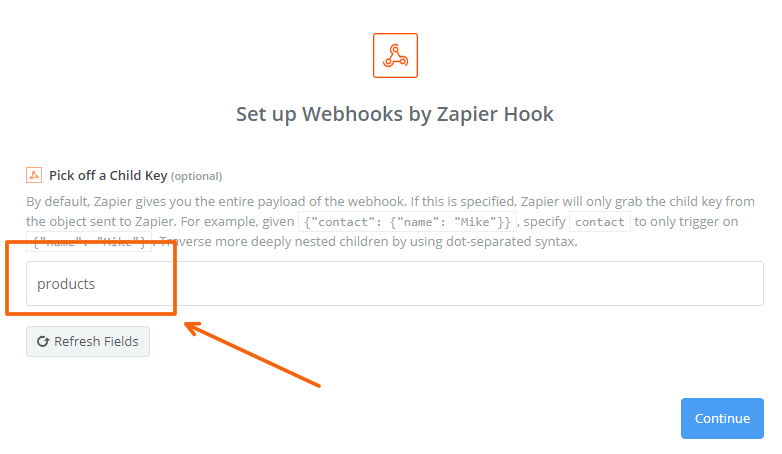
6
Copy the webhook URL Zapier generates
In the next screen, Zapier will give you a unique URL. This is the URL that PitchPrint will invoke once an action occurs in your PitchPrint account. So, copy this URL into your clipboard by clicking the Copy button.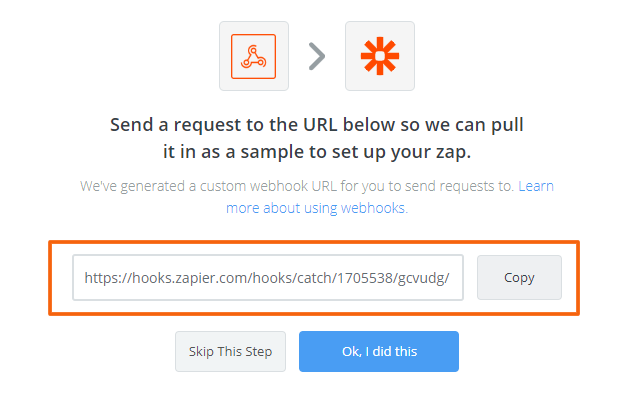
7
Open your PitchPrint webhooks page
Now, we need to put this URL in PitchPrint and then trigger an event so that PitchPrint sends a sample data to Zapier. To do this, navigate to your PitchPrint’s Webhooks admin page.
8
Add a webhook endpoint
Click the Add a webhook Endpoint button on the top right hand corner.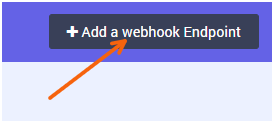
9
Paste the URL and pick the order completed event
This should give you a dialog box. In the dialog, paste the URL you copied from Zapier and for events, select the option “An Order is Completed” and Submit the button. This simply creates a Webhook trigger that gets called whenever an order status changes to completed.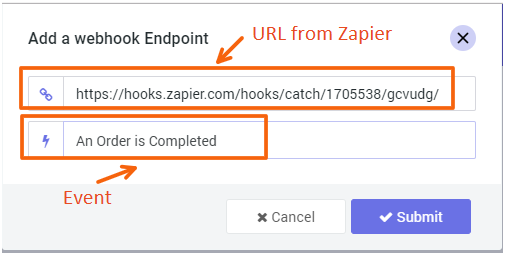
10
Trigger a completed order to send sample data
Now we need to trigger that event to send sample data to Zapier. To do this, you need to create an order and complete that order or open an existing order in your store, change its status to other than completed, save and then change it back to completed and save. Any time an order’s status changes to “completed”, that event gets sent to PitchPrint and in turn to Zapier through the URL you have provided. Also note, the order should be one with a PitchPrint customization.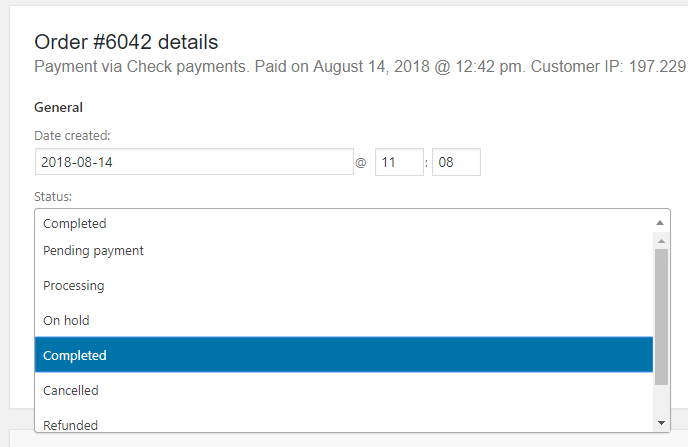
11
Confirm Zapier received the sample data
Once that step is completed, let’s go back to our Zapier and click the button “Ok, I did this”. Zapier will check its log based on that URL if any event was sent. Then we should see sample data as shown below: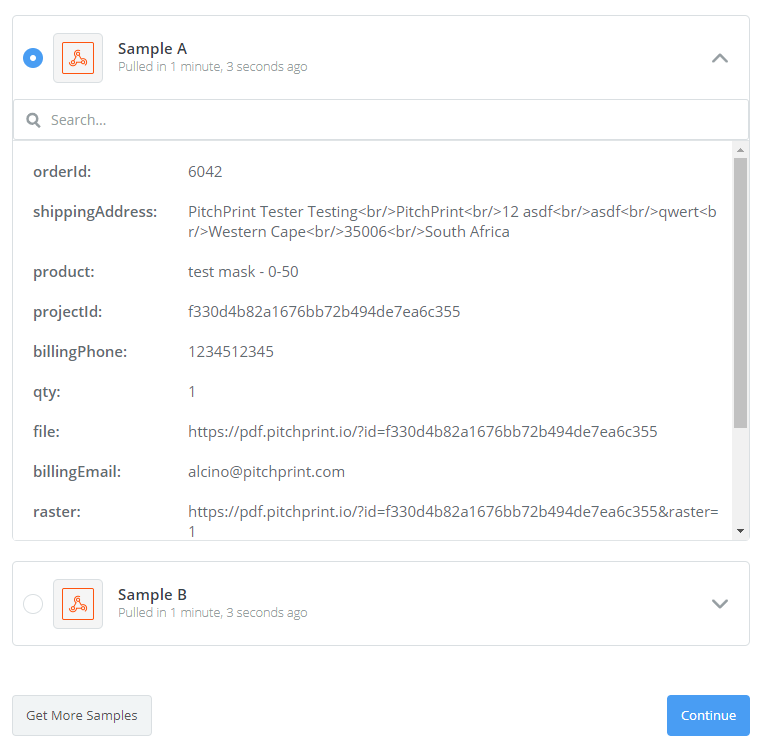
12
Review the captured order fields
As you can see, it captures the orderId, the shipping address, product and link to the pdf file, named “file”. In the next step, we are going to use this data to send an email. So click the Continue button.
13
Choose Email by Zapier as the action app
In the prior steps, we have simply created an event trigger in Zapier. It means we are able to get data into Zapier from PitchPrint. Next, we need to choose what to do with that data. We can send it as email, save it to Dropbox etc.. there are many things we can do with this data. We can even post process the PDF file using other apps. So since we decided to send an email with it, next thing is to Choose an Action App. In the search box, type in email and select Email by Zapier.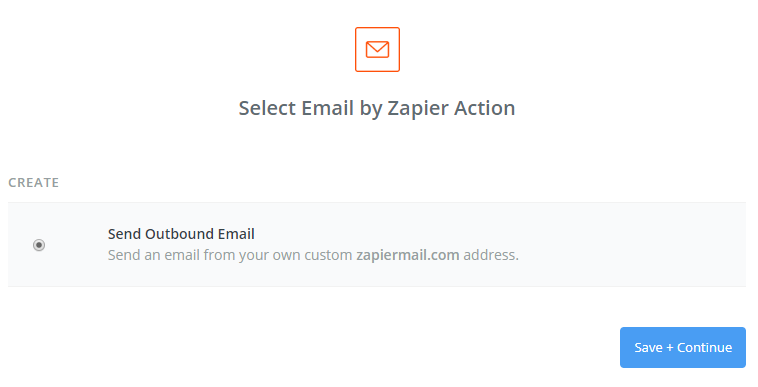
14
Select Send Outbound Email
With the Send Outbound Email option selected, let’s click the Save + Continue button.
15
Set the destination email address
In the next step, we need to prepare how our email will be processed. For the To field, enter in an email address, this is the destination email address, assuming your printer has one, you can try or send to yourself and see.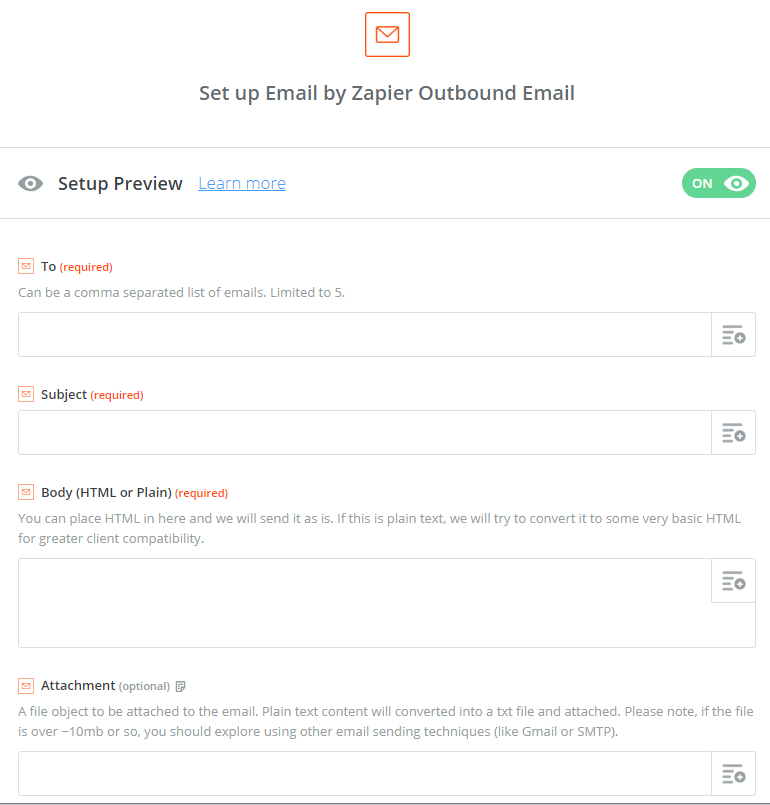
16
Attach the PDF file to the email
Type in a subject and email body. And for the attachment, we want to attach the PDF file, please note you can also choose to attach a JPEG or PNG file, so you need to click the plus icon on the right edge of the Attachment field and select the file option from there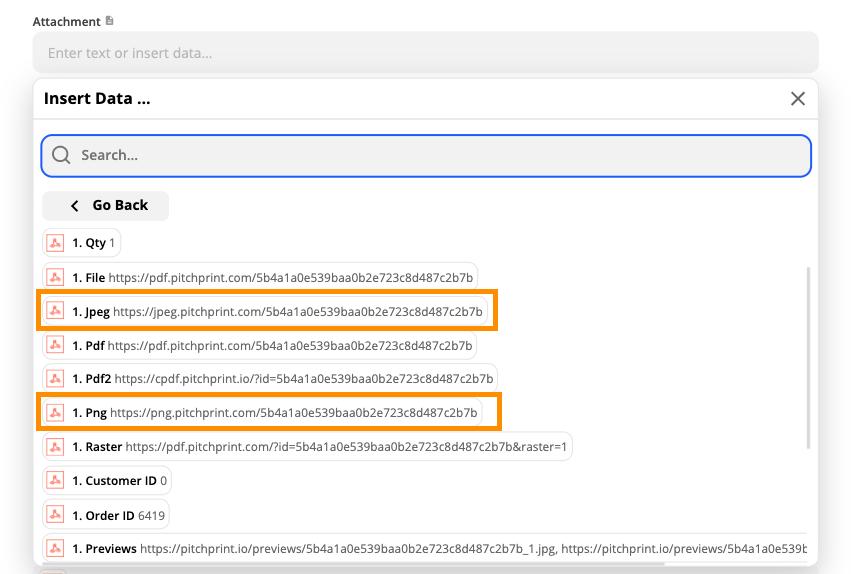 So that will be our attachment to the email, the PDF File. Click the continue button and you will see details of the email that is about to be sent.
17
Send a test email
Click the Send test Email by Zapier and wait a few minutes to receive the email. You should receive a successful screen as shown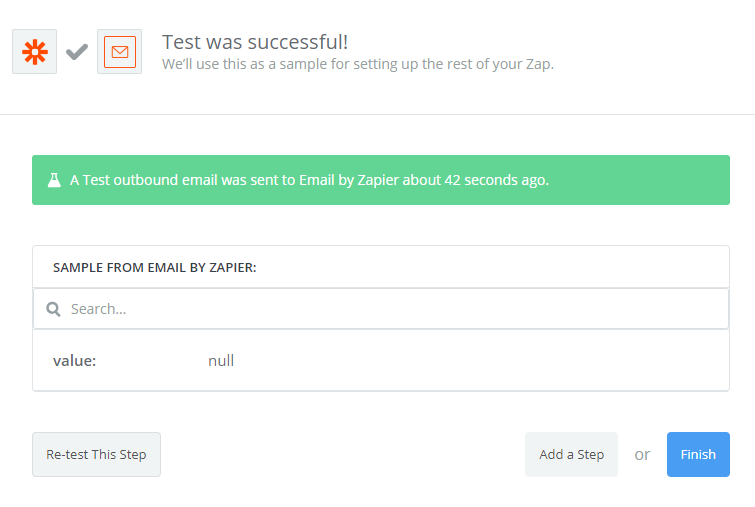
18
Finish and turn on the Zap
Click the Finish button and finally Turn ON your Zap.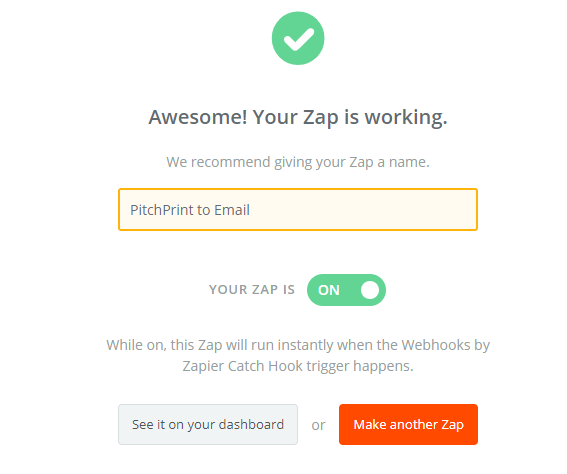
19
Confirm automated delivery
Your Zap should now run automated. Whenever a status completed even it triggered from an order in your store, an email with the PDF attached will be created and sent to the email address you have provided in your Zap.
Related articles
PDF Rendering
How PitchPrint generates print-ready PDFs and its distiller engines.
Ghostscript Arguments
Customize PDF output with Ghostscript conversion arguments.
PDF Uploader
Upload PDF files and convert them into editable designs.