

Let’s get a reference to our UI elements
First, we need to get our elements into variables so we can use them later on, as follows:Initialize PitchPrint client
Next, we need to initialize the PitchPrint client class, which will return us a reference () to interact with the app..Define our event handler functions
These are the two functions we are going to define to handle the app validated and project saved events..Attach events to the app
So here, we are going to attach events to the PitchPrint client class, such that if any of the events happen, it calls out functionsTest our app
Ok, so far so good, you can test the page in a browser and see that it loads properly and that there are no errors thrown. To test, click the Launch Designer button. And your designer should show like this. If not, please open a ticket and let us know.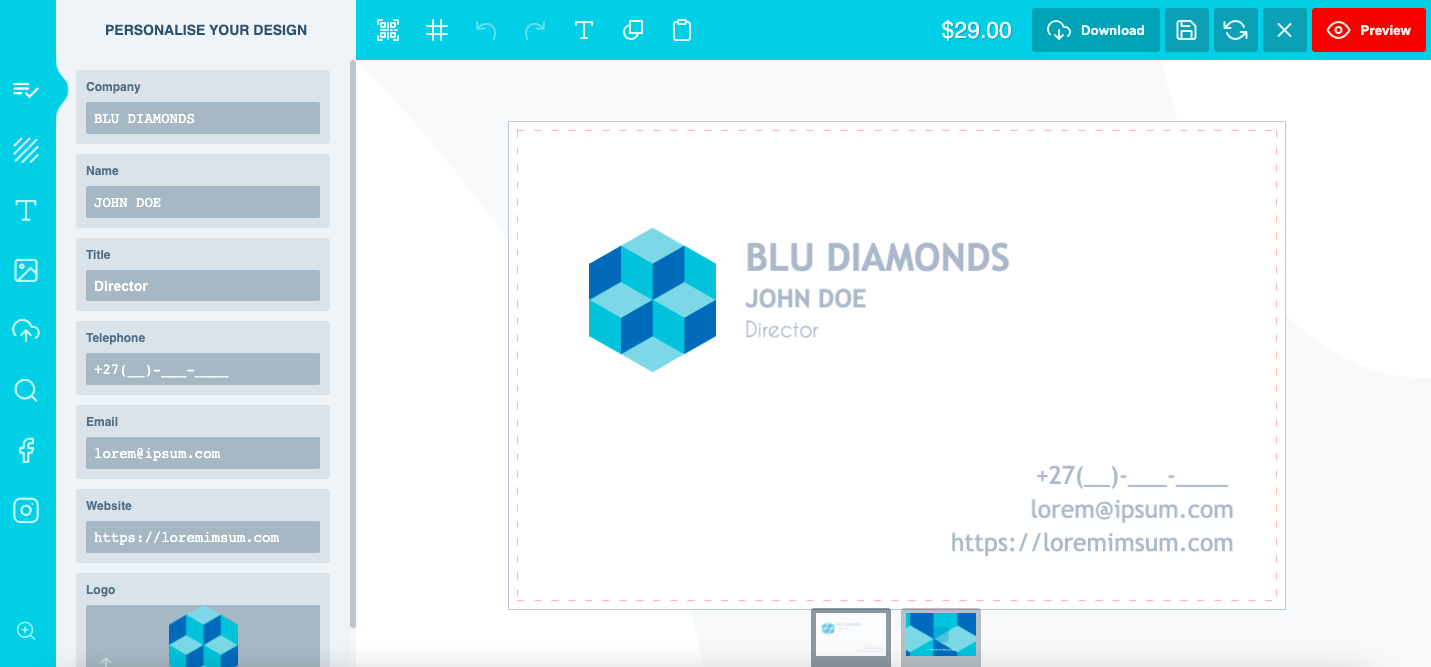 Using your own credentials
For simplicity, we have used our own demo-credentials, that is API key and designId. Now you should change these to yours, the one you created in the previous topic.
So in the variables definition, change the apiKey value to your own apiKey.
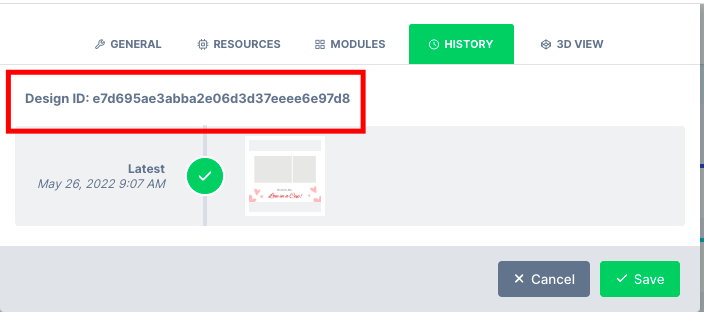
To get your designId, navigate to the designs page. Open the configuration tab of the design which you would like to use. Go to the history tab and you’ll see the designId please have a look below for reference:
Using your own credentials
For simplicity, we have used our own demo-credentials, that is API key and designId. Now you should change these to yours, the one you created in the previous topic.
So in the variables definition, change the apiKey value to your own apiKey.
To get your designId, navigate to the designs page. Open the configuration tab of the design which you would like to use. Go to the history tab and you’ll see the designId please have a look below for reference:
Related articles
Introduction
Overview of what PitchPrint is and how it works.
Generate your auth keys
Create the API and Secret keys needed to integrate the app.
After Save
Handle the project-saved event and use the returned data.
My Account - Saved Projects
Add a My Account page so customers can view their saved projects.