> ## Documentation Index
> Fetch the complete documentation index at: https://pitchprint.com/llms.txt
> Use this file to discover all available pages before exploring further.
# Webhooks
> Register an endpoint that PitchPrint calls on file upload, project save or order completion, then test it with a Mailgun bin.
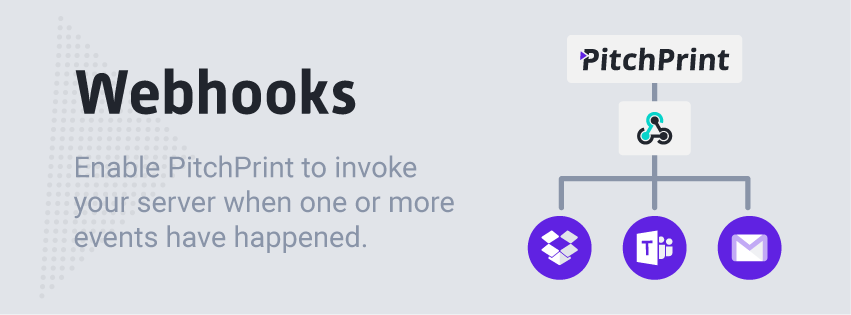 The Webhooks enables you to easily integrate and connect the PitchPrint platform to your outside platforms. For instance, you may want to send the PDF file of a project directly to your printer, or save all your user's uploaded pictures in your DropBox or Google Drive. A Webhook makes this possible by invoking your specified external URL whenever an even happens on the PitchPrint platform along with the details of such an event for further actions.
The following events are captured at the moment:
1. \*\*File Upload
\*\*
2. \*\*Project Saved
\*\*
3. **Order Completed**
These events gets dispatched to your registered URL the instance they happen. So the first step is finding what and where to send the events to. Most industrial printers with automation have means of ingesting jobs into their workflows via APIs but for a test, we can use a past bin to see what data is being purged by the platform after which you can try out our Zapier integration. Zapier is an awesome platform you can use to connect to other platforms using Webhooks. We will cover a detailed tutorial on that later on. But for start, you can test with Mailgun bin.
Navigate to the [Mailgun bin](http://bin.mailgun.net), this will create a new bin for you. A bin like this can be used to easily test API calls on the fly and discarded once finished. Once you navigate there, it will give you a URL, a new bin for this test. Copy that URL. ***Don't close this tab***
Next, you navigate to your [PitchPrint Admin](https://admin.pitchprint.io/webhooks) and click the Webhooks link on the left.
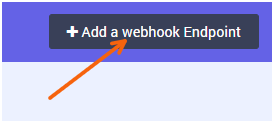
Click the button to **Add a Webhook Endpoint**:
The Webhooks enables you to easily integrate and connect the PitchPrint platform to your outside platforms. For instance, you may want to send the PDF file of a project directly to your printer, or save all your user's uploaded pictures in your DropBox or Google Drive. A Webhook makes this possible by invoking your specified external URL whenever an even happens on the PitchPrint platform along with the details of such an event for further actions.
The following events are captured at the moment:
1. \*\*File Upload
\*\*
2. \*\*Project Saved
\*\*
3. **Order Completed**
These events gets dispatched to your registered URL the instance they happen. So the first step is finding what and where to send the events to. Most industrial printers with automation have means of ingesting jobs into their workflows via APIs but for a test, we can use a past bin to see what data is being purged by the platform after which you can try out our Zapier integration. Zapier is an awesome platform you can use to connect to other platforms using Webhooks. We will cover a detailed tutorial on that later on. But for start, you can test with Mailgun bin.
Navigate to the [Mailgun bin](http://bin.mailgun.net), this will create a new bin for you. A bin like this can be used to easily test API calls on the fly and discarded once finished. Once you navigate there, it will give you a URL, a new bin for this test. Copy that URL. ***Don't close this tab***
Next, you navigate to your [PitchPrint Admin](https://admin.pitchprint.io/webhooks) and click the Webhooks link on the left.
Click the button to **Add a Webhook Endpoint**:
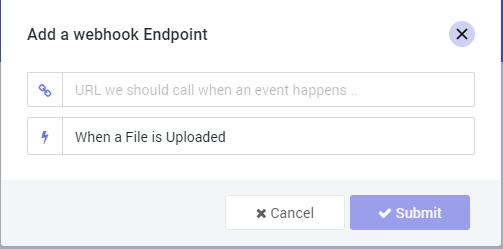
 In the dialog that appears, paste in the URL you copied from the bin in step 1. This is where PitchPrint will send the event to when the selected action happens. And for action, you can leave it at **When a File is Uploaded**: And submit the form.
 Now open any product page with PitchPrint design ***associated with your current apiKey***. Launch the editor and upload a file.
Once the upload completes, do refresh your bin tab you opened in step 1. You should find all the details of the just uploaded file with a tiny thumbnail, a low res version of the file if it's an image, as well as the raw file and some other details.
Now that is what PitchPrint sends to your registered Endpoint for file uploads and with this, you can download the file and perhaps use it in further processing. Same goes with Project-saved events or Order Processed. The link to the PDF file is made available and can be captured immediately, emailed to your printer or even saved on your drive. We will cover a more in-depth integration of this feature using the [Zapier Webhook](https://zapier.com/apps/webhook/integrations) in our tutorials. In it, we will send the file as an email attachment as well as save them in a Dropbox folder.
**Please Note**: If you're using Shopify and your order completed webhook is not working, this is due to an issue on the Dawn Theme. Should you encounter this issue please contact [support@pitchprint.com](mailto:support@pitchprint.com).
**Update:** Article on Sending PDF Files to Email can be [found here](/docs/tutorial/automation-sending-your-pdf-file-to-printer)
This documentation is built and hosted on [Mintlify](https://mintlify.com), a developer documentation platform.
Now open any product page with PitchPrint design ***associated with your current apiKey***. Launch the editor and upload a file.
Once the upload completes, do refresh your bin tab you opened in step 1. You should find all the details of the just uploaded file with a tiny thumbnail, a low res version of the file if it's an image, as well as the raw file and some other details.
Now that is what PitchPrint sends to your registered Endpoint for file uploads and with this, you can download the file and perhaps use it in further processing. Same goes with Project-saved events or Order Processed. The link to the PDF file is made available and can be captured immediately, emailed to your printer or even saved on your drive. We will cover a more in-depth integration of this feature using the [Zapier Webhook](https://zapier.com/apps/webhook/integrations) in our tutorials. In it, we will send the file as an email attachment as well as save them in a Dropbox folder.
**Please Note**: If you're using Shopify and your order completed webhook is not working, this is due to an issue on the Dawn Theme. Should you encounter this issue please contact [support@pitchprint.com](mailto:support@pitchprint.com).
**Update:** Article on Sending PDF Files to Email can be [found here](/docs/tutorial/automation-sending-your-pdf-file-to-printer)
This documentation is built and hosted on [Mintlify](https://mintlify.com), a developer documentation platform.