> ## Documentation Index
> Fetch the complete documentation index at: https://pitchprint.com/llms.txt
> Use this file to discover all available pages before exploring further.
# Text Styles
> Group text and shapes into reusable emblems, then export them to a category so they appear in the Text panel of your designs.
Text Styles are design elements consisting of grouped items that can be used and customized in different designs. This, unlike individual elements, are grouped to form an emblem that can be used as is. They are more like mini-designs.
**Update:**
Single text elements can now be exported as a Text Style. So step 2 below is optional
 Admin can create a Text Style while creating or editing their designs. To create a Text Style, simply add your Text and Shapes *(images do not work properly at this time)* following this process:
Add Text and Shape to form a coherent design on the canvas and group select them.
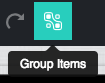
Group them together by clicking the Group icon ***(Update: If the item is a text on the canvas, you can export it without grouping)*** :
Admin can create a Text Style while creating or editing their designs. To create a Text Style, simply add your Text and Shapes *(images do not work properly at this time)* following this process:
Add Text and Shape to form a coherent design on the canvas and group select them.
Group them together by clicking the Group icon ***(Update: If the item is a text on the canvas, you can export it without grouping)*** :
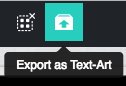
 Once they have been grouped, look at the secondary menu list and you will find the export Text Style icon enabled:
 Click this to pop open the dialog for exporting Text Styles as shown:
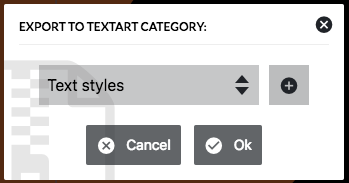 You can click the plus sign to create a new category or you can export to the selected category, Now click 'Ok'.
Your new Text Style should appear in the Text Panel when you load any of your designs assigned to a product.
Few thoughts to bear in mind when creating your Text Styles:
1. Keep it simple and less cluttered as customers might need to edit them.
2. Use only a combination of shapes and texts. It takes to long to load images.
3. Make use of fonts that will be available for that design. If the font is not loaded for a particular design, then the app will resort to default fonts.
4. TextBox does not scale well in grouped items so kindly use default TextArea only.
5. Be creative!
## Related articles
Create a Text Style while building or editing your designs.
Choose between standard, text-wrapping, and curved text box formatting options.
Upload your own custom TTF or Woff font files to expand the fonts available to customers.
Add Google Fonts directly from within the design editor.
This documentation is built and hosted on [Mintlify](https://mintlify.com), a developer documentation platform.
You can click the plus sign to create a new category or you can export to the selected category, Now click 'Ok'.
Your new Text Style should appear in the Text Panel when you load any of your designs assigned to a product.
Few thoughts to bear in mind when creating your Text Styles:
1. Keep it simple and less cluttered as customers might need to edit them.
2. Use only a combination of shapes and texts. It takes to long to load images.
3. Make use of fonts that will be available for that design. If the font is not loaded for a particular design, then the app will resort to default fonts.
4. TextBox does not scale well in grouped items so kindly use default TextArea only.
5. Be creative!
## Related articles
Create a Text Style while building or editing your designs.
Choose between standard, text-wrapping, and curved text box formatting options.
Upload your own custom TTF or Woff font files to expand the fonts available to customers.
Add Google Fonts directly from within the design editor.
This documentation is built and hosted on [Mintlify](https://mintlify.com), a developer documentation platform.