> ## Documentation Index
> Fetch the complete documentation index at: https://pitchprint.com/llms.txt
> Use this file to discover all available pages before exploring further.
# Sticky Items
> Use the always-top and always-bottom tags to pin an item to the front or back of the layer stack no matter what customers add later.
This **Layer Priority** feature allows you to manage the visual "depth" of any element on your canvas. By utilizing this setting, you can ensure that specific assets stay exactly where they belong in the visual stack, regardless of the order in which other items are added.
Think of your design as a series of stacked layers. Normally, the most recently added item sits on top, but this feature allows you to override that rule:
* **The Top-Most Layer (Foreground):** Enabling this option "pins" an element to the absolute front of your design. It will perpetually float above all other content—even if you add new images or text later. This is ideal for logos, watermarks, or decorative frames that should never be hidden.
* **The Bottom-Most Layer (Background):** This option anchors an element to the very back of the canvas. It serves as a permanent foundation, ensuring that every other item you add to the project sits on top of it. This is perfect for background textures or base templates.
### Setting an Element to "Always on Top"
To ensure a specific item (such as a logo or frame) remains at the very top of the layer stack by default, follow these steps:
Click on the **Item** on the canvas to open its settings.
Navigate to the **Tags** section within the item properties.
Type `always-top` into the Tag field.
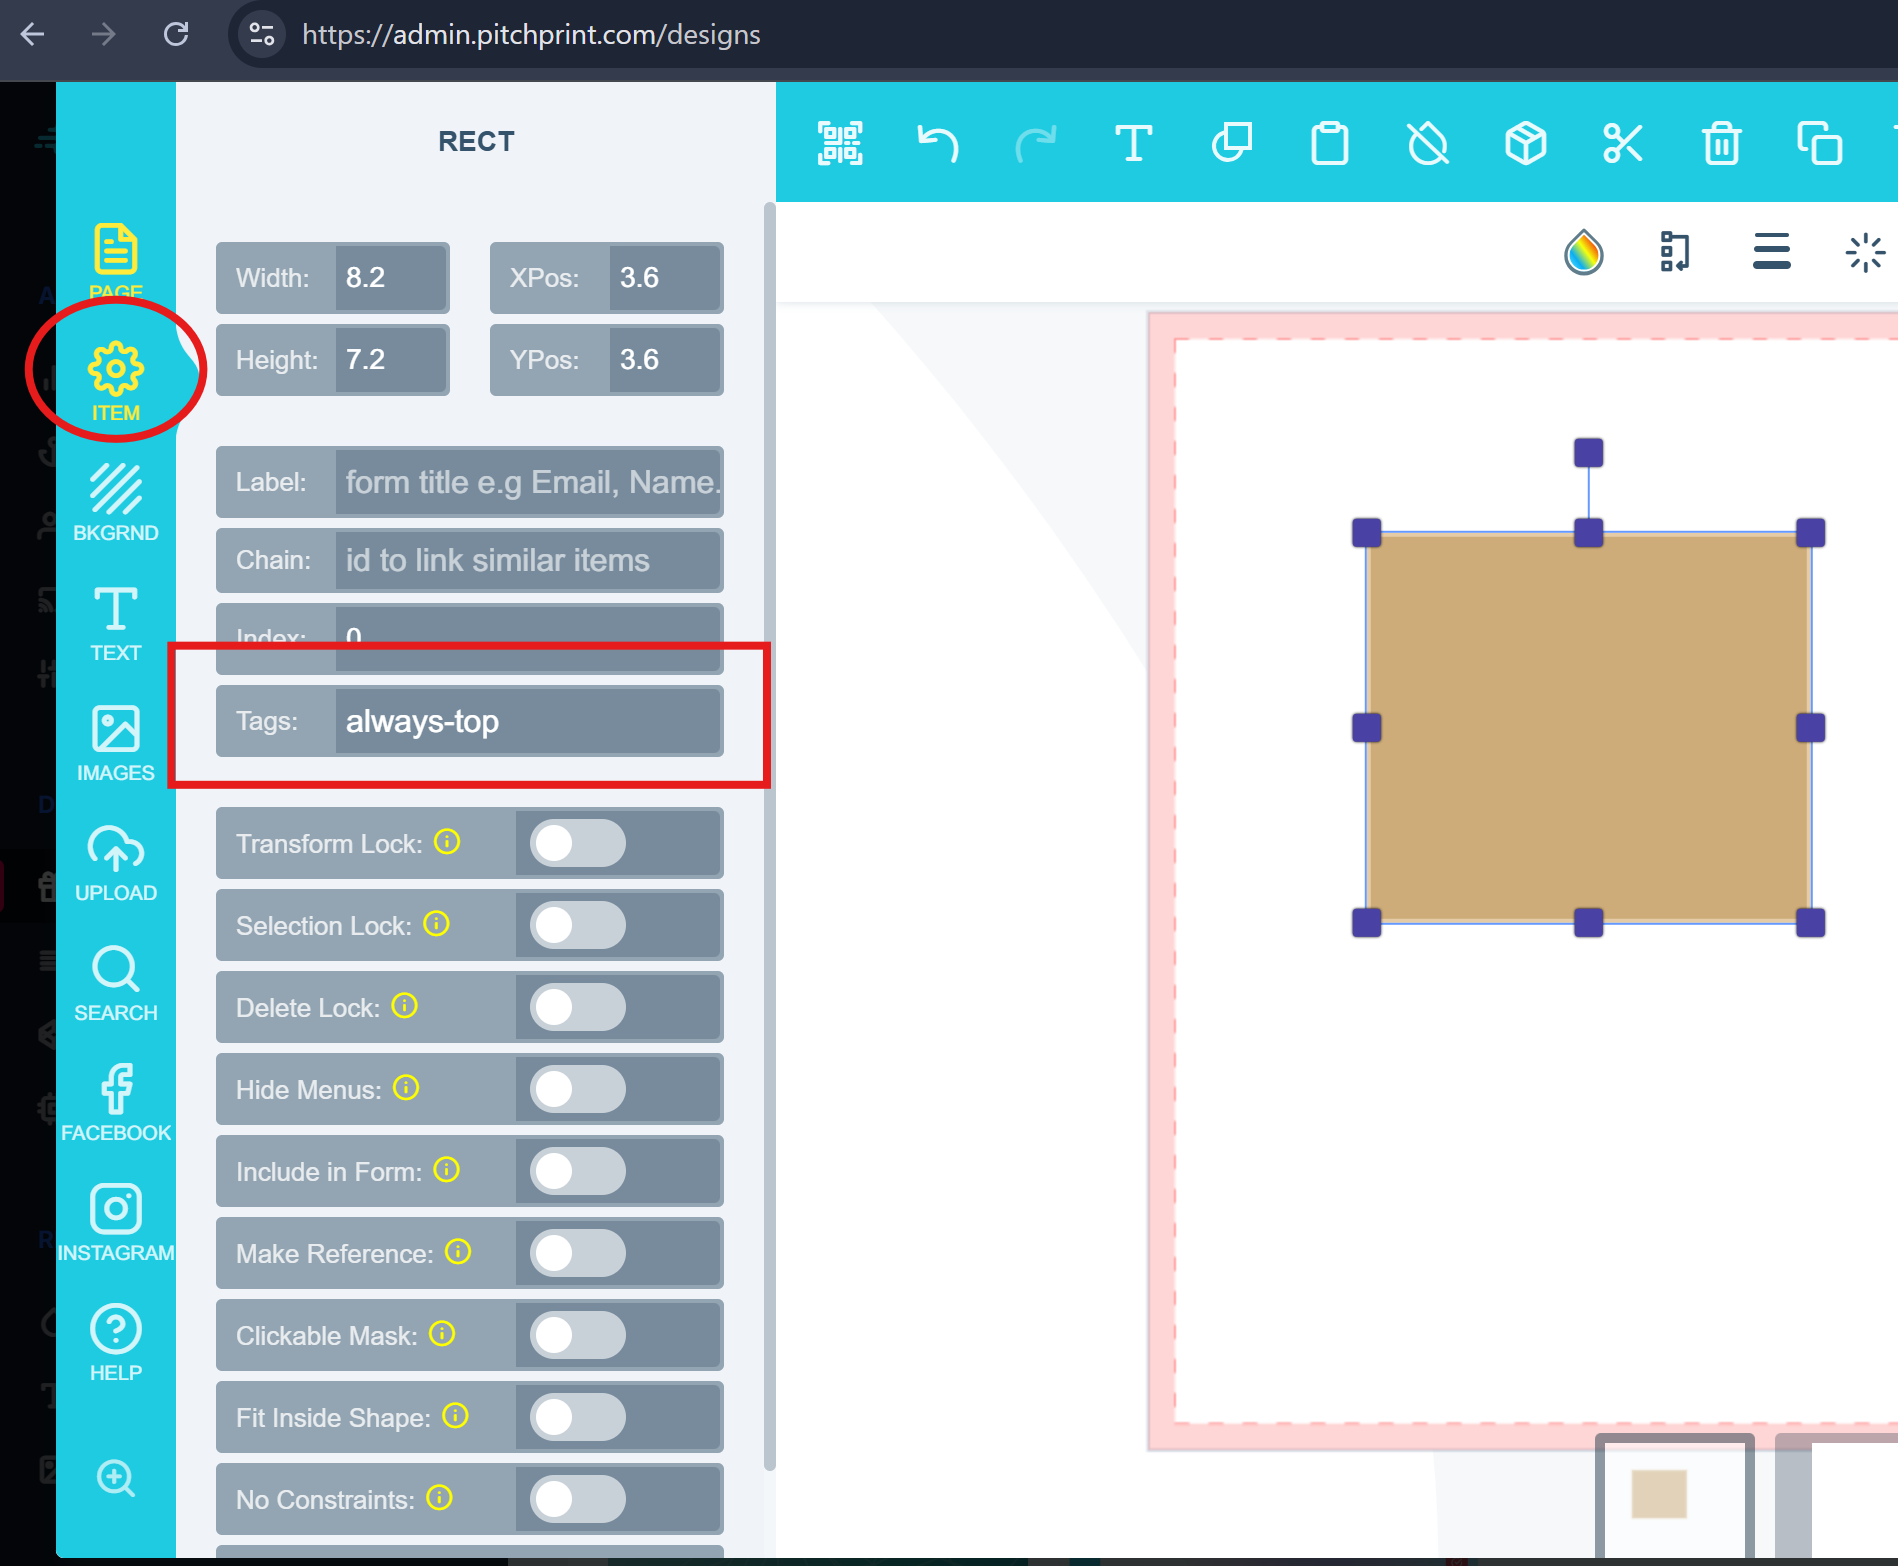 By applying this tag, the element will automatically stay in the foreground, even as customers add new images or text to the design.
### Setting an Element to "Always on Bottom"
To ensure a specific item (such as a background texture or base template) remains anchored to the very back of the layer stack, follow these steps:
Click on the specific element on your canvas to open its properties.
Locate the **Tags** field within the **Item** settings panel.
Type `always-bottom` into the field and save your changes.
By applying this tag, the element will automatically stay in the foreground, even as customers add new images or text to the design.
### Setting an Element to "Always on Bottom"
To ensure a specific item (such as a background texture or base template) remains anchored to the very back of the layer stack, follow these steps:
Click on the specific element on your canvas to open its properties.
Locate the **Tags** field within the **Item** settings panel.
Type `always-bottom` into the field and save your changes.
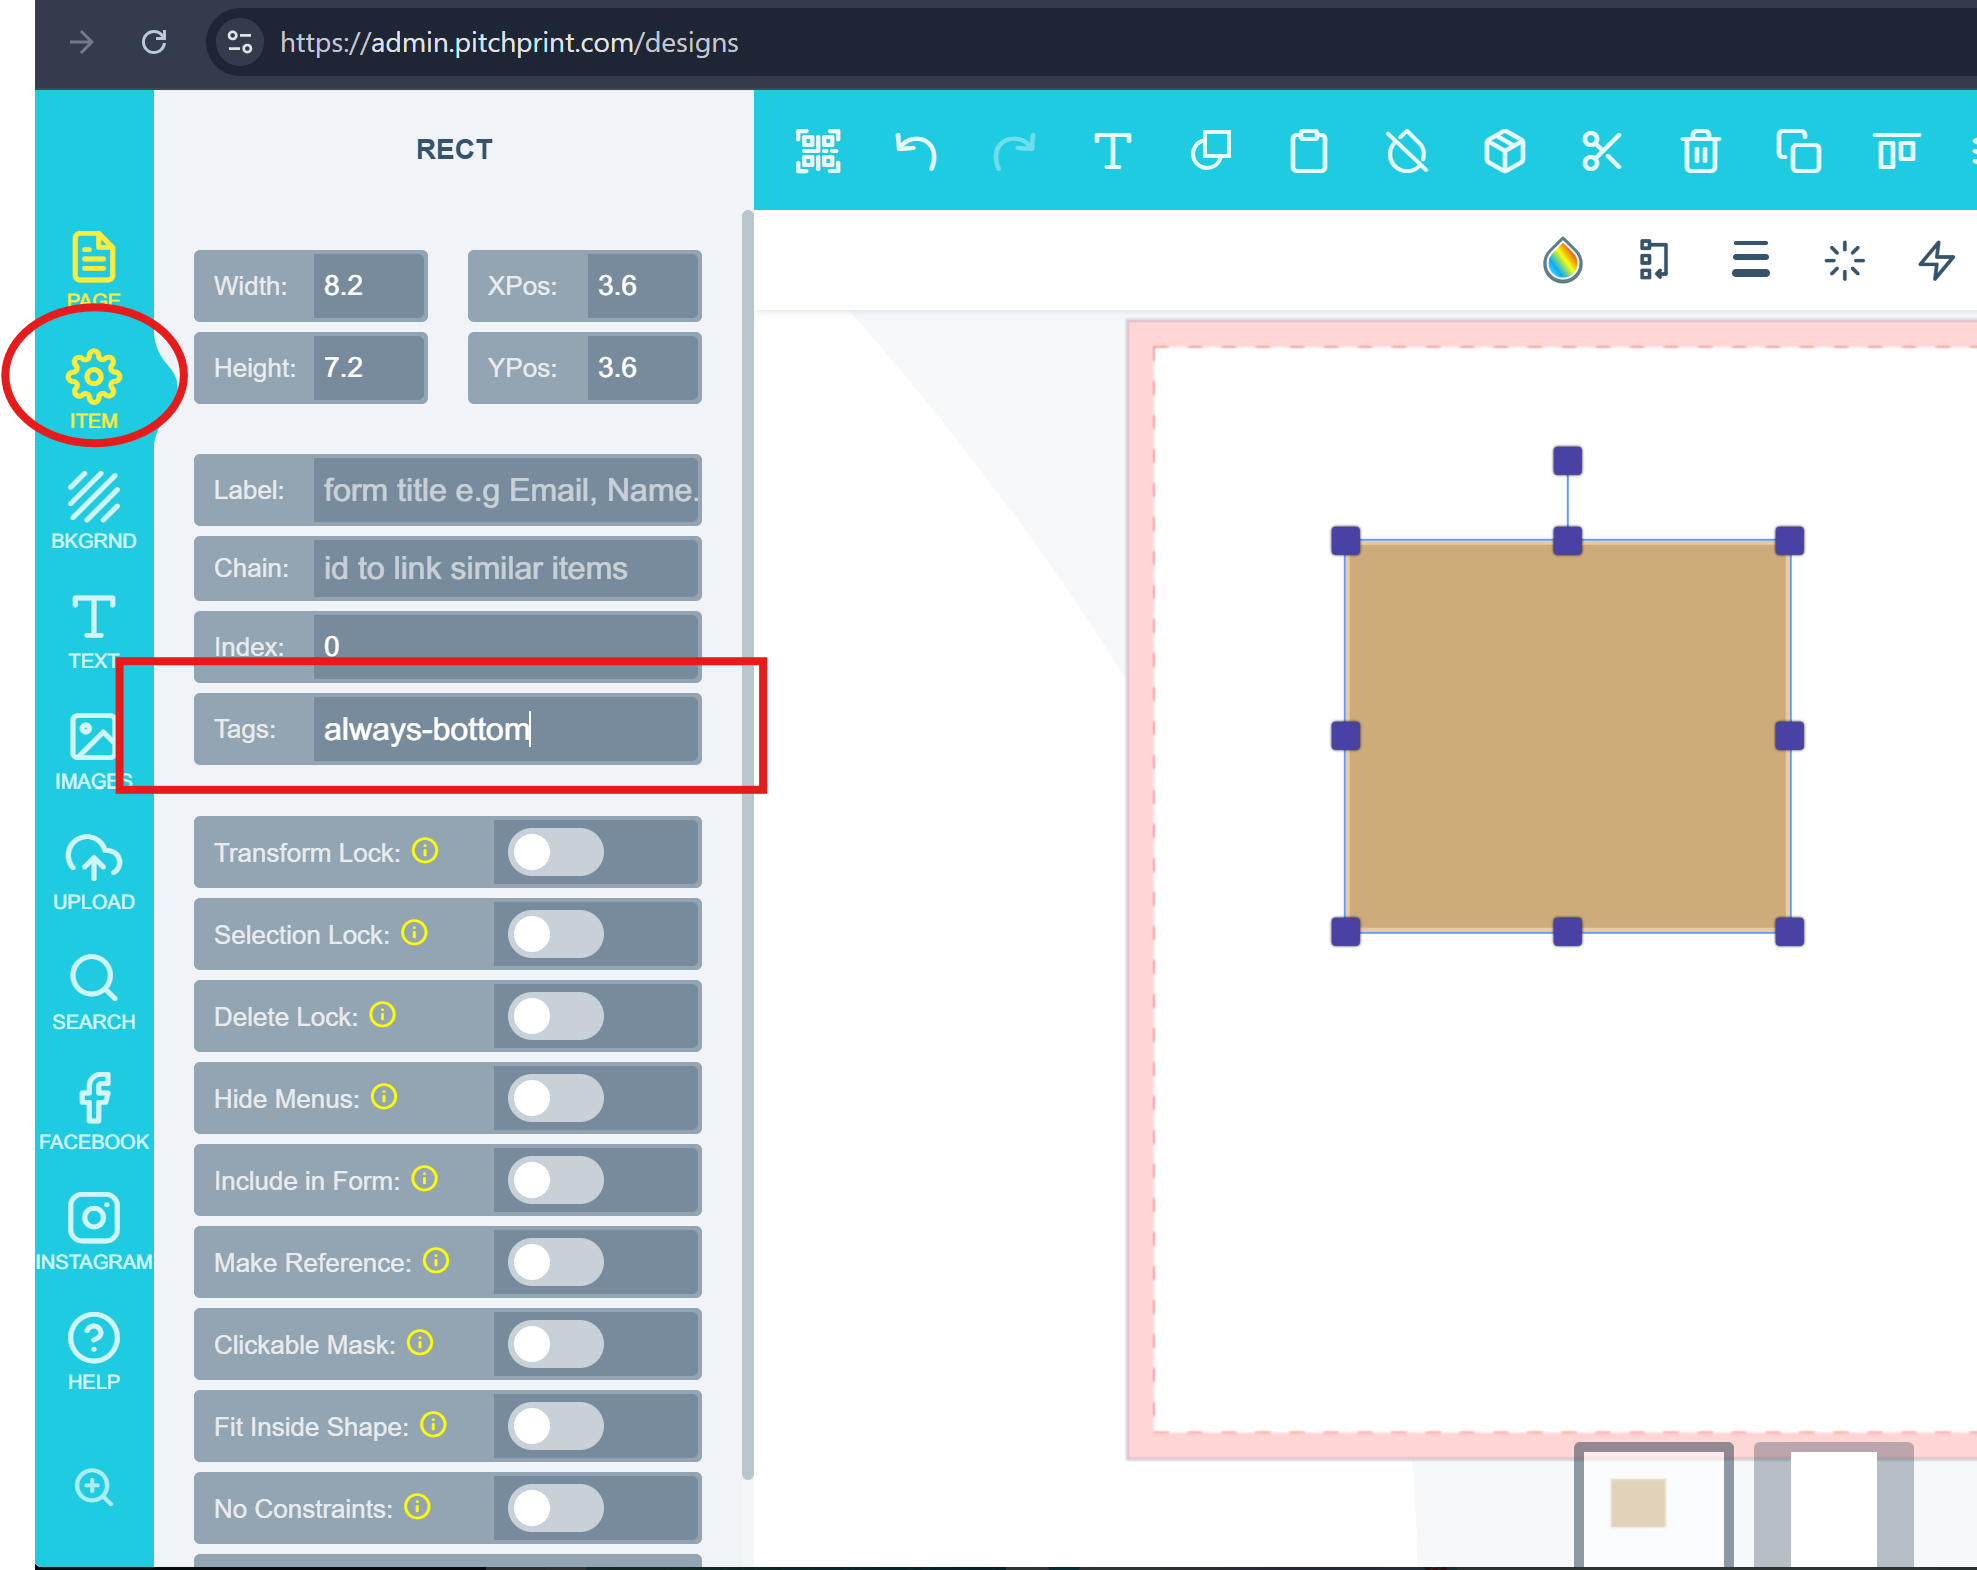 By applying this tag, the element will function as a permanent background. Any new photos, text, or shapes added by the user will automatically appear in front of this item.
If you experience any issues, please contact [**support@pitchprint.com**](mailto:support@pitchprint.com) for assistance.
This documentation is built and hosted on [Mintlify](https://mintlify.com), a developer documentation platform.
By applying this tag, the element will function as a permanent background. Any new photos, text, or shapes added by the user will automatically appear in front of this item.
If you experience any issues, please contact [**support@pitchprint.com**](mailto:support@pitchprint.com) for assistance.
This documentation is built and hosted on [Mintlify](https://mintlify.com), a developer documentation platform.