> ## Documentation Index
> Fetch the complete documentation index at: https://pitchprint.com/llms.txt
> Use this file to discover all available pages before exploring further.
# Photo Print Module
> Sell photo prints in three modes - paper type selection, bulk ordering or vintage designs - and configure the sizes and papers you offer.
 This module enables your customers to easily order print copies of their photos, sourced from their social media accounts or those stored on their computers or phones, directly from your online store.
The Photo Print module has been updated to function in 3 modes which are:
1. **Photo with Paper Type selection**
2. **Bulk Photo Prints**
3. **Vintage Photo Prints**
All three modes follow similar photo selection flow, starting with the welcome screen shown below:
This module enables your customers to easily order print copies of their photos, sourced from their social media accounts or those stored on their computers or phones, directly from your online store.
The Photo Print module has been updated to function in 3 modes which are:
1. **Photo with Paper Type selection**
2. **Bulk Photo Prints**
3. **Vintage Photo Prints**
All three modes follow similar photo selection flow, starting with the welcome screen shown below:
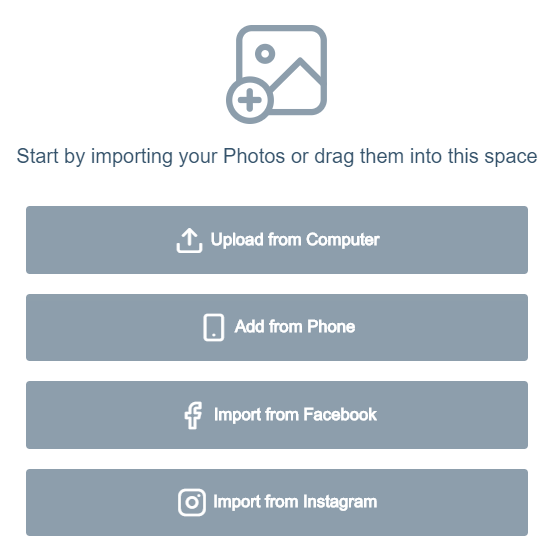 This screen offers the customer the interface to import photos from various source or drag them unto the page as displayed.
Selected photos will populate the user gallery on the left panel from where they can click to add to the print collection.
### Photo with Paper Type selection
Enabling the module in this mode will allow you to create a set of preset sizes your customers can select from as well as paper types you offer to print on.
This mode is great for few photo prints where you want to offer the customer an option to select paper type on which to print with the quantity against each photo. Once the customer has added a photo, they will see the following pop-up.
This screen offers the customer the interface to import photos from various source or drag them unto the page as displayed.
Selected photos will populate the user gallery on the left panel from where they can click to add to the print collection.
### Photo with Paper Type selection
Enabling the module in this mode will allow you to create a set of preset sizes your customers can select from as well as paper types you offer to print on.
This mode is great for few photo prints where you want to offer the customer an option to select paper type on which to print with the quantity against each photo. Once the customer has added a photo, they will see the following pop-up.
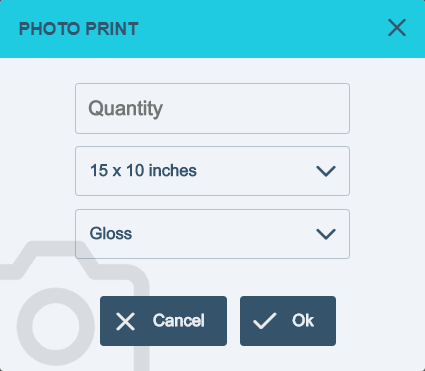 This dialog allows them to set the **Quantity**, **Size** and **Paper type** per photo.
You can view and try out our demo by [clicking here](https://wp.demo.pitchprint.io/product/photo-prints-paper-type/)
### Bulk Photo Prints
This mode is specifically designed to enable customers bulk-order their photo prints with little hassles. No paper selection is required, they simply click to add as many photos as they want printed and set the sizing. Users can select multiple sizes of the same photo as well as set quantities on each size variation.
You can view and try out our demo by [clicking here](https://wp.demo.pitchprint.io/product/blue-collage-bulk-photo-prints/)
This also gives customers few editing features like Rotation, Filters and Position adjustment per photo. By default, the photo is placed to automatically "FIT" the size area but users can then drag and adjust to expose or hide the regions of the photo they want.
### Vintage Photo Prints
This mode allows your customers to order their prints in different designs you have created as pages. It relies exclusively on the pages inside of a design for sizing and design cues.
You can view and try out our demo by [clicking here](https://wp.demo.pitchprint.io/product/photo-prints-vintage/)
Basically, the pages in that design become the sizes. So, if your design has 2 pages first landscape 10 by 5 and a second page 20 by 8, then you'll have size options of 10x5 and 20x8 for your users to select from.
In addition to the sizing, there are a few other rules to be followed in properly creating the design.
Create a Photo Mask. This should be a plain shape where the photo will go into. Name that mask as **"photo"** and place a dummy image in there which will be replaced by the customer's selected photo.
Create a Caption Text and name the item **"title".** This will assist the app in finding the item which text corresponds to the caption and update this appropriately when user types in their caption.
This dialog allows them to set the **Quantity**, **Size** and **Paper type** per photo.
You can view and try out our demo by [clicking here](https://wp.demo.pitchprint.io/product/photo-prints-paper-type/)
### Bulk Photo Prints
This mode is specifically designed to enable customers bulk-order their photo prints with little hassles. No paper selection is required, they simply click to add as many photos as they want printed and set the sizing. Users can select multiple sizes of the same photo as well as set quantities on each size variation.
You can view and try out our demo by [clicking here](https://wp.demo.pitchprint.io/product/blue-collage-bulk-photo-prints/)
This also gives customers few editing features like Rotation, Filters and Position adjustment per photo. By default, the photo is placed to automatically "FIT" the size area but users can then drag and adjust to expose or hide the regions of the photo they want.
### Vintage Photo Prints
This mode allows your customers to order their prints in different designs you have created as pages. It relies exclusively on the pages inside of a design for sizing and design cues.
You can view and try out our demo by [clicking here](https://wp.demo.pitchprint.io/product/photo-prints-vintage/)
Basically, the pages in that design become the sizes. So, if your design has 2 pages first landscape 10 by 5 and a second page 20 by 8, then you'll have size options of 10x5 and 20x8 for your users to select from.
In addition to the sizing, there are a few other rules to be followed in properly creating the design.
Create a Photo Mask. This should be a plain shape where the photo will go into. Name that mask as **"photo"** and place a dummy image in there which will be replaced by the customer's selected photo.
Create a Caption Text and name the item **"title".** This will assist the app in finding the item which text corresponds to the caption and update this appropriately when user types in their caption.
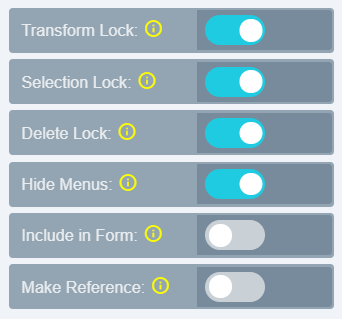
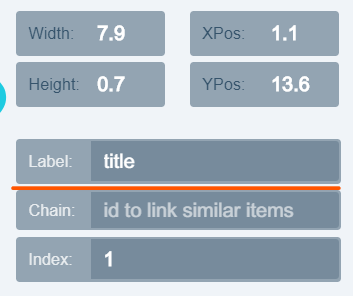 Lock elements to prevent the customer from moving things around. This is the general configuration we advise:
 ### How to Enable Photo Print for a Design:
To enable this module, navigate to your Designs [Page](https://admin.pitchprint.io/designs) and create a blank design with a title in a category of your choice. The design can have just a single blank page. This will eventually be removed.
### How to Enable Photo Print for a Design:
To enable this module, navigate to your Designs [Page](https://admin.pitchprint.io/designs) and create a blank design with a title in a category of your choice. The design can have just a single blank page. This will eventually be removed.
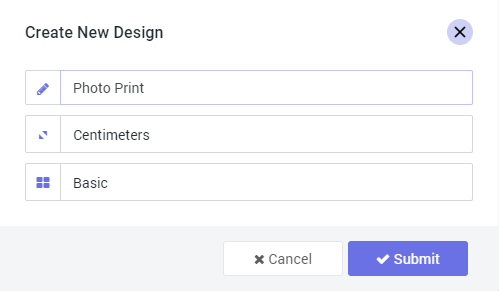 Once you have saved the design, find it in the list, mouse over it and click the **Configure Icon** as shown:
 This should pop up the panel shown below. Navigate to the **Modules Tab**, there you will find the Photo Print module, Click to enable it.
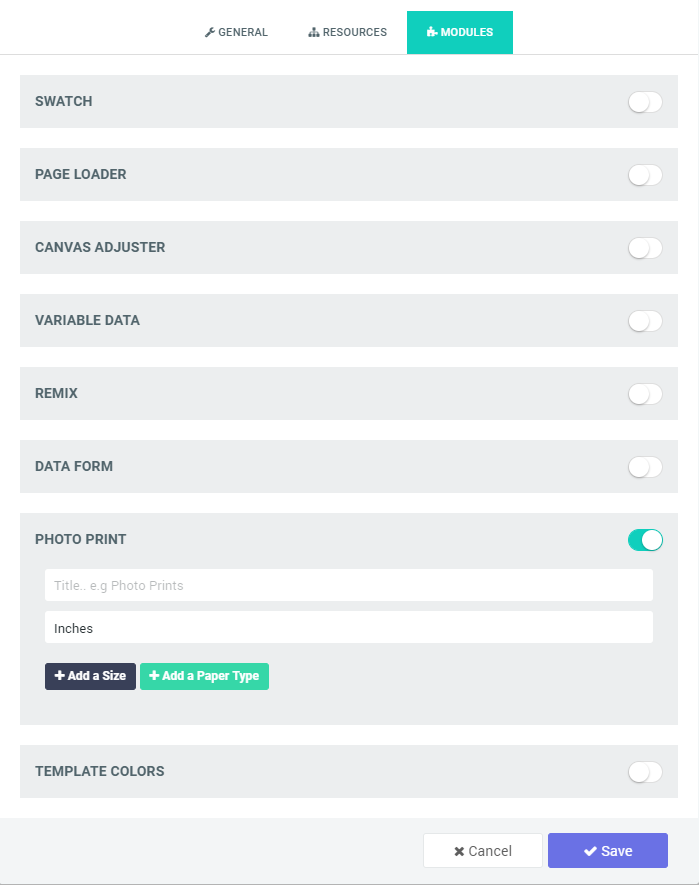 Now you can give it a title, and choose the measuring unit you'd prefer. Next click the **Add a Size** button, you can add as many sizes as you require.
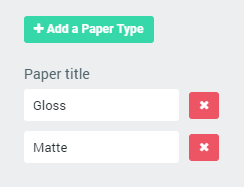
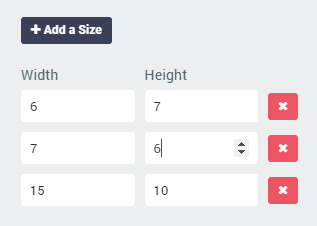 Lastly click the **Add a Paper Type** button to add the types of printing paper you have.
 Click the **Save** button.
## Related articles
Set DPI limits so customers are warned about low-resolution photo uploads.
This documentation is built and hosted on [Mintlify](https://mintlify.com), a developer documentation platform.
Click the **Save** button.
## Related articles
Set DPI limits so customers are warned about low-resolution photo uploads.
This documentation is built and hosted on [Mintlify](https://mintlify.com), a developer documentation platform.