> ## Documentation Index
> Fetch the complete documentation index at: https://pitchprint.com/llms.txt
> Use this file to discover all available pages before exploring further.
# How to create a clickable mask
> Draw or import a shape, then enable Clickable Mask so it becomes an image placeholder customers fill with their own photos.
A clickable mask is an image placeholder that is mainly used in products such as photo prints, canvas prints and promotional items to name a few.
To make use of this feature please follow the steps below:
Go to the [designs](https://admin.pitchprint.com/designs) page open an existing design OR create a new one.
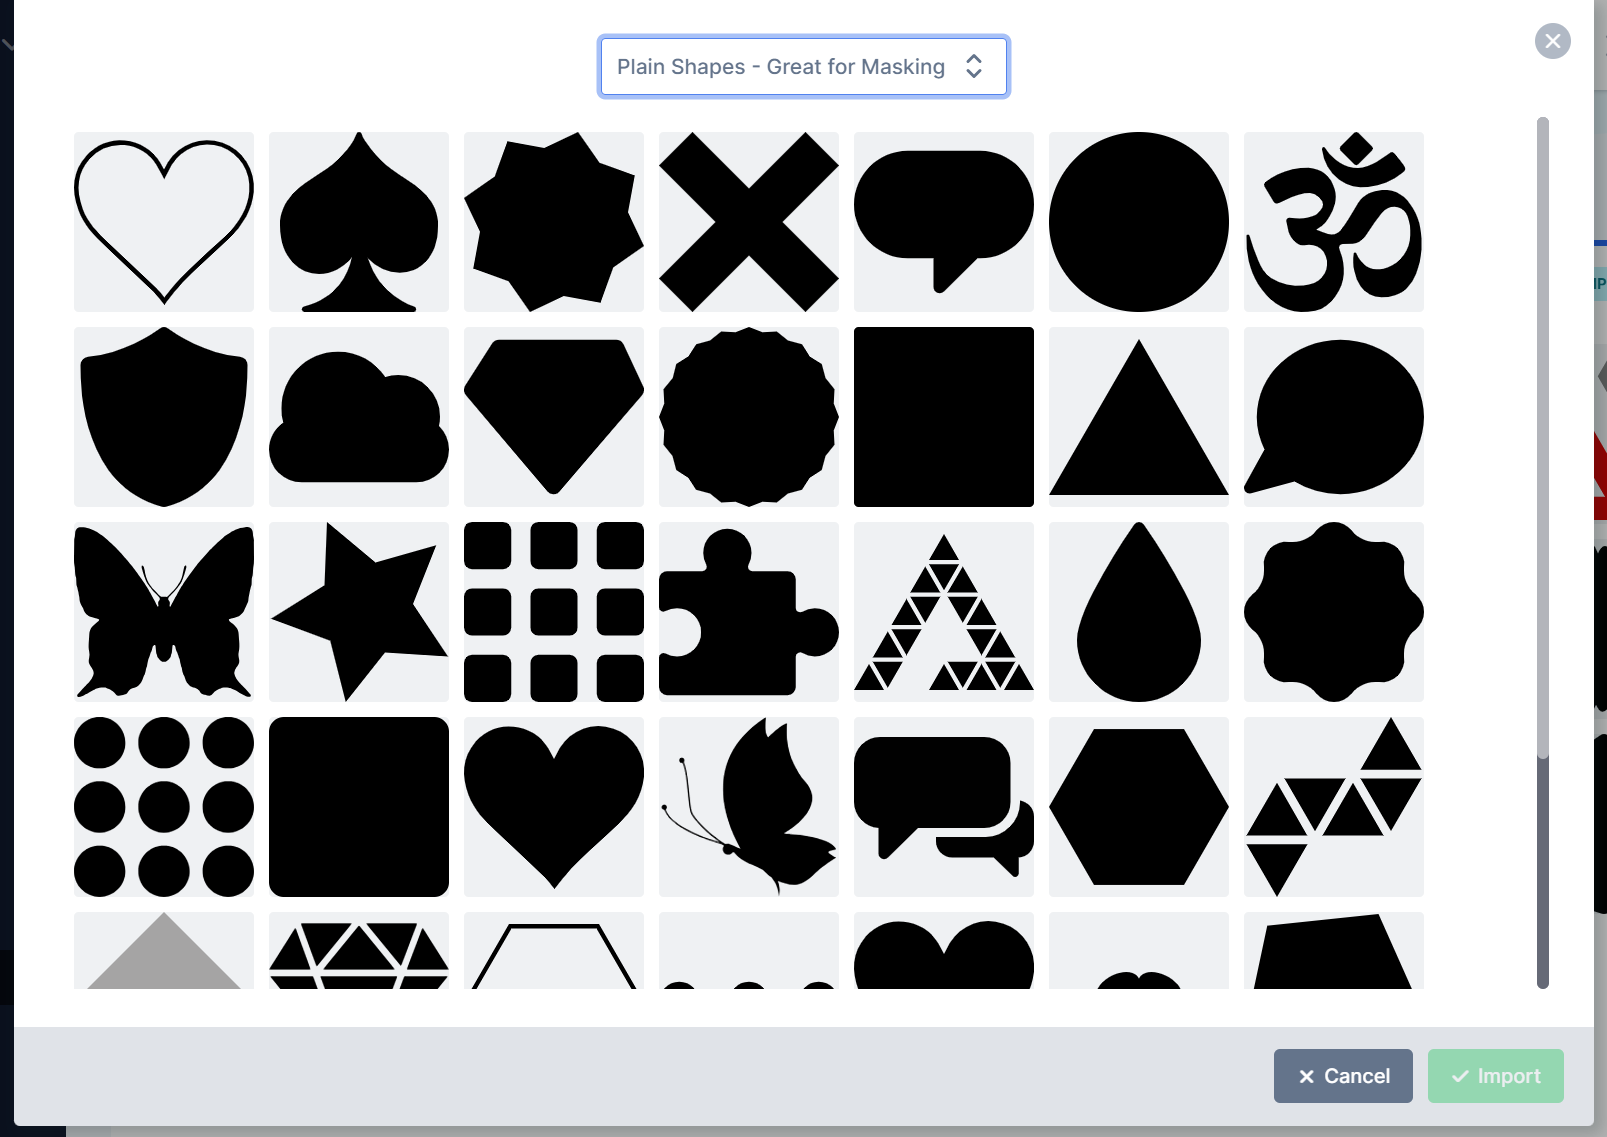
For the shape you can either draw your own or import some of our readily available shapes:
To draw click on the button shown below:
 When you click on the button a menu will open up as depicted below:
 Draw your desired shape and click on the ***mouse click icon*** to exit drawing mode.
To import shapes go to the [pictures](https://admin.pitchprint.com/pictures) tab. Create a new category or open an existing one. Click on import. Select ***Plain Shapes Great for masking*** from the drop down list select the item(s) you need and click import as shown below:
Draw your desired shape and click on the ***mouse click icon*** to exit drawing mode.
To import shapes go to the [pictures](https://admin.pitchprint.com/pictures) tab. Create a new category or open an existing one. Click on import. Select ***Plain Shapes Great for masking*** from the drop down list select the item(s) you need and click import as shown below:
 Once you have your shape(s). Add the shape(s) to the canvas. Click on the shape. Go to the item menu and enable ***Clickable Mask*** as shown below:
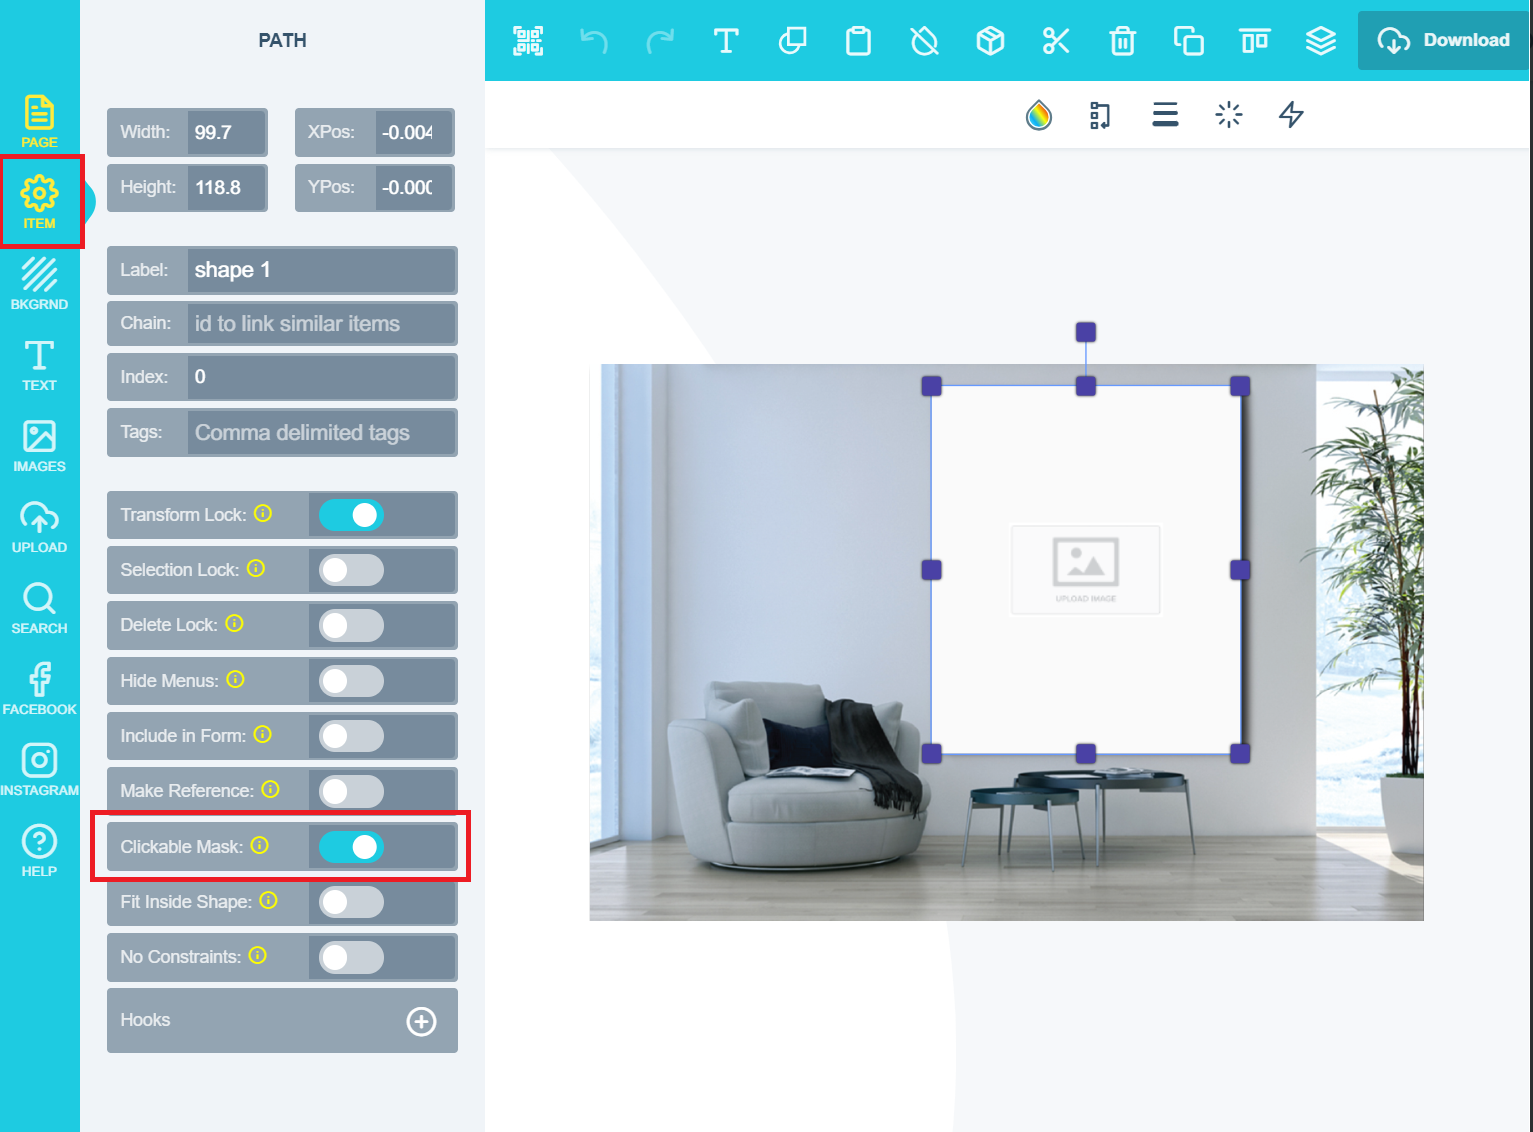 Once complete your shape will now become an image placeholder which your customers can use to insert their images.
Please note the clickable mask can only house raster(png, tiff, jpg etc.) images, vector images will not work inside your clickable mask.
## Related articles
Set a guide image that prompts clients to click a mask shape.
Use any shape as a clipping area to trim content in the final PDF.
Prepare a single-path SVG that can be used as a photo mask.
Build a design template from an SVG shape, such as a phone case.
This documentation is built and hosted on [Mintlify](https://mintlify.com), a developer documentation platform.
Once complete your shape will now become an image placeholder which your customers can use to insert their images.
Please note the clickable mask can only house raster(png, tiff, jpg etc.) images, vector images will not work inside your clickable mask.
## Related articles
Set a guide image that prompts clients to click a mask shape.
Use any shape as a clipping area to trim content in the final PDF.
Prepare a single-path SVG that can be used as a photo mask.
Build a design template from an SVG shape, such as a phone case.
This documentation is built and hosted on [Mintlify](https://mintlify.com), a developer documentation platform.