> ## Documentation Index
> Fetch the complete documentation index at: https://pitchprint.com/llms.txt
> Use this file to discover all available pages before exploring further.
# AI Smart Replace
> Let customers search for an element inside an image and swap it for AI-generated content that blends into the original.
 This module allows your customers to easily find and replace specific parts of an image using AI. Unlike simple "find and replace" tools, this advanced feature lets users search for visual elements within an image and swap them with new content. The AI ensures that the new content fits naturally into the rest of the image, either based on user input or automatically.
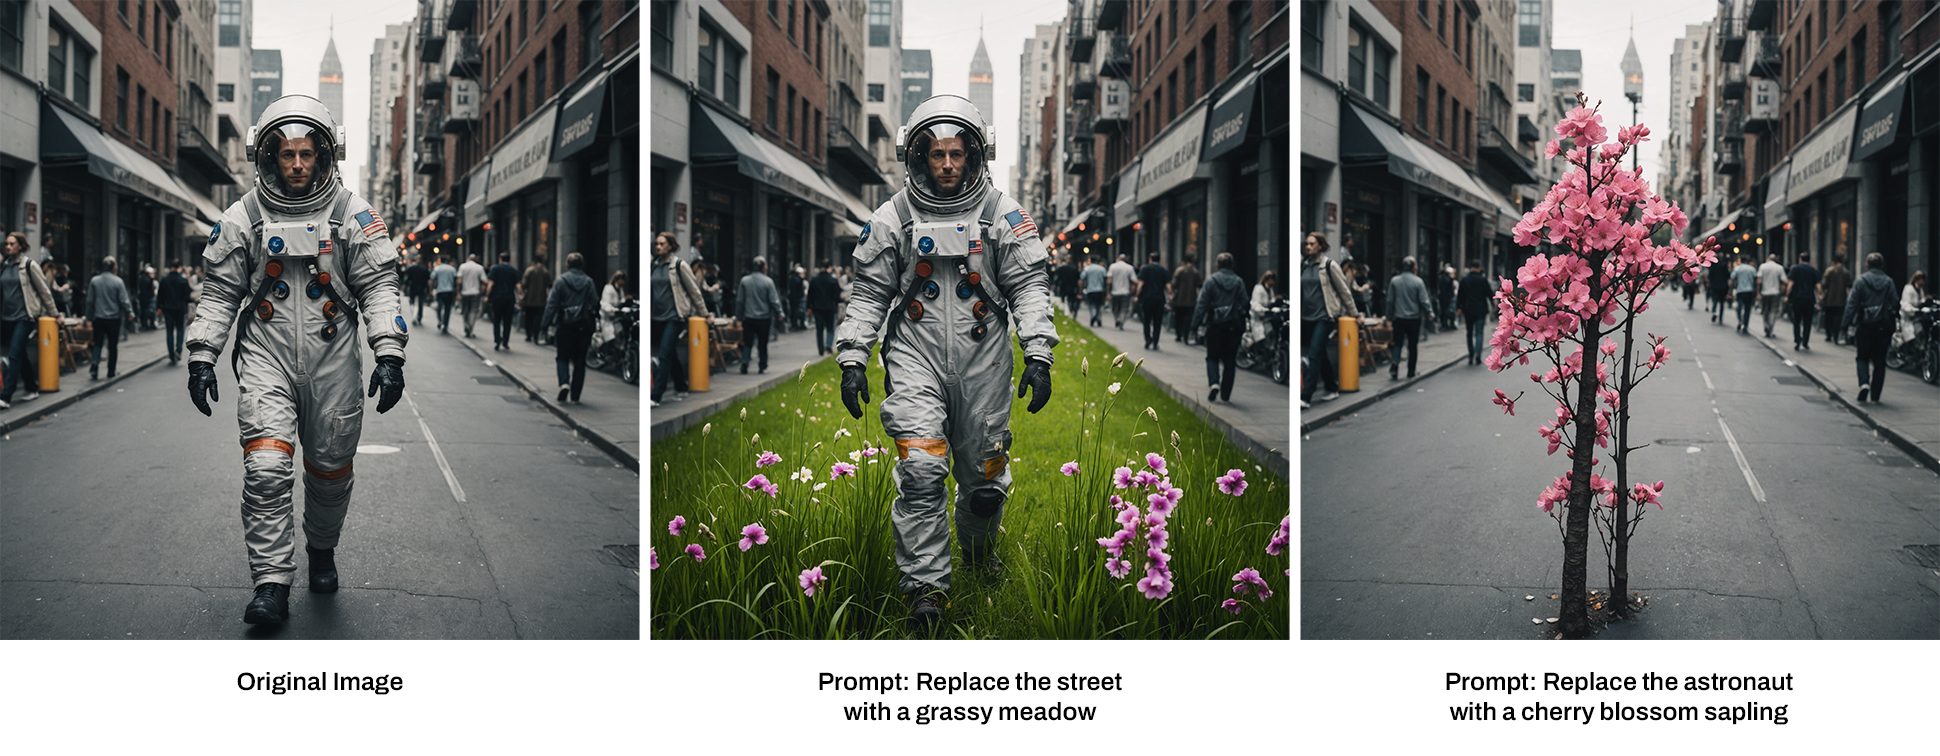 Here’s how the **search and replace** function works:
Identifying Elements: The AI starts by detecting specific elements in the image, like objects, colors, or textures.
User Input: Customers can Describe the element they want to change (e.g., “find all the flowers”).
The AI finds everything matching the search criteria.
Once the target is found, the AI checks the size, shape, colors, and textures of the object to ensure that the replacement will fit perfectly with the image.
User Input: Customers can describe what they want the AI to replace the element with, like “replace the tree with a fountain,” or let the AI generate its own content.
AI Generation: The AI generates the new content and places it into the image, matching lighting, shadows, and perspective to make it look natural.
The AI seamlessly blends the new content with the original image so there are no visible edges or mismatches.
**How to use Upscale:**
Start by uploading your image into the PitchPrint editor, and inserting it on the canvas.
Once the image is on the canvas, click on the 'Edit Picture' button
Here’s how the **search and replace** function works:
Identifying Elements: The AI starts by detecting specific elements in the image, like objects, colors, or textures.
User Input: Customers can Describe the element they want to change (e.g., “find all the flowers”).
The AI finds everything matching the search criteria.
Once the target is found, the AI checks the size, shape, colors, and textures of the object to ensure that the replacement will fit perfectly with the image.
User Input: Customers can describe what they want the AI to replace the element with, like “replace the tree with a fountain,” or let the AI generate its own content.
AI Generation: The AI generates the new content and places it into the image, matching lighting, shadows, and perspective to make it look natural.
The AI seamlessly blends the new content with the original image so there are no visible edges or mismatches.
**How to use Upscale:**
Start by uploading your image into the PitchPrint editor, and inserting it on the canvas.
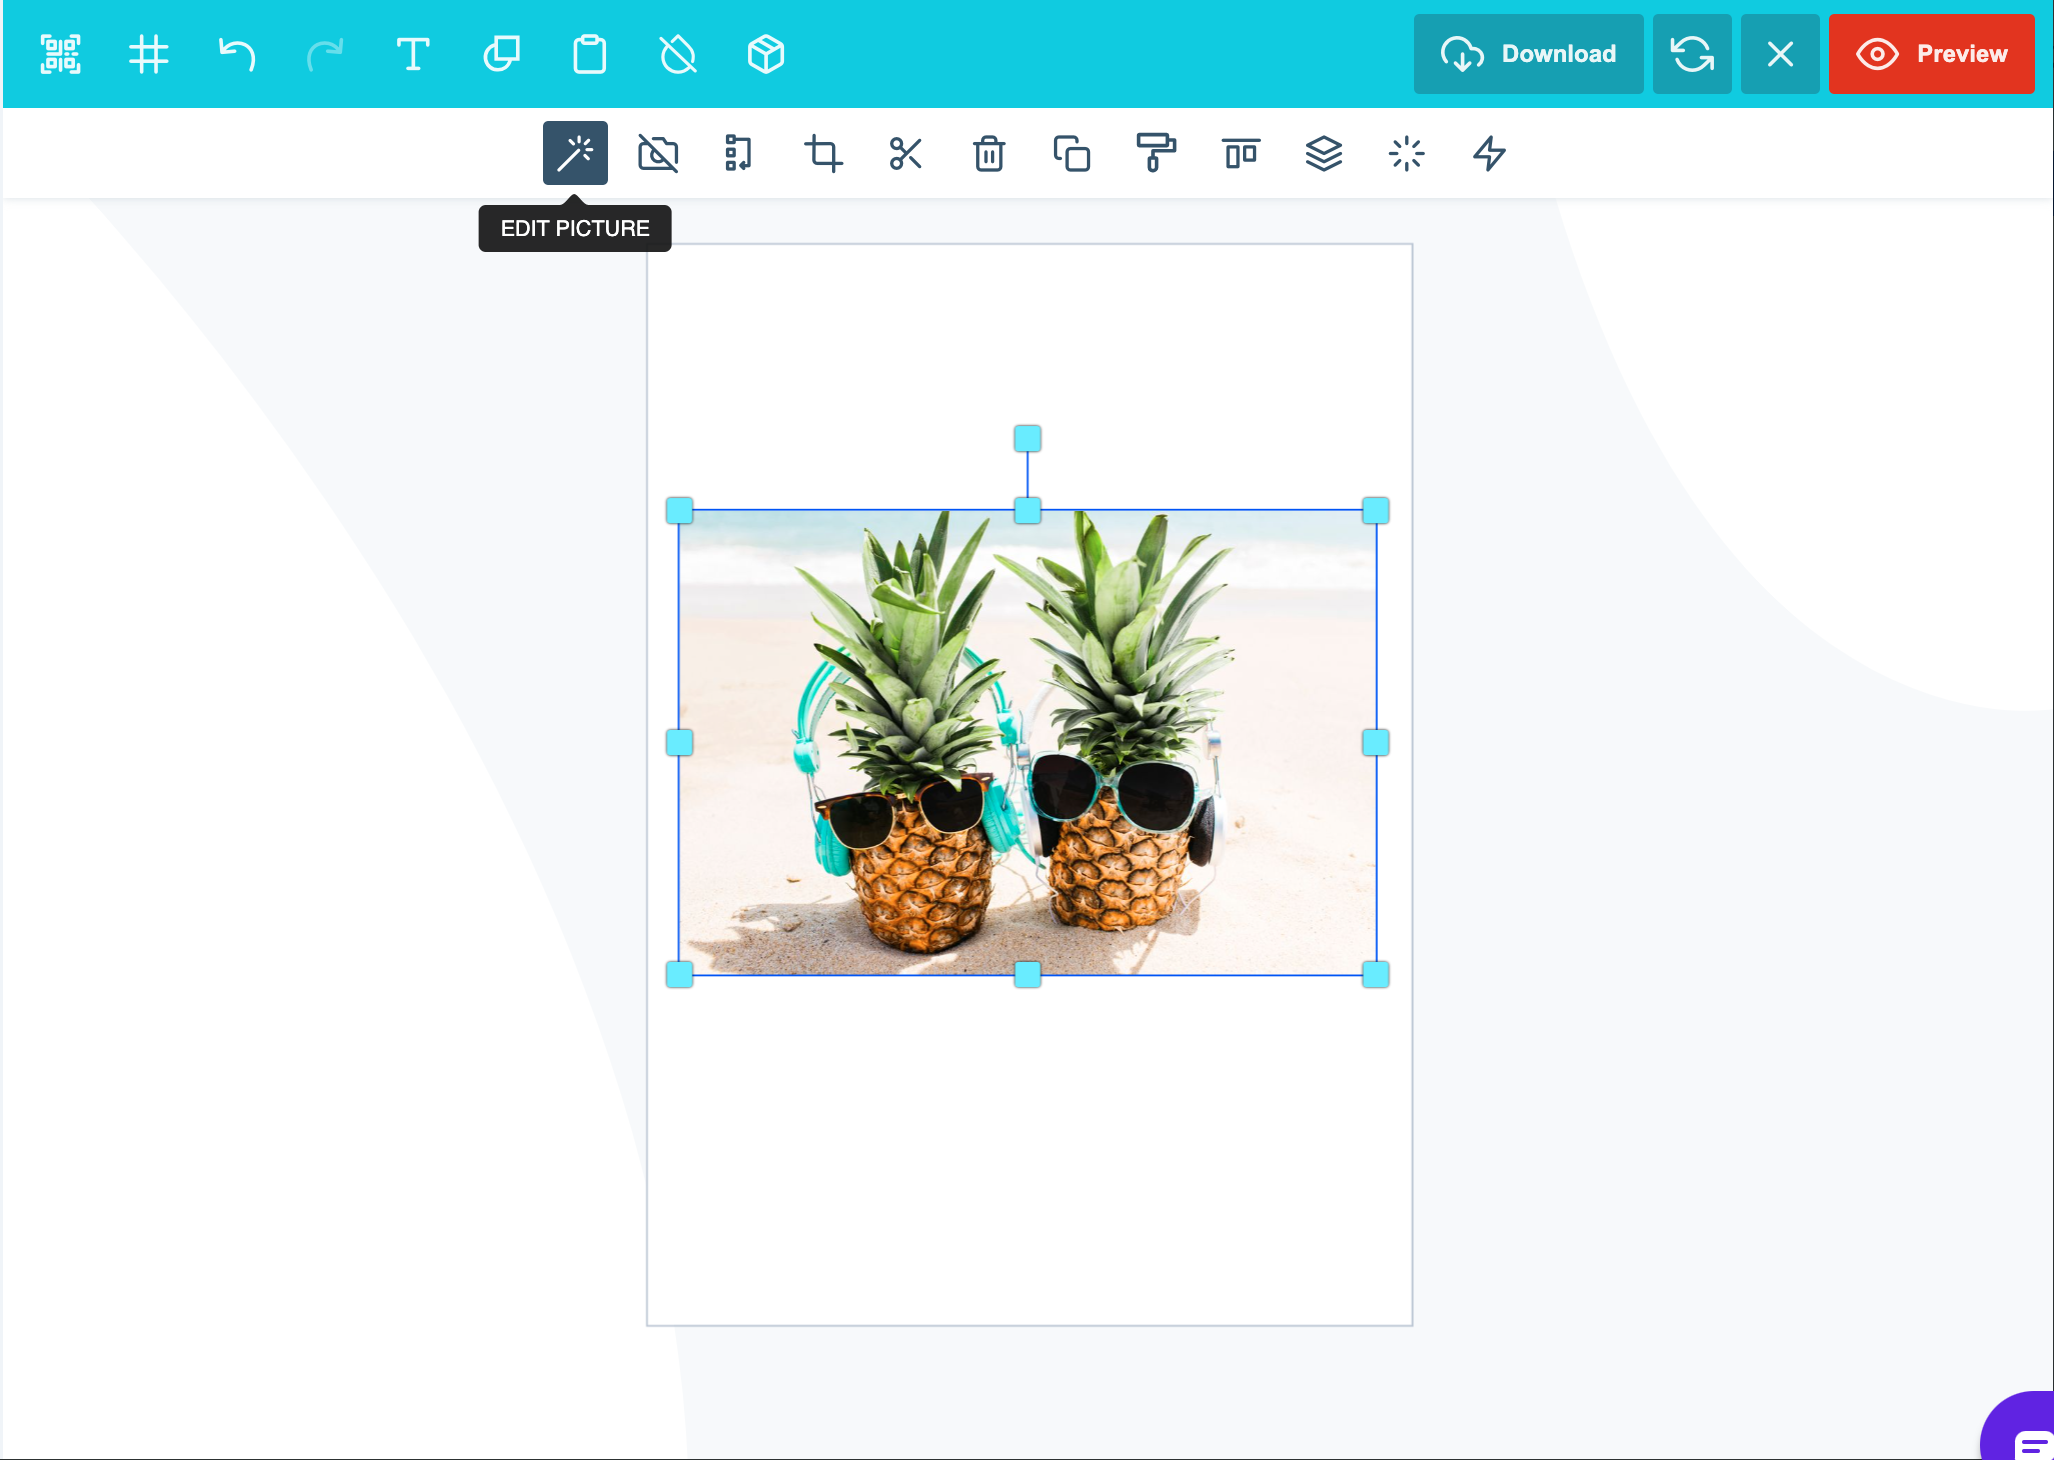
Once the image is on the canvas, click on the 'Edit Picture' button
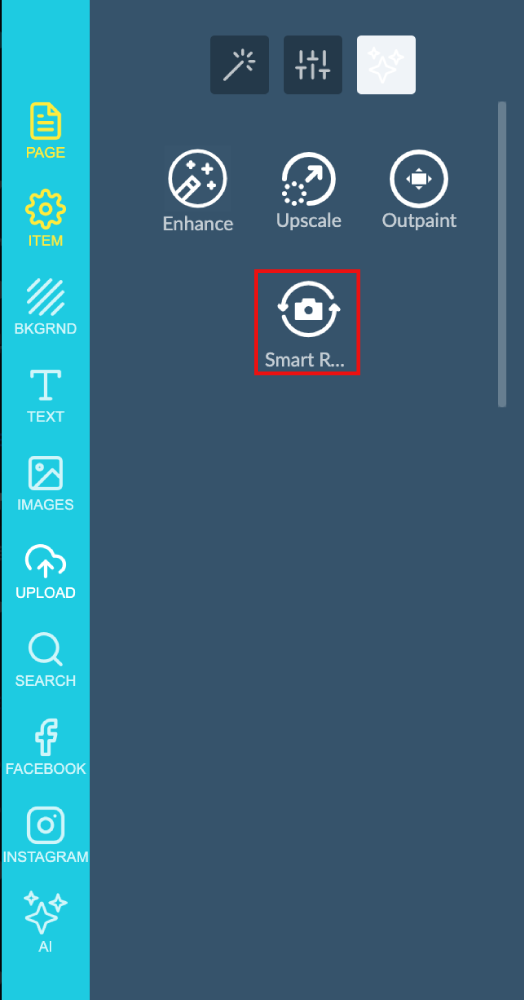
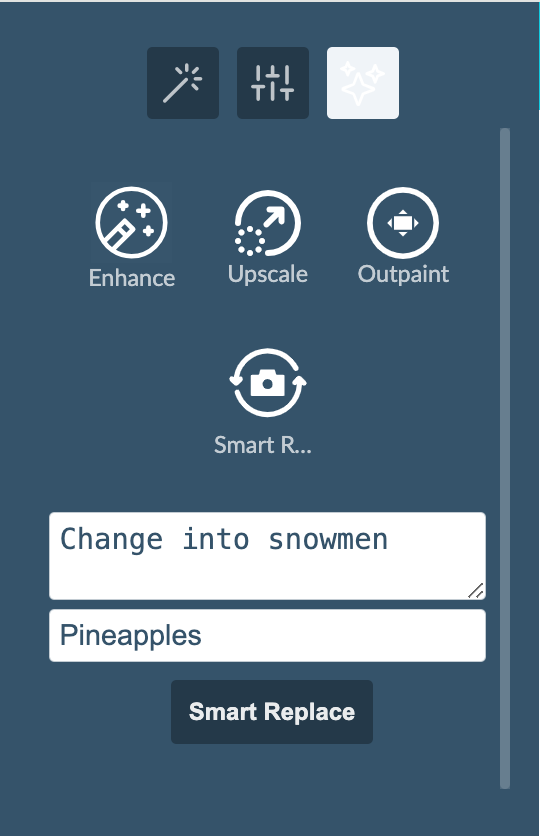
 In the side panel you will find the AI Image enhancement tools, Click on 'Smart Replace'
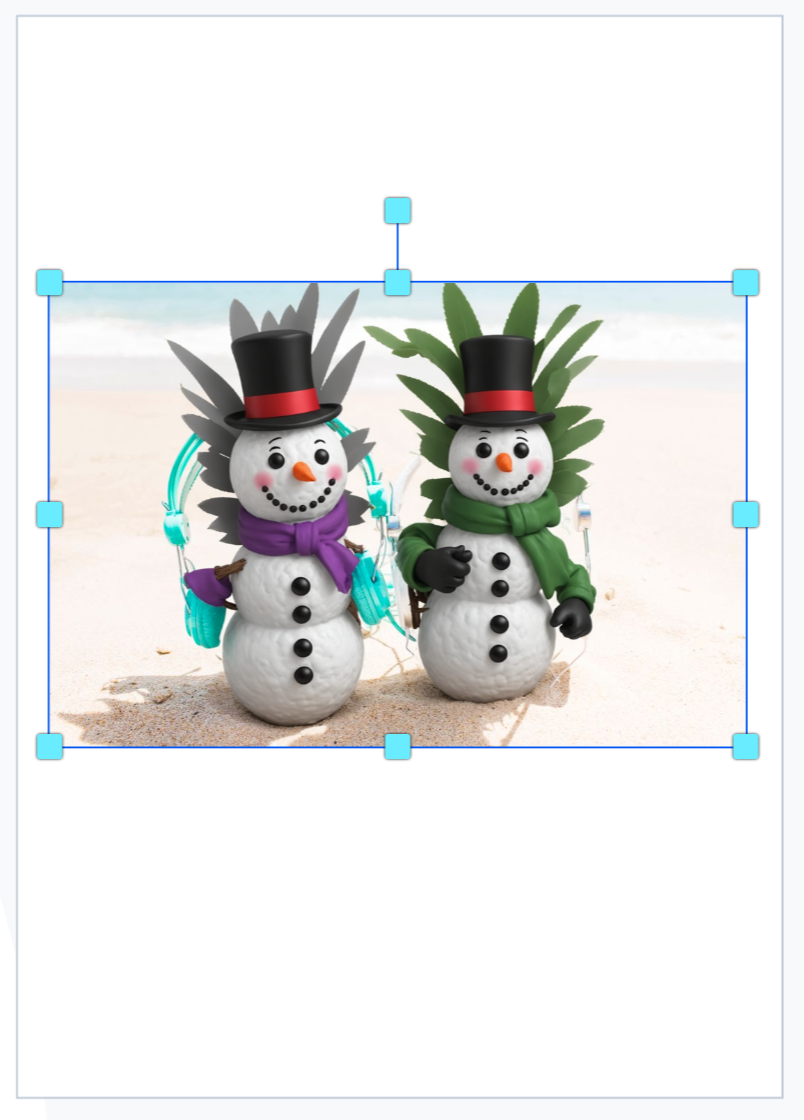
 Now you will have to add your prompt: For this example I will change the pineapples into snowmen
 AI will then go and identify the Pineapples and change them into Snowmen:
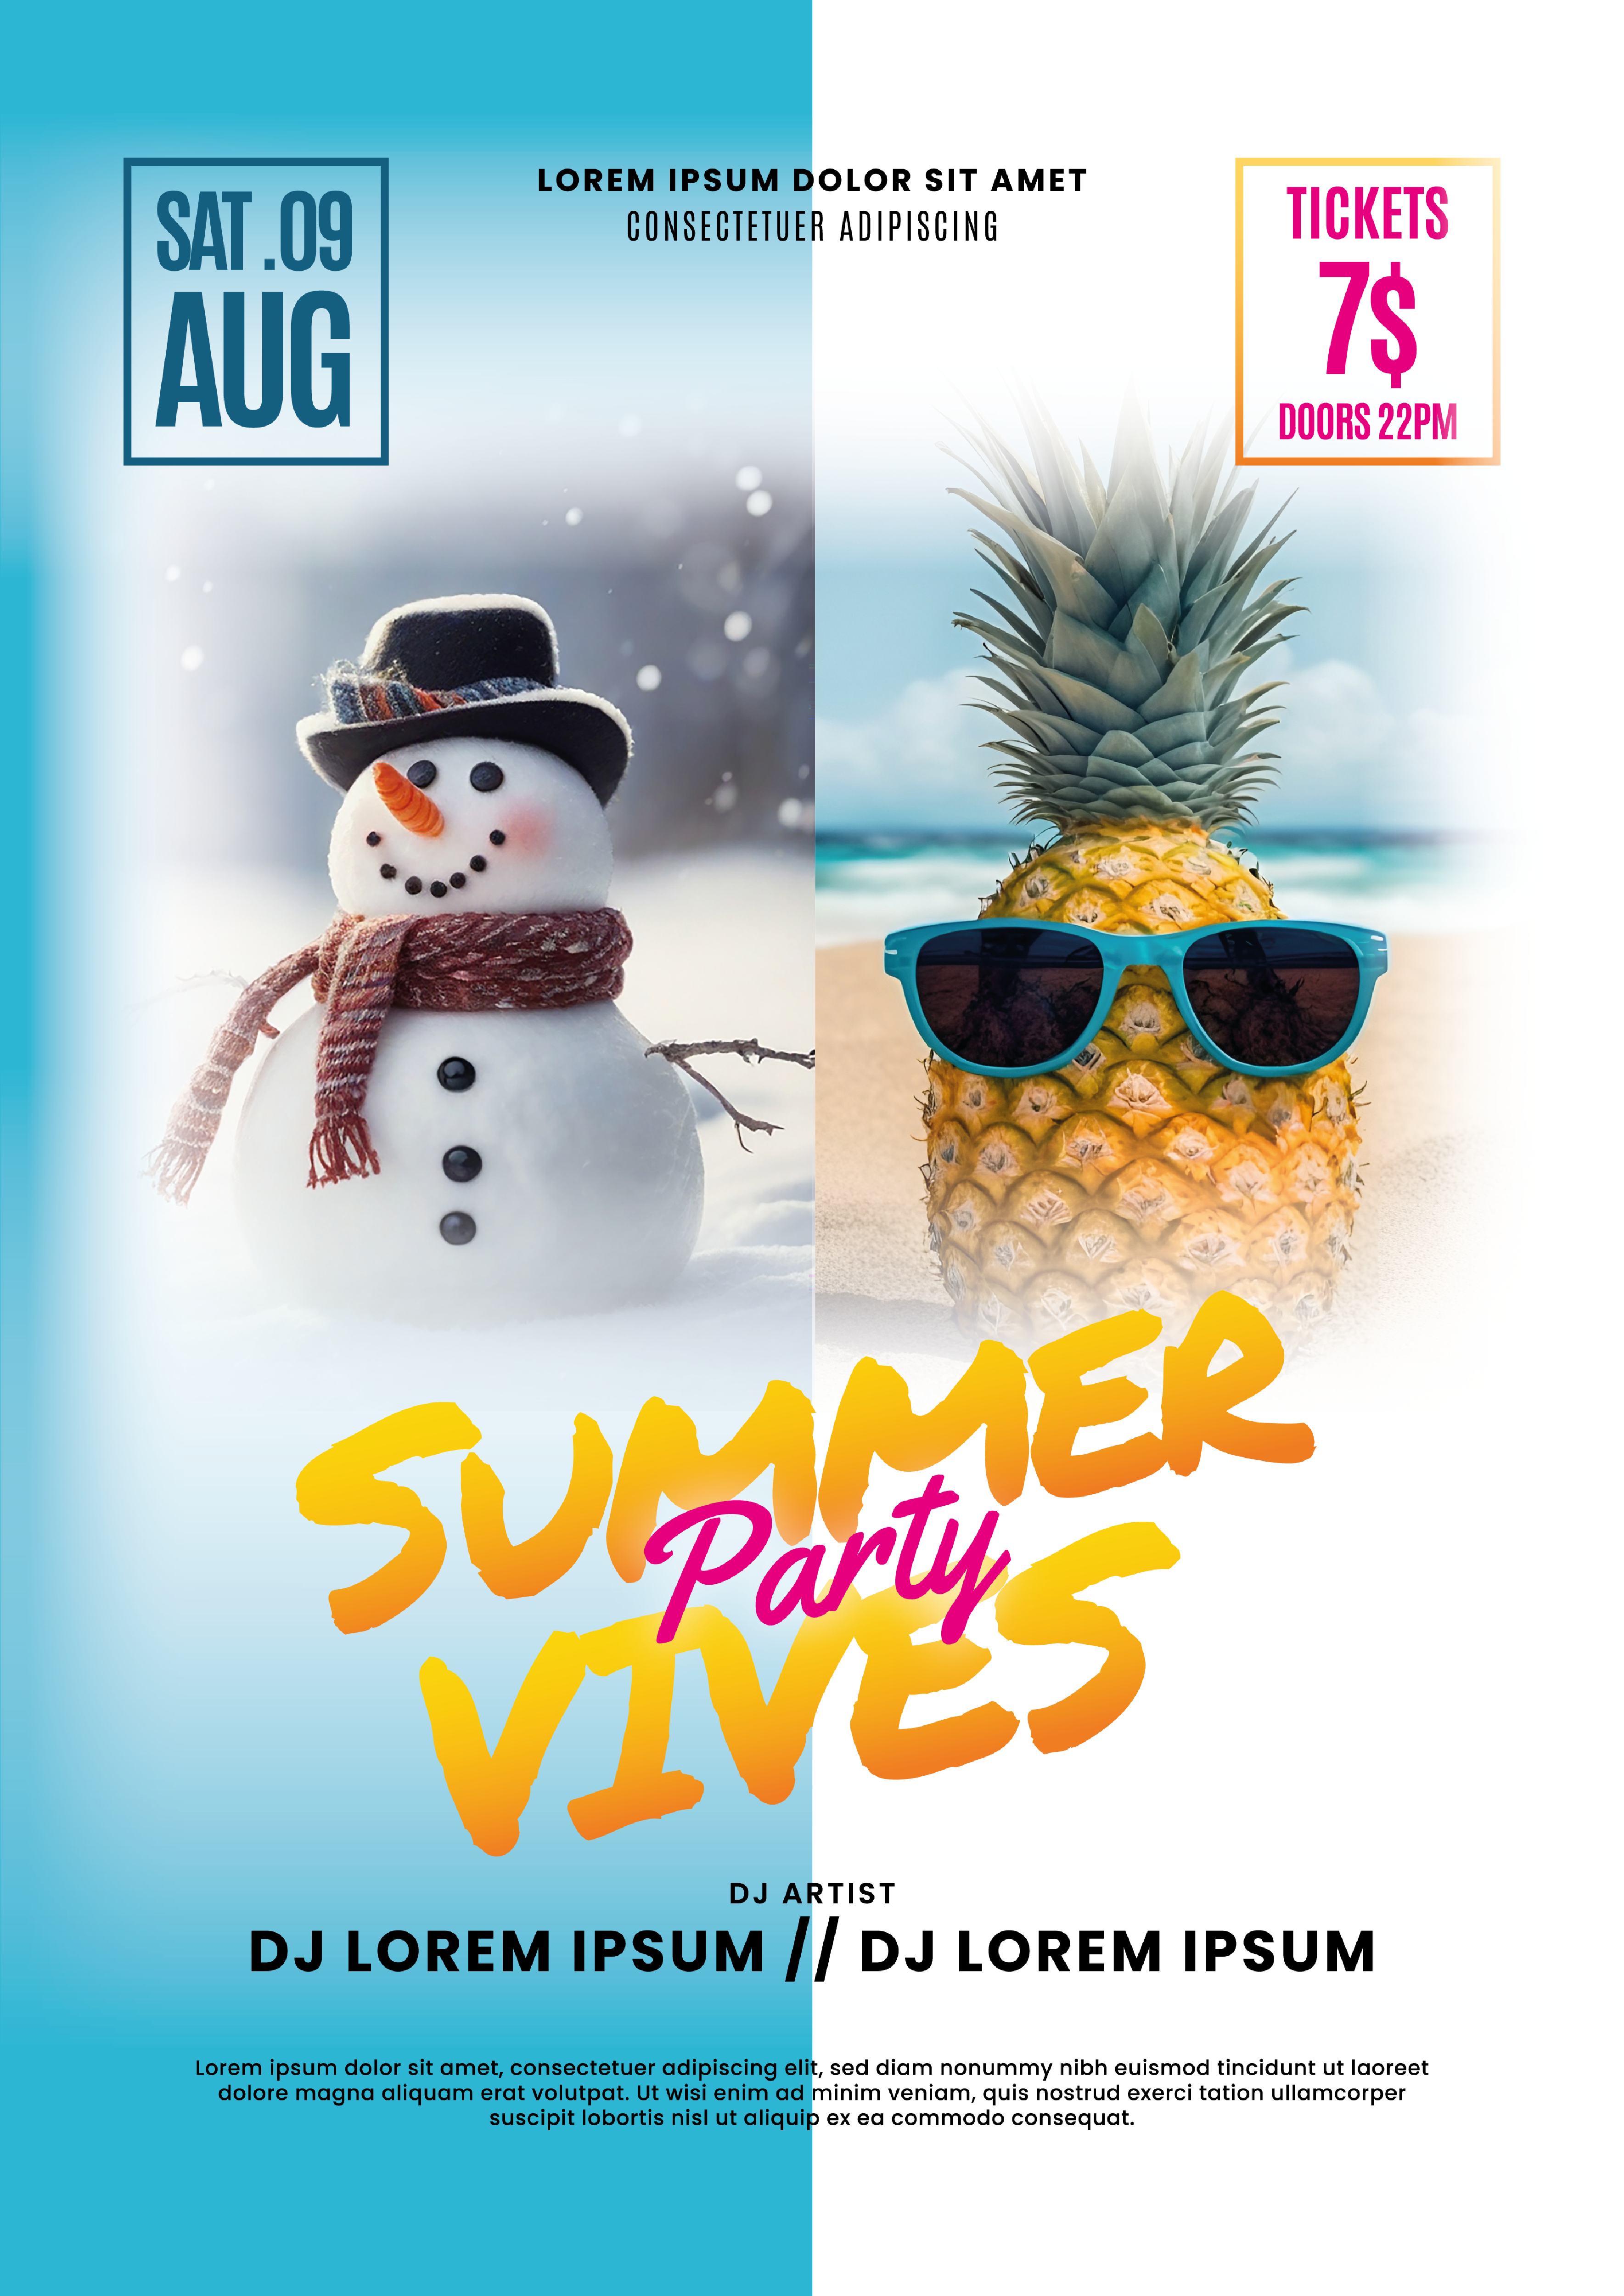
 It can also be used in design layouts:
 **Applications:**
\- **Object Substitution:** Swap objects in an image (e.g., replace a car with a boat).
\- **Color and Texture Changes:** Change colors or textures (e.g., turning red objects blue).
\- **Creative Edits:** Make artistic changes (e.g., replacing trees with sculptures).
\- **Photo Restoration:** Repair damaged areas of images by replacing them with AI-generated content.
In short, this module gives your customers a powerful tool to find and replace elements in images in a smooth and creative way using AI.
Please note that this feature is still in **BETA mode** and we will continue to add functionality. Please reach out to us via [support@pitchprint.com](mailto:support@pitchprint.com) with any suggestions or questions.
*\*Additional charges apply*
## Related articles
Expand images beyond their original borders with AI.
Increase image resolution and quality with AI without losing detail.
Refine images while preserving layout, proportions, and composition.
Convert rough sketches into fully detailed images.
This documentation is built and hosted on [Mintlify](https://mintlify.com), a developer documentation platform.
**Applications:**
\- **Object Substitution:** Swap objects in an image (e.g., replace a car with a boat).
\- **Color and Texture Changes:** Change colors or textures (e.g., turning red objects blue).
\- **Creative Edits:** Make artistic changes (e.g., replacing trees with sculptures).
\- **Photo Restoration:** Repair damaged areas of images by replacing them with AI-generated content.
In short, this module gives your customers a powerful tool to find and replace elements in images in a smooth and creative way using AI.
Please note that this feature is still in **BETA mode** and we will continue to add functionality. Please reach out to us via [support@pitchprint.com](mailto:support@pitchprint.com) with any suggestions or questions.
*\*Additional charges apply*
## Related articles
Expand images beyond their original borders with AI.
Increase image resolution and quality with AI without losing detail.
Refine images while preserving layout, proportions, and composition.
Convert rough sketches into fully detailed images.
This documentation is built and hosted on [Mintlify](https://mintlify.com), a developer documentation platform.