> ## Documentation Index
> Fetch the complete documentation index at: https://pitchprint.com/llms.txt
> Use this file to discover all available pages before exploring further.
# AI-Imaginate
> Let customers generate and upscale AI images from a text prompt, choosing size, style and category, then enable the plugin in your settings
 This module allows your customers to generate AI images based on a given text prompt, with additional options such as Styles and Sizes.
It has two main functionalities namely:
1. AI Image Generation
2. AI Image Upscaling
**AI Image Generation**
There are three size options to choose from namely:
1. Square
2. Portrait and,
3. Landscape
The module categorizes image generation into six distinct areas namely: ***Style, Art, Photography, Backgrounds, Product*** and an additional ***Trending*** category for the latest styles. Each category offers a set of tailored prompts, which simplifies the process of creating AI-generated images thus eliminating the process of creating your own prompts from scratch.
This module allows your customers to generate AI images based on a given text prompt, with additional options such as Styles and Sizes.
It has two main functionalities namely:
1. AI Image Generation
2. AI Image Upscaling
**AI Image Generation**
There are three size options to choose from namely:
1. Square
2. Portrait and,
3. Landscape
The module categorizes image generation into six distinct areas namely: ***Style, Art, Photography, Backgrounds, Product*** and an additional ***Trending*** category for the latest styles. Each category offers a set of tailored prompts, which simplifies the process of creating AI-generated images thus eliminating the process of creating your own prompts from scratch.
 How does it work?
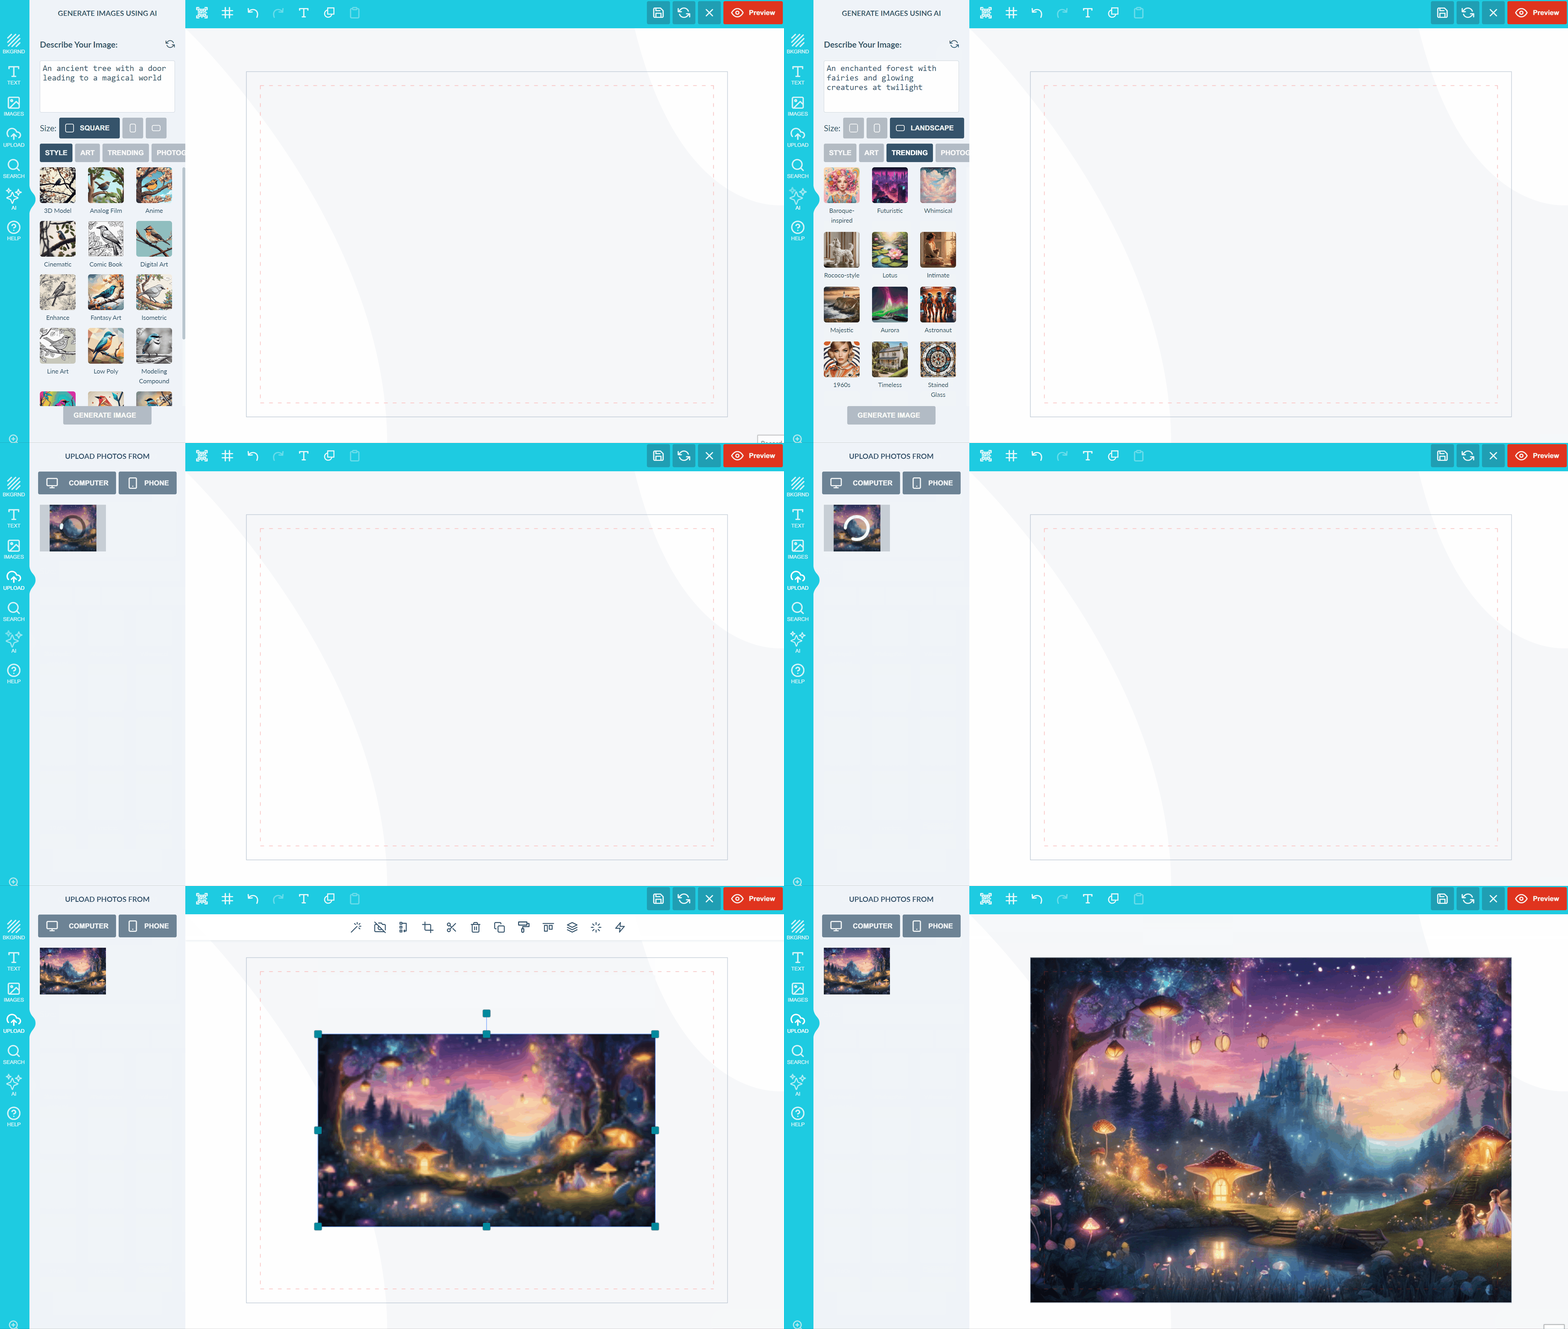
Firstly the user will describe their image using words, the more words you provide the more accurate the image. The reload icon provides a few options of random prompts that can be used for inspiration.
How does it work?
Firstly the user will describe their image using words, the more words you provide the more accurate the image. The reload icon provides a few options of random prompts that can be used for inspiration.
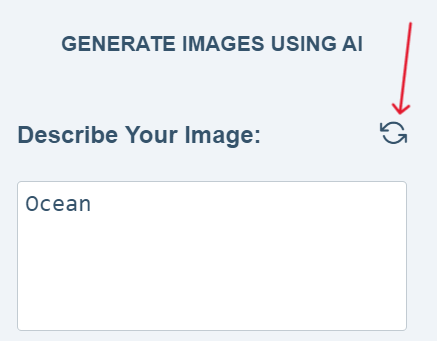 The user can then select the size for the image:
 *Please note this step is entirely optional*\*\*\*.\*\*\* We have two options the user can select from namely: **Style** and **Category**, category consists of ***Art, Trending, Photography, Backgrounds*** and ***Products.***
When a user selects the ***Style Option*** they can apply an aesthetic OR artistic approach to the image that they are generating. The style option alters the visual representation of the final image, such as making the image resemble anime, comic books, 3D etc.
The ***Category Option*** on the other hand provides prompts. A prompt is a thematic starting point that guides the content of the image. Categories like Art, Trending, Photography, Backgrounds and Products offer a variety of content-based prompts, helping end-users to generate images that align with a specific subject or theme. The user also has the option of creating their own prompts instead of using our default prompts.
While the ***Style*** determines the look and feel of the image, the ***Category*** determines it's subject matter and content.
*Please note this step is entirely optional*\*\*\*.\*\*\* We have two options the user can select from namely: **Style** and **Category**, category consists of ***Art, Trending, Photography, Backgrounds*** and ***Products.***
When a user selects the ***Style Option*** they can apply an aesthetic OR artistic approach to the image that they are generating. The style option alters the visual representation of the final image, such as making the image resemble anime, comic books, 3D etc.
The ***Category Option*** on the other hand provides prompts. A prompt is a thematic starting point that guides the content of the image. Categories like Art, Trending, Photography, Backgrounds and Products offer a variety of content-based prompts, helping end-users to generate images that align with a specific subject or theme. The user also has the option of creating their own prompts instead of using our default prompts.
While the ***Style*** determines the look and feel of the image, the ***Category*** determines it's subject matter and content.
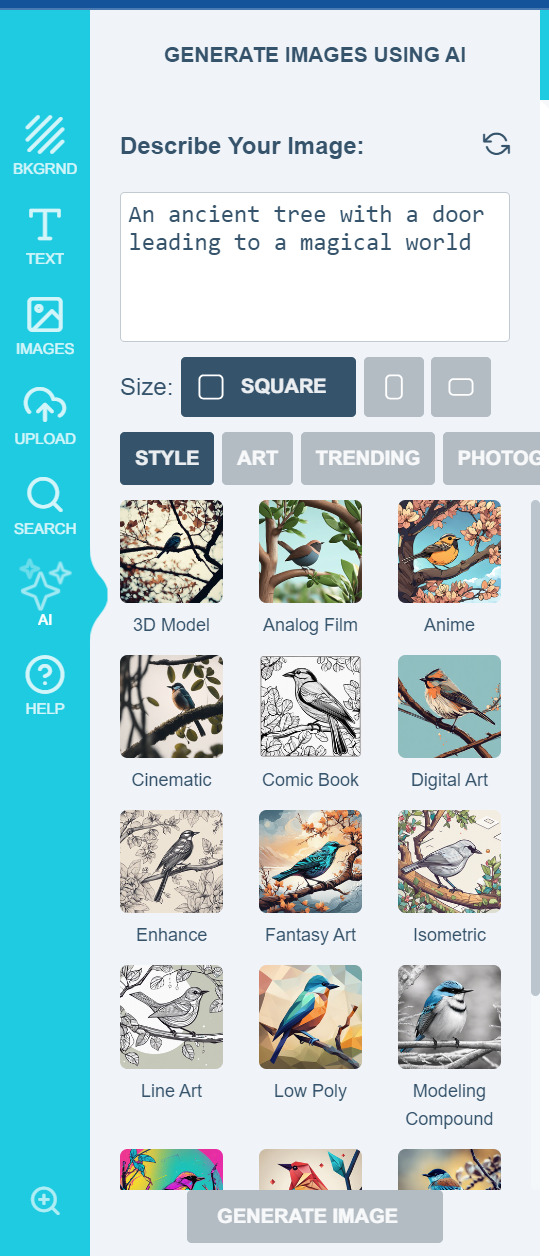 After making all selections click on ***GENERATE IMAGE*** an image will be generated and added to the canvas as well as the file uploads section so you can make use of it again in future should you wish to.
To enable this amazing feature please go to [settings](https://admin.pitchprint.com/settings) >> Then scroll down to Plugins and Enable AI-Imaginate(BETA) as shown below. Please save your changes in order to see the plugin on the front end.
After making all selections click on ***GENERATE IMAGE*** an image will be generated and added to the canvas as well as the file uploads section so you can make use of it again in future should you wish to.
To enable this amazing feature please go to [settings](https://admin.pitchprint.com/settings) >> Then scroll down to Plugins and Enable AI-Imaginate(BETA) as shown below. Please save your changes in order to see the plugin on the front end.
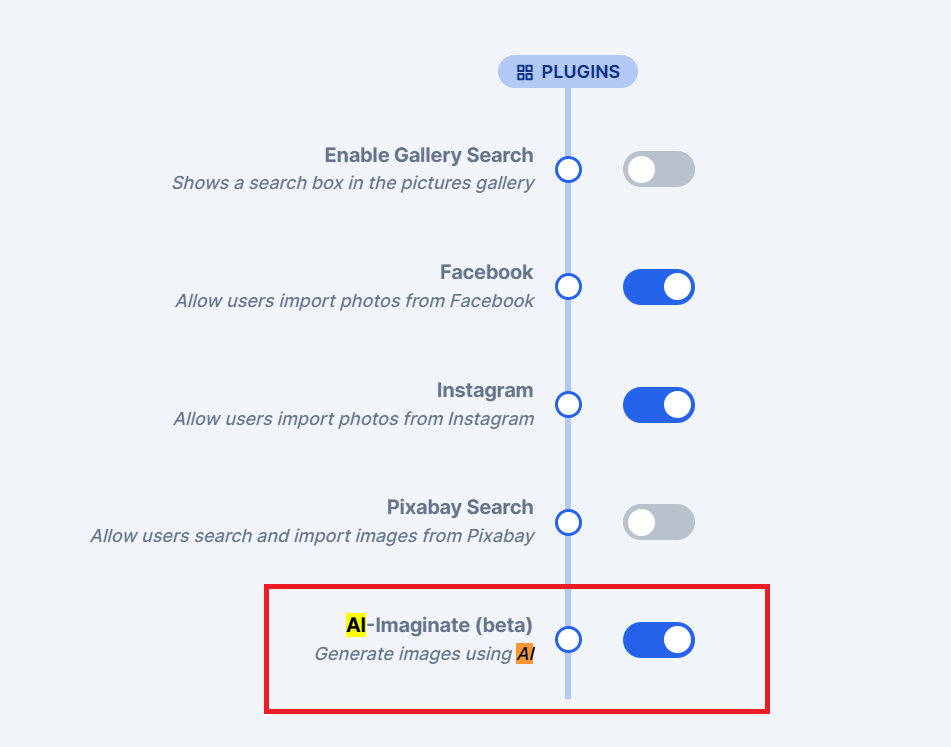 To complete the process, reload your [layouts](https://admin.pitchprint.com/layouts). Remember to save any code elsewhere prior to performing this action.
Please note that this feature is still in **BETA mode** and we will continue to add functionality. Please reach out to us via [support@pitchprint.com](mailto:support@pitchprint.com) with any suggestions or questions.
## Related articles
Generate images from text descriptions with AI-Imaginate.
Convert rough sketches into fully detailed images.
Refine images while preserving layout, proportions, and composition.
Find and replace elements within an image using AI.
This documentation is built and hosted on [Mintlify](https://mintlify.com), a developer documentation platform.
To complete the process, reload your [layouts](https://admin.pitchprint.com/layouts). Remember to save any code elsewhere prior to performing this action.
Please note that this feature is still in **BETA mode** and we will continue to add functionality. Please reach out to us via [support@pitchprint.com](mailto:support@pitchprint.com) with any suggestions or questions.
## Related articles
Generate images from text descriptions with AI-Imaginate.
Convert rough sketches into fully detailed images.
Refine images while preserving layout, proportions, and composition.
Find and replace elements within an image using AI.
This documentation is built and hosted on [Mintlify](https://mintlify.com), a developer documentation platform.