> ## Documentation Index
> Fetch the complete documentation index at: https://pitchprint.com/llms.txt
> Use this file to discover all available pages before exploring further.
# 3D Views
> Build a model in the 3D studio, set its colour, lighting and artwork, then assign it to a design so customers preview their work in 3D.
PitchPrint 3D view makes it possible for end customers to visualize their designs on an actual product with perspective in 3D.
Most of the models can be navigated in 3D by orbiting around the object while the rest are static representation of the objects. A sample product can be viewed here: [3D mug demo product](https://wp.demo.pitchprint.io/product/mug-3d-view/)
### How to implement 3D View in your store
For every 3D view, you need a model and an artwork to stamp on the model's surface. The artwork in most cases is your customer's project customization.
To get started, you need to customize your model in our online design studio and later assign it to a design for use whenever your customer wants to preview their design. This article will guide you end-to-end on how to implement a sample 3D view. [Click here to load the design studio](https://admin.pitchprint.io/three)
In the studio, click the Add New Model button on the top right corner. This loads up a two-step dialog. In the first step, you pick a model and configure it in the second. So go ahead and select any of our provided models. For additional models, you can reach out to us to create and for you.
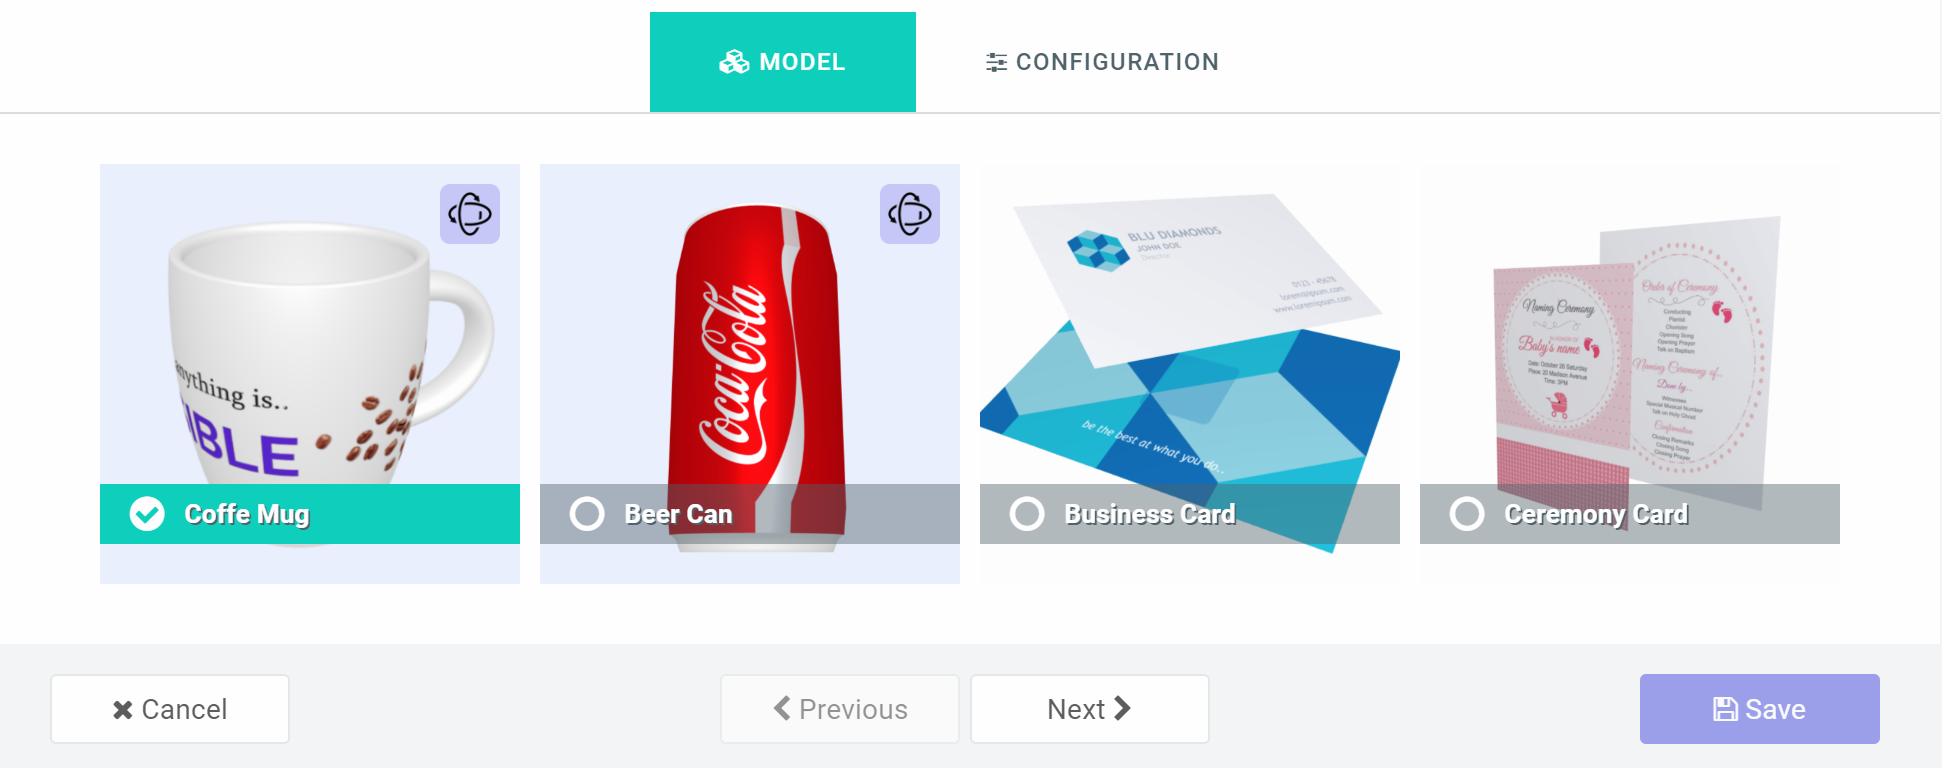 When you mouse over the thumbnails, you will observe some of them zoom in and rotate; those are orbit-able models while the rest are not.
Click the Next button to configure your selected model.
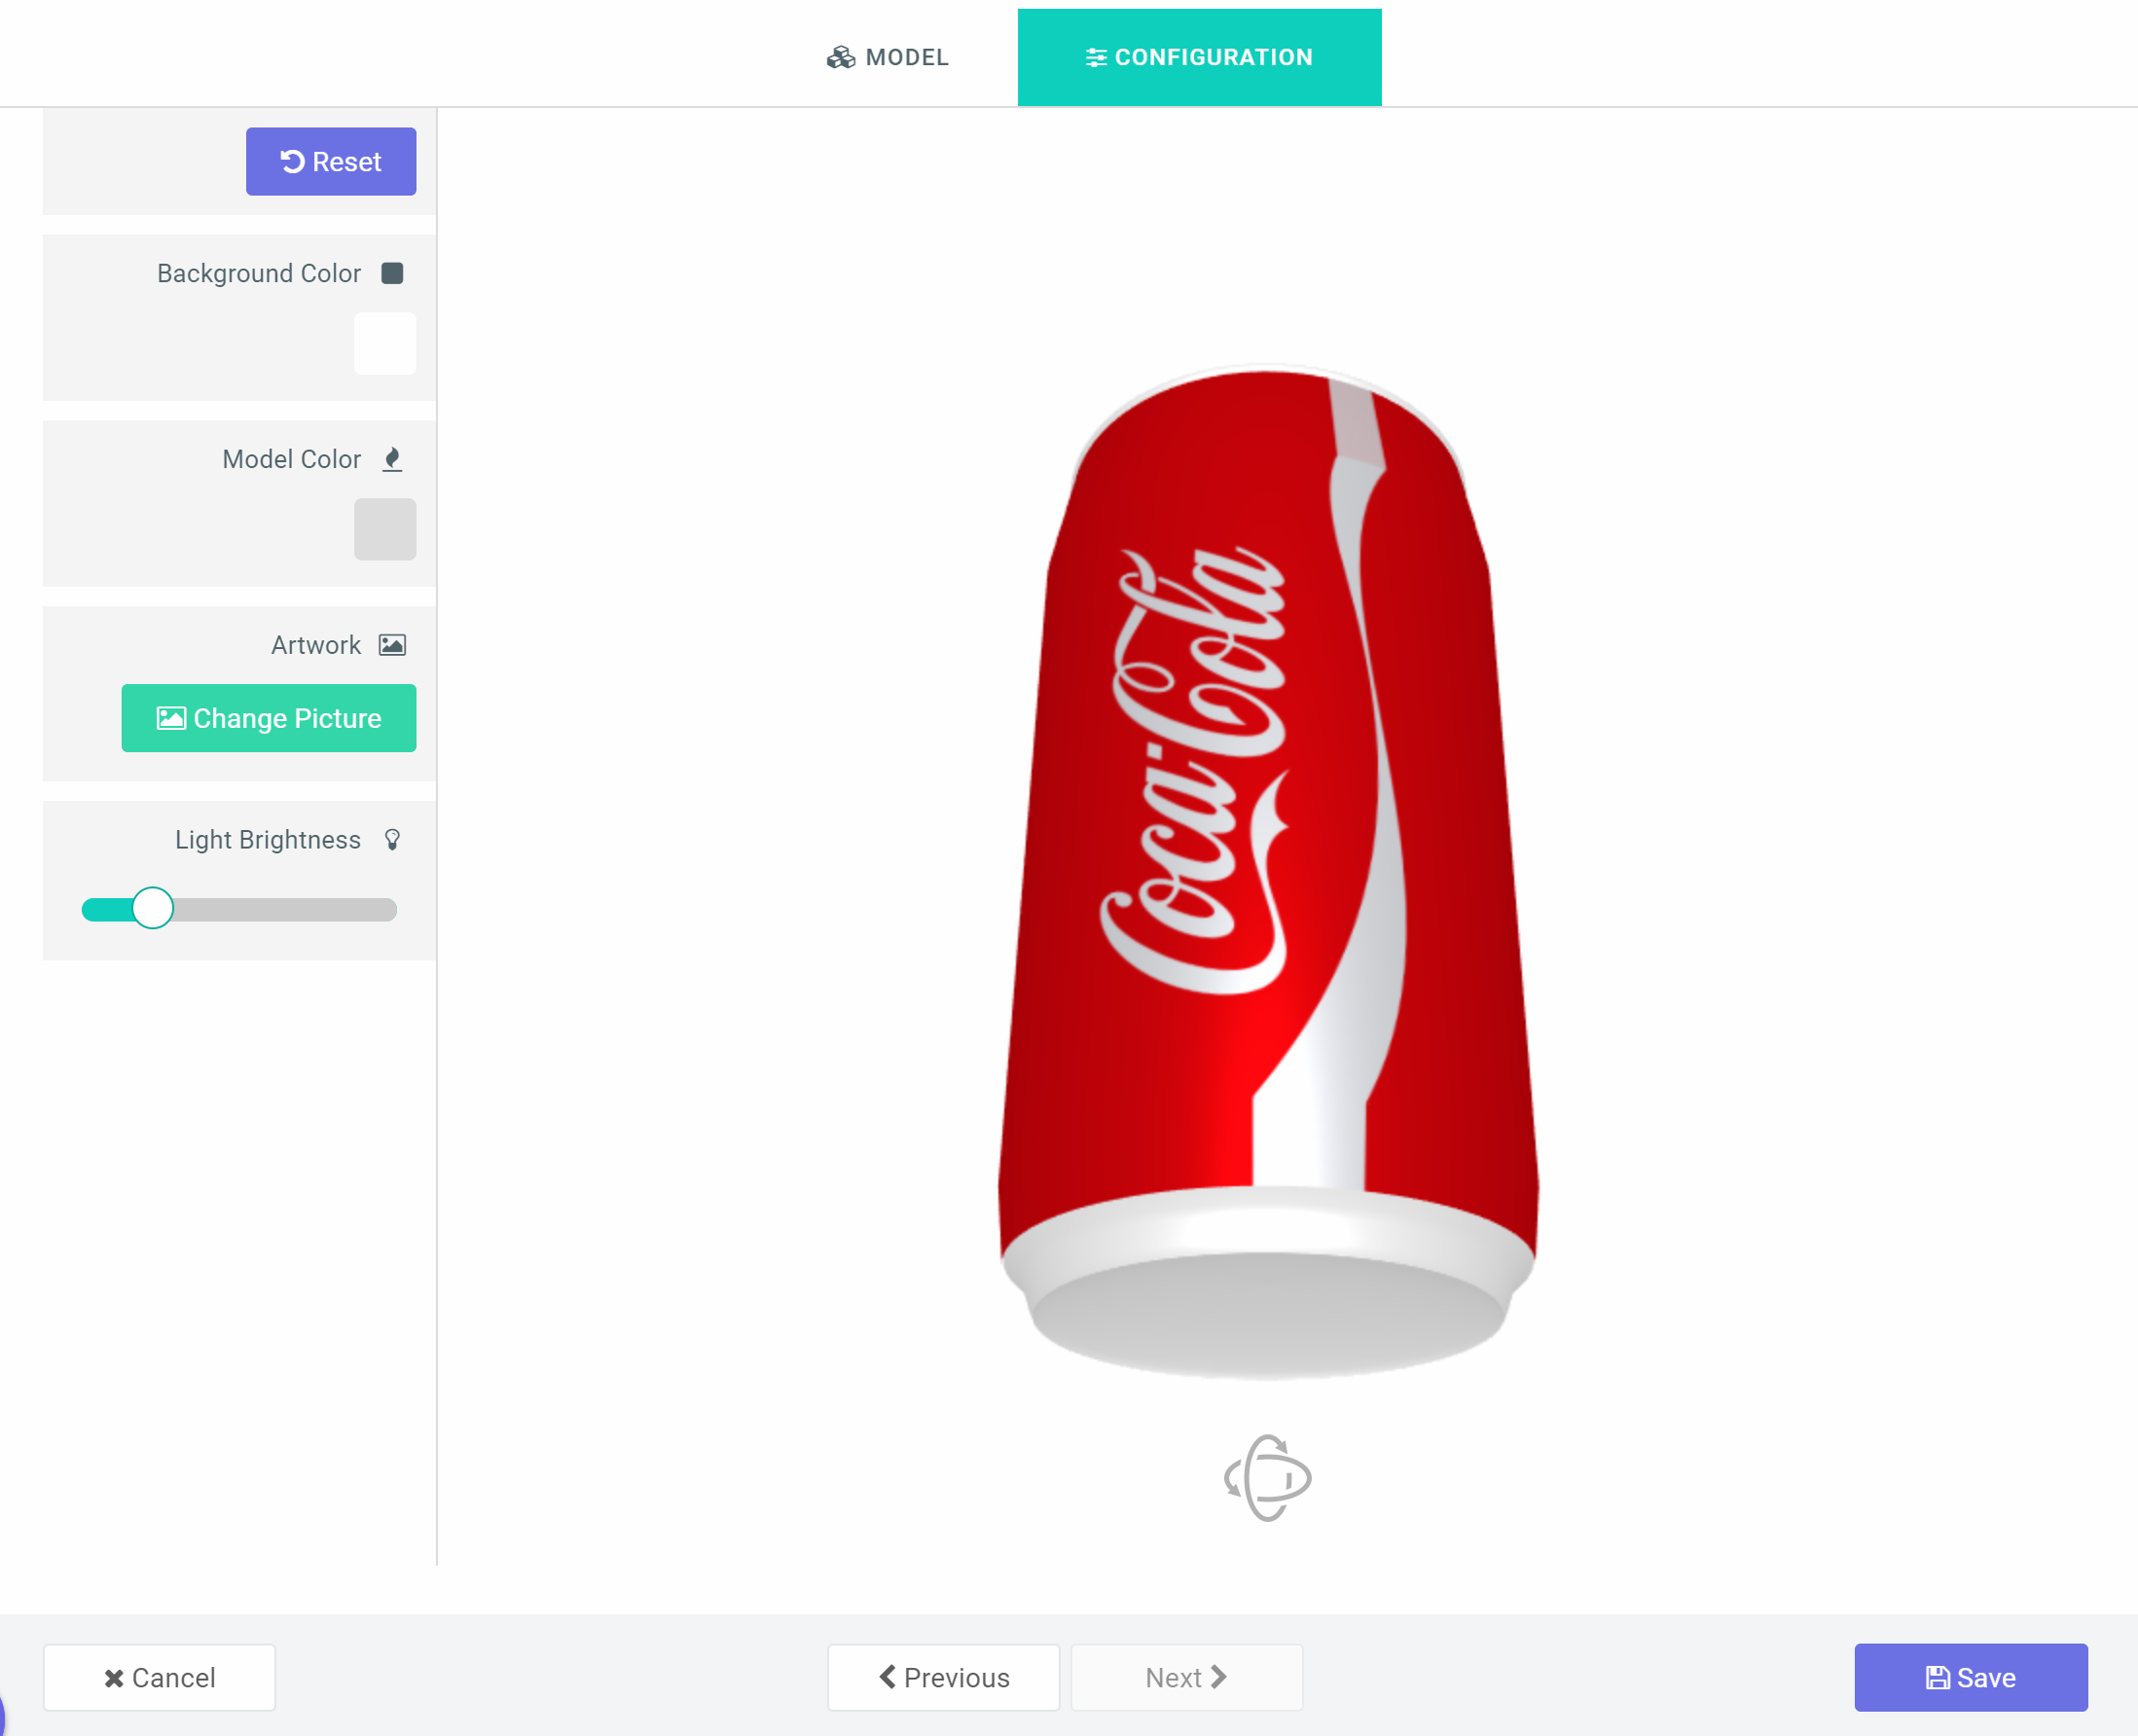
The left panel presents options to customize the model. You can set your background color ***(background image option coming soon)***, Select a model color and upload the default artwork. Remember, the artwork is going to be replaced by your customer's personalized design.
The light allows you to set how light reflects on the model. You need to be careful with this so it doesn't create so much reflection thereby making your product look reflective. Adjust these settings to suit your taste and click the Save button.
When you mouse over the thumbnails, you will observe some of them zoom in and rotate; those are orbit-able models while the rest are not.
Click the Next button to configure your selected model.
The left panel presents options to customize the model. You can set your background color ***(background image option coming soon)***, Select a model color and upload the default artwork. Remember, the artwork is going to be replaced by your customer's personalized design.
The light allows you to set how light reflects on the model. You need to be careful with this so it doesn't create so much reflection thereby making your product look reflective. Adjust these settings to suit your taste and click the Save button.
 Now your model should appear in your studio gallery.
### Assign Model to your Design
Final step is to navigate to your [designs page](https://admin.pitchprint.io/designs). Click on the configure icon against a design you want to attach the 3D view to. One of the tabs on your configuration dialog is **3D View**. Click it and you should find your newly created model there:
Now your model should appear in your studio gallery.
### Assign Model to your Design
Final step is to navigate to your [designs page](https://admin.pitchprint.io/designs). Click on the configure icon against a design you want to attach the 3D view to. One of the tabs on your configuration dialog is **3D View**. Click it and you should find your newly created model there:
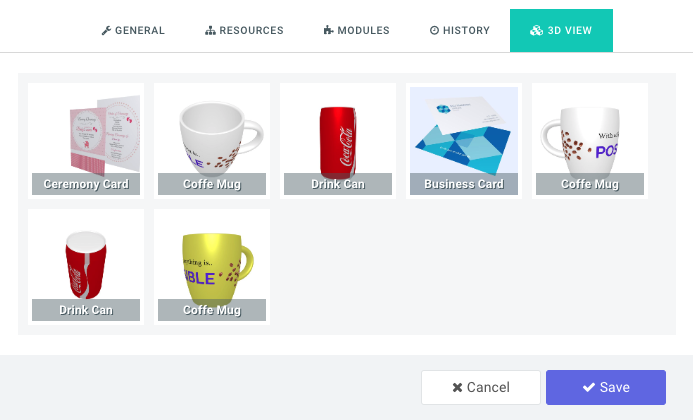 Click the model to assign it to this design and save your configuration. To de-assign, just click again; it's a toggle switch.
That's it. Navigate to your product page, launch the customize design and click to preview your customization. This should show the new 3D View in place of the old preview.
When you save your project, the product preview should load the 3D viewer instead of static images.
You can reach out to us for additional models.
3D Views is a Premium feature.
## Related articles
Overview of PitchPrint 3D View, uploading a mesh and assigning designs to a model.
Learn what 3D Studio is and which model file types you can upload.
How to UV map a model so your design displays correctly on its surface.
Build a two-page design and texture for a 3D business card model.
This documentation is built and hosted on [Mintlify](https://mintlify.com), a developer documentation platform.
Click the model to assign it to this design and save your configuration. To de-assign, just click again; it's a toggle switch.
That's it. Navigate to your product page, launch the customize design and click to preview your customization. This should show the new 3D View in place of the old preview.
When you save your project, the product preview should load the 3D viewer instead of static images.
You can reach out to us for additional models.
3D Views is a Premium feature.
## Related articles
Overview of PitchPrint 3D View, uploading a mesh and assigning designs to a model.
Learn what 3D Studio is and which model file types you can upload.
How to UV map a model so your design displays correctly on its surface.
Build a two-page design and texture for a 3D business card model.
This documentation is built and hosted on [Mintlify](https://mintlify.com), a developer documentation platform.