> ## Documentation Index
> Fetch the complete documentation index at: https://pitchprint.com/llms.txt
> Use this file to discover all available pages before exploring further.
# Generate your auth keys
> Create an account, add a domain in the PitchPrint admin and get the API Key and Secret Key needed to integrate the app
To integrate the app into your website, you need an API key as well as a Secret Key.
The API Key is for public facing side of your server and acts as a means of identifying your particular website, while the Secret Key is used to generate signatures for back-end communication with our system, more like a means to authenticate alongside the API Key that this request is coming from you.
So to start with, go to our [registration page](https://admin.pitchprint.io/register) to create an account or the [login page](https://admin.pitchprint.io/login) if you already have an account with us.
Once you’ve logged in, navigate to the [Domains page](https://admin.pitchprint.io/domains) and click the green button on the top right corner labelled **"Add Domain"**. This pops up a window like this:
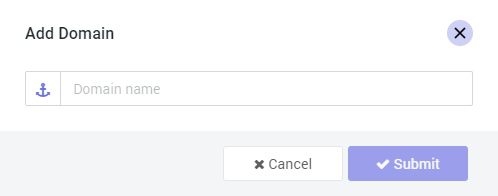 Now type in your domain name.
This name is simply a label and could be any domain name you choose. We have our own internal identifier, and the name can easily be renamed later on. It doesn't have to be the actual site domain.
Once you do that and click Submit button, the application creates that domain with its own layout file, sample design, images and so on. It also generates the two important items, the API and Secret keys.
Your domains page should now have one domain listed, the one you just created with its keys, date created, the license type Basic as well as an option to edit the domain name anytime you so choose to.
Now that you have generated the necessary keys, let's get started with a plain html page and load the necessary JavaScript files into it.
## Related articles
Overview of what PitchPrint is and how it works.
Load the PitchPrint app into your page and wire up events.
Handle the project-saved event and use the returned data.
Add a My Account page so customers can view their saved projects.
This documentation is built and hosted on [Mintlify](https://mintlify.com), a developer documentation platform.
Now type in your domain name.
This name is simply a label and could be any domain name you choose. We have our own internal identifier, and the name can easily be renamed later on. It doesn't have to be the actual site domain.
Once you do that and click Submit button, the application creates that domain with its own layout file, sample design, images and so on. It also generates the two important items, the API and Secret keys.
Your domains page should now have one domain listed, the one you just created with its keys, date created, the license type Basic as well as an option to edit the domain name anytime you so choose to.
Now that you have generated the necessary keys, let's get started with a plain html page and load the necessary JavaScript files into it.
## Related articles
Overview of what PitchPrint is and how it works.
Load the PitchPrint app into your page and wire up events.
Handle the project-saved event and use the returned data.
Add a My Account page so customers can view their saved projects.
This documentation is built and hosted on [Mintlify](https://mintlify.com), a developer documentation platform.